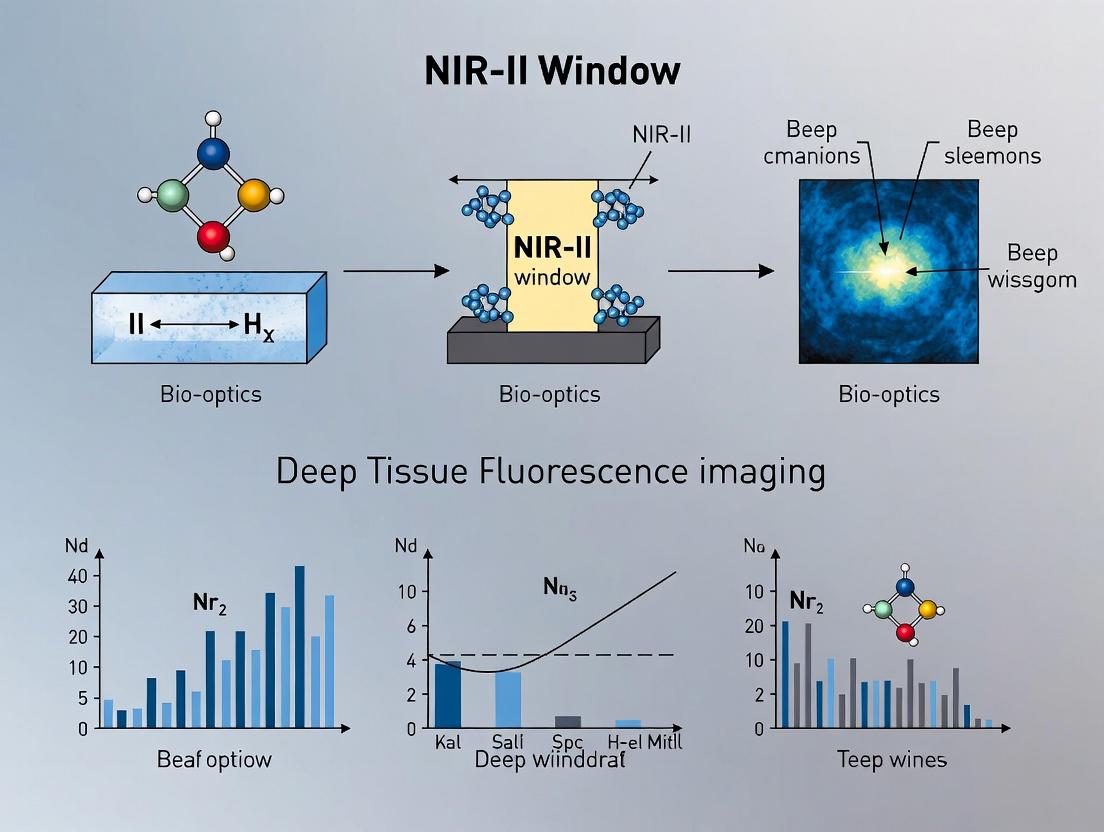
The NIR-II Window Revolution: Advanced Deep Tissue Fluorescence Imaging for Biomedical Research
This article provides a comprehensive guide to Second Near-Infrared (NIR-II, 1000-1700 nm) window fluorescence imaging for researchers and drug development professionals.
The NIR-II Window Revolution: Advanced Deep Tissue Fluorescence Imaging for Biomedical Research
Abstract
This article provides a comprehensive guide to Second Near-Infrared (NIR-II, 1000-1700 nm) window fluorescence imaging for researchers and drug development professionals. We explore the foundational physics behind reduced scattering and autofluorescence, detail current methodologies from probe design to in vivo applications, address critical troubleshooting and optimization challenges, and validate NIR-II's superiority through comparative analysis with traditional techniques. This resource synthesizes the latest advancements to empower precise, deep-tissue biological interrogation.
Beyond the Visible: Understanding the NIR-II Window's Physics and Advantages for Deep Tissue Imaging
Within the thesis context of advancing deep tissue fluorescence imaging, the precise definition of optical windows in biological tissue is foundational. The attenuation of light by tissue components—primarily hemoglobin, water, and lipids—creates distinct spectral regions of minimal absorption, known as "windows." Exploiting these windows, particularly the NIR-II (1000-1700 nm), is central to achieving unprecedented spatial resolution, signal-to-background ratio, and penetration depth for in vivo imaging, with direct implications for preclinical research and therapeutic development.
Quantitative Definition of Optical Windows
The following table summarizes the key characteristics, biological attenuators, and performance metrics of the primary optical windows.
Table 1: Definition and Comparison of Biological Optical Windows
| Window | Wavelength Range (nm) | Primary Attenuators (Tissue Chromophores) | Typical Penetration Depth | Effective Tissue Scattering | Key Advantage |
|---|---|---|---|---|---|
| NIR-I | 700 - 950 | Hemoglobin (Oxy & Deoxy), Melanin | 1-3 mm | High | Mature dye/quantum dot library; Standard silicon detectors. |
| NIR-II | 1000 - 1350 | Water (low absorption) | 3-8 mm | Reduced (~ λ^-0.2 to λ^-1) | Lower scattering, superior resolution & SBR. |
| NIR-IIa | 1300 - 1400 | Water (absorption peak) | Limited | Very Low | Minimal scattering for high-fidelity vascular imaging. |
| NIR-IIb | 1500 - 1700 | Water (high absorption) | Moderate (limited by water) | Extremely Low | Ultra-low background for high-contrast imaging. |
| NIR-III / SWIR | 1700 - 2200+ | Water, Lipids | Shallow (water-dominated) | N/A | Emerging window for spectroscopic tissue analysis. |
Application Notes & Experimental Protocols
Protocol 1: ComparativeIn VivoVascular Imaging Across NIR Windows
Objective: To visualize the murine cerebral vasculature using a non-targeted NIR-II fluorophore (e.g., IRDye 800CW for NIR-I, IR-1048 for NIR-II) and quantify signal-to-background ratio (SBR) and full-width at half-maximum (FWHM) of vessel profiles.
Materials (Scientist's Toolkit):
- Animal Model: Female BALB/c nude mouse (6-8 weeks old).
- Fluorophores: IRDye 800CW (NIR-I), IR-1048 dye (or PEGylated Ag2S quantum dots for NIR-II).
- Imaging System: NIR spectrometer-equipped imaging setup with: 808 nm & 1064 nm lasers, InGaAs camera (sensitivity range 900-1700 nm) with thermoelectric cooling, silicon camera for NIR-I, appropriate long-pass filters (LP 1250 nm, LP 1500 nm).
- Software: ImageJ with NIR analysis plugins, MATLAB for FWHM calculation.
Procedure:
- Preparation: Anesthetize mouse with isoflurane (2% induction, 1.5% maintenance). Place in a stereotaxic imaging stage.
- Injection: Administer 200 µL of fluorophore solution (IR-1048 at 5 nmol in PBS) via tail vein injection.
- NIR-I Imaging:
- Set excitation to 808 nm laser.
- Use a silicon camera with an 850 nm long-pass emission filter.
- Acquire image sequence 5-10 minutes post-injection.
- NIR-II Imaging:
- Switch excitation to 1064 nm laser.
- Use InGaAs camera. Acquire three sets of images using sequential emission filters: LP 1000 nm (NIR-II full), LP 1250 nm (NIR-IIa), LP 1500 nm (NIR-IIb).
- Keep laser power and integration time consistent for comparable intensity scales.
- Data Analysis:
- Draw intensity profiles across a selected 50 µm capillary.
- Calculate FWHM from the profile.
- Measure mean signal intensity inside the vessel (S) and in an adjacent tissue region (B). Compute SBR = S / B.
- Populate results in a comparative table.
Expected Outcome: Vessel FWHM will decrease and SBR will increase progressively from NIR-I to NIR-IIb windows, demonstrating reduced scattering and improved clarity.
Protocol 2: Sentinel Lymph Node Mapping in the NIR-II Window
Objective: To demonstrate deep-tissue surgical guidance by mapping the axillary lymph node following intradermal injection of a NIR-II nanoprobe.
Materials (Scientist's Toolkit):
- Nanoprobe: PbS/CdS core/shell quantum dots (emission ~1300 nm).
- Animal Model: SKH-1 hairless mouse.
- Imaging System: Real-time NIR-II fluorescence imaging system with a 980 nm laser and a >1200 nm LP filter.
Procedure:
- Probe Administration: Anesthetize the mouse. Intradermally inject 20 µL of QD solution (1 µM) into the forepaw pad.
- Dynamic Imaging: Begin continuous imaging over the shoulder/axilla region immediately post-injection. Acquire frames every 10 seconds for 20 minutes.
- Signal Kinetics: Plot time-intensity curves for the injection site and the draining lymph node to quantify drainage kinetics.
- Surgical Guidance: After identifying the SLN (peak signal, typically 5-10 min), make a small skin incision. Use the NIR-II imaging system in real-time to guide precise dissection and excision of the fluorescent node.
- Ex Vivo Validation: Image the excised tissue to confirm fluorescence and perform H&E staining for histological correlation.
Visualizations
Diagram 1: Light-Tissue Interaction Across Optical Windows
Diagram 2: NIR-II Imaging Workflow for Vascular Phenotyping
Research Reagent Solutions Toolkit
Table 2: Essential Materials for NIR-II Imaging Research
| Item | Function & Rationale | Example(s) |
|---|---|---|
| NIR-II Fluorophores | Emit light within the NIR-II window to minimize scattering/absorption. | Organic dyes (CH-4T, IR-1061), Quantum Dots (Ag2S, PbS/CdS), Single-Wall Carbon Nanotubes (SWCNTs). |
| Targeted Bioconjugates | Enable molecular imaging by binding to specific biomarkers (e.g., VEGF, integrins). | Antibody-, peptide-, or aptamer-conjugated NIR-II probes. |
| InGaAs Camera | Detects photons in the 900-1700 nm range. Essential for NIR-II signal capture. | Teledyne Judson, Princeton Instruments, Hamamatsu (cooled to -80°C for low noise). |
| Long-Pass Filters | Block excitation laser light and shorter wavelength emissions to isolate NIR-II signal. | 1100 nm, 1250 nm, 1500 nm long-pass filters (Semrock, Thorlabs). |
| Dispersion Media | For safe, stable in vivo administration of hydrophobic nanoprobes. | PEG-phospholipids, F-127 Pluronic, serum albumin. |
| Tissue-Simulating Phantoms | Calibrate imaging systems and quantify performance metrics (resolution, sensitivity). | Intralipid-ink gels with tunable scattering/absorption coefficients. |
The interaction of light with biological tissue presents the fundamental challenge in deep-tissue fluorescence imaging. Within the context of advancing the Near-Infrared-II (NIR-II, 1000-1700 nm) window for imaging research, understanding the physics of scattering, absorption, and autofluorescence is critical. The NIR-II window offers significantly reduced scattering and absorption by endogenous chromophores, along with minimal autofluorescence, enabling superior resolution and penetration depth compared to visible (400-700 nm) and NIR-I (700-900 nm) imaging.
Quantitative Optical Properties of Tissue
Table 1: Optical Properties of Biological Tissue Across Spectral Windows
| Optical Property | Visible (e.g., 550 nm) | NIR-I (e.g., 800 nm) | NIR-II (e.g., 1300 nm) | Primary Cause |
|---|---|---|---|---|
| Reduced Scattering Coefficient (μs') | ~10-20 cm⁻¹ | ~5-10 cm⁻¹ | ~2-5 cm⁻¹ | Mie scattering by cellular organelles & fibers |
| Absorption Coefficient (μa) - Blood | Very High (~20 cm⁻¹) | Moderate (~0.5 cm⁻¹) | Very Low (<0.1 cm⁻¹) | Hemoglobin (Hb/HbO₂) |
| Absorption Coefficient (μa) - Water | Negligible | Very Low | Low-Moderate (rises after 1400 nm) | O-H bond overtone vibrations |
| Absorption Coefficient (μa) - Lipids | Low | Low | Moderate (peaks ~1200 nm) | C-H bond overtones |
| Tissue Autofluorescence | Very High | Moderate | Negligible | Flavins, NADH, Collagen, Elastin |
| Estimated Penetration Depth | < 1 mm | 1-2 mm | > 3-5 mm | Cumulative effect of μs' and μa |
| Theoretical Resolution at 3 mm depth | Poor (> 500 μm) | Moderate (~200 μm) | High (< 50 μm) | Reduced scattering enables ballistic photon retention |
Data compiled from recent literature on tissue phantoms and *in vivo studies (2023-2024).*
Core Physics: Mechanisms and Implications for NIR-II
Scattering
Light scattering in tissue is predominantly forward-directed (Mie-type) due to structures like mitochondria, nuclei, and collagen fibers. The scattering coefficient (μs) decreases with increasing wavelength (λ), following an approximate power law: μs' ∝ λ^(-b), where b is the scattering power (typically 0.5-2 for biological tissue). This wavelength dependence is the primary reason for reduced scattering and improved resolution in the NIR-II window.
Absorption
Major absorbers in tissue define the "biological windows." Hemoglobin and melanin dominate in the visible range, water absorption increases steadily into the NIR, and lipids have specific peaks. The NIR-II window (1000-1350 nm) is uniquely positioned in a local minimum for hemoglobin, water, and lipid absorption.
Autofluorescence
Autofluorescence arises from endogenous fluorophores such as flavin adenine dinucleotide (FAD), reduced nicotinamide adenine dinucleotide (NADH), and structural proteins. These molecules require high-energy (short wavelength) excitation, and their emission tails off beyond ~800 nm. The NIR-II window is virtually free from this background noise, drastically improving signal-to-background ratio (SBR).
Experimental Protocols
Protocol 1: Measuring Tissue Optical Properties Using Integrating Sphere Spectroscopy
Objective: Quantify the reduced scattering (μs') and absorption (μa) coefficients of ex vivo tissue samples in the NIR-II range.
Materials:
- Dual-beam integrating sphere spectrophotometer (equipped with NIR-II detectors, e.g., InGaAs or HgCdTe).
- NIR-II light source (e.g., tunable laser or broadband source with monochromator).
- Ex vivo tissue sample, sliced to known thickness (e.g., 1-2 mm).
- Calibrated reflectance and transmittance standards (Spectralon).
- Index-matching fluid (optional, to reduce surface reflections).
Procedure:
- System Calibration: Measure the baseline dark signal. Measure the reference beam intensity (Iref) and the signal from the reflectance standard (Rstd) and transmittance standard (T_std).
- Sample Measurement: Place the tissue sample at the entrance port for transmittance (T) measurement, then at the exit port for reflectance (R) measurement. Ensure uniform illumination.
- Data Acquisition: Record total diffuse transmittance (Ttotal) and diffuse reflectance (Rdiffuse) spectra from 900 nm to 1600 nm at 10 nm intervals.
- Inverse Adding-Doubling (IAD) Calculation: Input R and T values, sample thickness, and refractive index into IAD software. The algorithm iteratively solves the radiative transport equation to extract μa and μs'.
- Validation: Validate results using tissue-simulating phantoms with known optical properties.
Protocol 2: Quantifying NIR-II vs. NIR-I Imaging PerformanceIn Vivo
Objective: Compare penetration depth and resolution of a NIR-II fluorophore (e.g., IRDye 1200CW) vs. a NIR-I fluorophore (e.g., IRDye 800CW) in a mouse model.
Materials:
- NIR-II fluorescence imaging system (e.g., 1064 nm laser excitation, InGaAs camera with 1200-1600 nm emission filter).
- NIR-I fluorescence imaging system (e.g., 785 nm laser excitation, Si CCD camera with 800-900 nm filter).
- Anesthetized mouse model.
- NIR-II fluorophore (e.g., IRDye 1200CW) and NIR-I fluorophore (e.g., IRDye 800CW).
- Capillary tubes or sub-surface implantation mold.
Procedure:
- Sample Preparation: Prepare identical concentration solutions of the NIR-I and NIR-II fluorophores. Fill capillary tubes or create a sub-surface point source by implanting a small fluorophore-containing gel at a defined depth (e.g., 0, 1, 2, 3, 4 mm) in tissue or a tissue-mimicking phantom on the mouse.
- Sequential Imaging: Image the mouse using the NIR-I system. Record laser power, exposure time, and all settings. Without moving the animal, switch to the NIR-II imaging system and acquire images with matched laser power density (mW/cm²) and equivalent exposure time (adjusted for detector sensitivity).
- Image Analysis: For each depth and wavelength window:
- Measure the Full Width at Half Maximum (FWHM) of the point source to quantify resolution degradation.
- Calculate the Signal-to-Background Ratio (SBR) as (Mean Signal Intensity - Mean Background Intensity) / Standard Deviation of Background.
- Plot FWHM and SBR versus tissue depth for both spectral windows.
- Statistical Analysis: Perform triplicate measurements. Report mean ± standard deviation. Use Student's t-test to confirm significant differences (p < 0.05) between NIR-I and NIR-II performance metrics at each depth.
Visualization Diagrams
Diagram Title: Physics of Light in Tissue: NIR-I vs. NIR-II Pathways
Diagram Title: Workflow for Tissue Optical Property Measurement
The Scientist's Toolkit: Research Reagent Solutions
Table 2: Essential Materials for NIR-II Deep Tissue Imaging Research
| Item | Function & Relevance |
|---|---|
| NIR-II Fluorophores (e.g., IRDye 1200CW, CH-4T, Ag2S quantum dots) | Emit fluorescence in the 1000-1700 nm window; the core agent for generating signal with low background. |
| Tissue-Simulating Phantoms (e.g., Intralipid, India Ink, Agarose) | Mimic tissue scattering (Intralipid) and absorption (Ink); essential for system calibration and protocol validation. |
| InGaAs or HgCdTe Camera | Detects NIR-II photons; superior quantum efficiency in 900-1700 nm range compared to silicon CCDs. |
| 1064 nm or 808 nm Diode Lasers | Common excitation sources for NIR-II fluorophores; 1064 nm minimizes tissue scattering/absorption of excitation light. |
| Long-pass & Band-pass Filters (e.g., 1100 nm LP, 1200/20 nm BP) | Isolate NIR-II emission, block excitation laser light, and define specific imaging sub-windows (e.g., NIR-IIa, 1300-1400 nm). |
| Integrating Sphere Spectrophotometer | Gold-standard tool for quantitatively measuring the bulk optical properties (μa, μs') of tissue samples. |
| Index-Matching Fluids/Gels | Reduce surface specular reflections at tissue-air interfaces during ex vivo optical measurements. |
| Dedicated IAD Software | Performs inverse Monte Carlo fitting on reflectance/transmittance data to extract intrinsic optical coefficients. |
Application Notes
The NIR-II window (1000-1700 nm) represents a transformative modality for in vivo fluorescence imaging, directly addressing the limitations of traditional visible (400-700 nm) and NIR-I (700-900 nm) fluorescence. This application note details the core advantages that define its utility in deep-tissue research, framed within a thesis on advancing non-invasive biodistribution and pharmacokinetic studies.
1. Enhanced Penetration Depth Biological tissues exhibit significantly reduced scattering and absorption of NIR-II photons compared to shorter wavelengths. Key endogenous absorbers like water, lipids, and hemoglobin have minimal absorption coefficients in this region. This allows photons to travel deeper into tissue before being attenuated, enabling visualization of structures several centimeters deep, such as deeply seated tumors or cerebral vasculature through the intact skull.
2. Superior Spatial Resolution Reduced photon scattering in the NIR-II window mitigates the "blurring" effect prevalent in NIR-I imaging. The point spread function is tighter, allowing for the resolution of finer anatomical features. This permits high-fidelity imaging of capillary-level vasculature and precise localization of targeted contrast agents in dense tissue matrices.
3. High Signal-to-Background Ratio (SBR) A combination of factors contributes to dramatically improved SBR. The autofluorescence of biological tissues is exceedingly low beyond 1000 nm, virtually eliminating a major source of background. Concurrently, reduced scattering minimizes out-of-focus signal. This results in images with exceptional contrast, where the target signal stands out clearly against a near-black background, enabling more sensitive detection of molecular targets.
Quantitative Comparison of Optical Windows
Table 1: Optical Properties and Performance Metrics Across Fluorescence Imaging Windows
| Parameter | Visible (400-700 nm) | NIR-I (700-900 nm) | NIR-II (1000-1700 nm) | Measurement/Notes |
|---|---|---|---|---|
| Tissue Scattering | Very High | High | Low | Scattering coefficient (μs') decreases ~ λ^-α (α≈0.2-1.4) |
| Hemoglobin Absorption | Very High | Moderate | Very Low | Absorption coefficient (μa) drops by 1-2 orders of magnitude |
| Water Absorption | Low | Low | Moderate (peaks after 1400 nm) | Optimal window is 1000-1350 nm to avoid water peak |
| Tissue Autofluorescence | Very High | Moderate | Negligible | Major contributor to background in Vis/NIR-I |
| Typical Penetration Depth | <1 mm | 1-3 mm | 1-3 cm | Depth where signal drops to 1/e of original |
| Achievable Resolution | Poor (due to scattering) | ~3-5 mm at depth | <1 mm at depth | Resolution defined by FWHM of point spread function |
| Typical In Vivo SBR | Low (< 5:1) | Moderate (5-10:1) | High (10-100:1) | Dependent on probe brightness and target density |
Table 2: Performance of Representative NIR-II Fluorophores in Preclinical Models
| Fluorophore Type | Emission Max (nm) | Model System | Imaged Structure | Reported SBR | Resolution Achieved |
|---|---|---|---|---|---|
| Single-Walled Carbon Nanotubes | 1000-1400 | Mouse Brain | Cerebral Vasculature | >50:1 | ~30 μm (through skull) |
| Quantum Dots (Ag2S) | 1200 | Mouse Hindlimb | Femoral Arteries & Veins | ~40:1 | ~50 μm at 3mm depth |
| Organic Dye (IR-FEP) | 1050 | Mouse Tumor | Subcutaneous Tumor Vasculature | ~25:1 | ~100 μm |
| Lanthanide Nanoparticles | 1525 | Mouse Abdomen | Spleen & Kidney | >100:1 | ~200 μm (whole-body) |
Experimental Protocols
Protocol 1: In Vivo NIR-II Imaging of Deep-Tissue Vasculature Using Quantum Dots
Objective: To visualize the deep hindlimb vasculature of a living mouse with high resolution using Ag2S quantum dots (QDs).
Materials: See "The Scientist's Toolkit" below.
Procedure:
- Animal Preparation: Anesthetize an 8-week-old nude mouse using an isoflurane-oxygen mixture (2-3% induction, 1-2% maintenance). Place the mouse in a supine position on a temperature-controlled imaging stage. Apply veterinary ophthalmic ointment to prevent corneal drying.
- Tail Vein Cannulation: Gently warm the tail with a heat lamp (37°C) for 1-2 minutes to dilate the lateral tail veins. Insert a 30G insulin needle attached to a 100 μL syringe containing the Ag2S QD solution (200 pmol in 100 μL of sterile PBS). Secure the needle with tape.
- System Setup & Baseline Image: Turn on the NIR-II imaging system. Use a 980 nm laser diode at a power density of 100 mW/cm² for excitation. Set the InGaAs camera to acquire with an integration time of 100-500 ms. Acquire a pre-injection image of the hindlimb region (900-1700 nm filter) to record background.
- Probe Administration & Time Series: Slowly inject the QD solution via the tail vein over 30 seconds. Initiate a dynamic imaging sequence immediately: acquire images every 5 seconds for the first 2 minutes, then every 30 seconds for the next 10 minutes.
- High-Resolution Imaging: At the 5-minute post-injection time point (peak vascular signal), acquire a high-resolution static image with increased integration time (1-2 seconds) and laser power adjusted within safe limits (max 200 mW/cm²).
- Data Processing: Subtract the pre-injection background image from all time points. Apply a Gaussian blur (sigma=1) to reduce high-frequency noise. Generate time-intensity curves for selected vessels using region-of-interest (ROI) analysis software. Calculate SBR as (Mean SignalROI - Mean SignalBackground) / Std_Background.
Protocol 2: Ex Vivo Validation of Probe Biodistribution via NIR-II Fluorometry
Objective: To quantify the accumulation of an NIR-II organic dye in major organs post-mortem, correlating with in vivo images.
Procedure:
- Perfusion & Organ Harvest: At a terminal time point post-injection (e.g., 24h), deeply anesthetize the mouse. Perform transcardial perfusion with 20 mL of cold PBS to flush blood from the vasculature. Harvest organs of interest (liver, spleen, kidneys, heart, lungs, tumor) and weigh them.
- Homogenization: Place each organ in 1-2 mL of PBS in a gentleMACS tube. Homogenize using a tissue dissociator or a manual homogenizer until a smooth slurry is formed.
- Fluorometric Measurement: Pipette 200 μL of each homogenate into a black-walled 96-well plate. Prepare standard solutions of the dye in PBS (0-500 nM). Use a NIR-compatible fluorometer with excitation matching your dye (e.g., 808 nm laser) and an emission spectrometer collecting from 1000-1600 nm.
- Quantification: Integrate the fluorescence intensity for each sample and standard. Subtract the signal from homogenates of an uninjected control mouse. Generate a standard curve and calculate the concentration of the dye (pmol) per gram of tissue.
Visualizations
Title: NIR-II In Vivo to Ex Vivo Workflow
Title: Core Advantages of NIR-II Window Logic
The Scientist's Toolkit: Essential Research Reagents & Materials
Table 3: Key Reagents and Equipment for NIR-II Imaging Experiments
| Item | Function / Role | Example Specifications / Notes |
|---|---|---|
| NIR-II Fluorophore | Contrast agent emitting in the 1000-1700 nm range. | E.g., Ag2S Quantum Dots, IR-1061 dyes, Single-Walled Carbon Nanotubes. Must be biocompatible or functionalized for targeting. |
| NIR Laser Source | Excitation light for fluorophore. Wavelength must match probe absorption. | 808 nm or 980 nm diode lasers are common. Power density must be calibrated for animal safety (< 0.5 W/cm²). |
| InGaAs Camera | Detects NIR-II photons. Essential for signal capture. | Cooled, 2D array detector sensitive from 900-1700 nm. High quantum efficiency and low dark noise are critical. |
| Long-Pass Filters | Blocks excitation laser light and collects only emission. | E.g., 900 nm, 1000 nm, or 1200 nm long-pass filters. Optical density > 4 at laser wavelength. |
| Small Animal Anesthesia System | Maintains animal immobility and physiological stability during imaging. | Isoflurane vaporizer with induction chamber, nose cone, and oxygen supply. |
| Temperature-Controlled Imaging Stage | Maintains animal body temperature under anesthesia to prevent hypothermia. | Heated stage with feedback control, typically set to 37°C. |
| Image Acquisition Software | Controls hardware, captures, and stores time-series data. | Vendor-specific or open-source (e.g., MATLAB, Python with camera SDK). Enables ROI analysis. |
| Fluorometer (NIR-sensitive) | Quantifies probe concentration in ex vivo tissue samples. | Must include a NIR-sensitive photodetector (e.g., InGaAs) and appropriate monochromators/spectrometers. |
| Tissue Homogenizer | Prepares uniform organ lysates for ex vivo fluorometry. | Gentle mechanical homogenizer (e.g., gentleMACS) to avoid damaging tubes or creating aerosols. |
Historical Context and Evolution of NIR-II Imaging Technology
The evolution of fluorescence imaging for deep-tissue applications has been fundamentally constrained by the strong scattering and absorption of light by biological tissues in the visible (400-700 nm) and traditional near-infrared (NIR-I, 700-900 nm) windows. The discovery and development of the second near-infrared window (NIR-II, typically 1000-1700 nm) has marked a paradigm shift, offering significantly reduced scattering, lower autofluorescence, and deeper penetration.
Key Historical Milestones:
- Late 20th Century: Recognition of the "tissue optical window" in the NIR-I region.
- 2009: Conceptual proposal of imaging beyond 1500 nm for reduced scattering.
- 2011-2013: Seminal work by Dai et al. and others demonstrated in vivo NIR-II imaging using single-walled carbon nanotubes (SWCNTs), proving superior resolution and depth compared to NIR-I.
- 2015-Present: Explosive growth in the development of novel NIR-II fluorescent agents (organic dyes, quantum dots, rare-earth nanoparticles) and advancements in detector technology (InGaAs cameras).
Application Notes: Comparative Advantages of NIR-II Imaging
Table 1: Quantitative Comparison of Imaging Windows
| Parameter | Visible (400-700 nm) | NIR-I (700-900 nm) | NIR-II (1000-1700 nm) | Notes |
|---|---|---|---|---|
| Tissue Scattering | Very High | High | Low (∝ λ^-α, α~0.2-4) | Scattering decreases with longer wavelength. |
| Absorption by Blood/H2O | High (Hb/HbO2) | Moderate | Very Low | Major absorbers (water, lipids) have minima in NIR-II. |
| Autofluorescence | Very High | Moderate | Negligible | Background signal drastically reduced. |
| Penetration Depth | < 1 mm | 1-3 mm | > 5 mm (up to cm scale) | Enables whole-body imaging in small animals. |
| Spatial Resolution | Low in vivo | Moderate | High (10-50 μm at depth) | Reduced scattering preserves spatial information. |
| Maximum Signal-to-Background Ratio (SBR) | Low | Moderate-High | Very High (often >100) | Critical for detecting faint pathological signals. |
Table 2: Evolution of NIR-II Fluorophore Platforms
| Fluorophore Class | Example Materials | Peak Emission (nm) | Quantum Yield Range | Key Advantages | Historical Development Era |
|---|---|---|---|---|---|
| Inorganic Nanomaterials | SWCNTs, Ag2S QDs, PbS/CdS QDs | 1000-1600 | 0.1-15% | Photostable, tunable emission. | Pioneering (2011-2015) |
| Rare-Earth Doped Nanoparticles | NaYF4:Yb,Er,Tm (Nd3+-sensitized) | 1500-1600 | 1-10% | Sharp emissions, long lifetime. | Expansion (2016-2018) |
| Organic Dyes & Conjugates | IR-1061, CH-4T, FDA-approved ICG | 900-1100 | 1-10% | Potential for clinical translation, faster clearance. | Translation Focus (2018-Present) |
| Donor-Acceptor-Donor (D-A-D) Dyes | Benzobisthiadiazole-based polymers/small molecules | 1000-1300 | 5-20% (in solvent) | Bright, tailorable chemistry. | Ongoing Development |
Experimental Protocols
Protocol 1:In VivoNIR-IIb (1500-1700 nm) Vascular Imaging with Rare-Earth Nanoparticles
Objective: To achieve high-resolution, deep-tissue imaging of the cerebral vasculature in a murine model.
Materials: See "The Scientist's Toolkit" below. Procedure:
- Nanoparticle Preparation: Dilute PEGylated NaYF4:Yb,Er,Tm@NaYF4:Nd nanoparticles in sterile 1x PBS to a concentration of 5 mg/mL. Sonicate for 5 minutes before injection.
- Animal Preparation: Anesthetize a 6-8 week old nude mouse using 2% isoflurane. Secure the animal in a stereotactic frame. Maintain body temperature at 37°C using a heating pad.
- System Calibration: Power on the 808 nm continuous-wave laser and the liquid nitrogen-cooled InGaAs camera (detection range: 900-1700 nm). Set the 1500 nm long-pass filter in place for NIR-IIb imaging. Acquire a background image with laser on and animal in place.
- Fluorophore Administration: Intravenously inject 200 µL of the nanoparticle solution via the tail vein.
- Image Acquisition:
- Set laser power density at 100 mW/cm² at the sample plane.
- Acquire dynamic images at 5 frames per second for the first 60 seconds post-injection to capture the flow.
- Switch to high-resolution static imaging at 300 ms exposure time.
- Acquire images in both NIR-II (1000-1700 nm, with 900 nm LP filter) and NIR-IIb (1500-1700 nm, with 1500 nm LP filter) channels.
- Data Processing: Subtract the background image. Apply a temporal color-coded map for dynamic flow visualization. Calculate signal-to-background ratio (SBR) and full-width at half-maximum (FWHM) for vessel resolution analysis.
Protocol 2: NIR-II Fluorescence Microscopy for Intracellular Imaging
Objective: To perform high-resolution, low-background imaging of subcellular structures using a NIR-II-emitting organic dye conjugate.
Materials: NIR-II dye-labeled dextran (or specific targeting ligand), cultured cells, confocal microscope adapted with an InGaAs detector or NIR-II-sensitive SPAD array. Procedure:
- Sample Preparation: Plate cells on glass-bottom dishes. At 70% confluency, replace medium with serum-free medium containing 50-100 nM of the NIR-II probe. Incubate for 1-4 hours (time depends on probe internalization pathway).
- Microscope Setup: Configure a 980 nm or 1064 nm pulsed laser for excitation. Ensure proper alignment through the microscope objective. Path emission light through a 1100 nm long-pass filter to a NIR-II-sensitive detector.
- Image Acquisition: For live-cell imaging, maintain environment at 37°C with 5% CO₂. Use low laser power (< 50 W/cm²) to minimize phototoxicity. Acquire z-stacks at 0.5 µm intervals.
- Analysis: Compare acquired NIR-II images with simultaneous or sequential conventional fluorescence (e.g., DAPI, GFP) images to confirm colocalization.
Visualizations
Evolution of NIR-II Imaging Technology
NIR-II In Vivo Imaging Protocol Workflow
The Scientist's Toolkit
Table 3: Essential Research Reagent Solutions for NIR-II Imaging
| Item | Function/Description | Example(s) |
|---|---|---|
| NIR-II Fluorophores | Emit light within the 1000-1700 nm window upon excitation. | SWCNTs, Ag2S Quantum Dots, IR-1061 dye, Rare-Earth Nanoparticles (NaYF4:Yb,Er), D-A-D organic dyes. |
| Targeting Ligands | Conjugated to fluorophores to enable specific binding to biomarkers (e.g., on tumors). | Peptides (cRGD), Antibodies, Aptamers, Folic Acid. |
| Surface Coating Agents | Improve biocompatibility, solubility, and circulation time of nanoparticles. | PEG derivatives (DSPE-PEG), Polyvinylpyrrolidone (PVP), Bovine Serum Albumin (BSA). |
| NIR-II Excitation Source | Provides photons to excite the fluorophore. Common wavelengths are 808, 980, and 1064 nm. | Continuous-wave or pulsed diode lasers, Optical Parametric Oscillator (OPO) lasers. |
| NIR-II Detector | Captures emitted NIR-II photons. Requires sensitivity beyond silicon. | InGaAs camera (cooled), Two-dimensional InGaAs array, Single-Photon Avalanche Diode (SPAD) array. |
| Optical Filters | Block excitation laser light and isolate the desired emission range. | Long-pass filters (e.g., 1000 nm, 1200 nm, 1500 nm), Band-pass filters. |
| Phantom Materials | Used for system calibration and characterization. Mimic tissue scattering/absorption. | Intralipid suspensions, Agar gel with Indian ink. |
| Image Analysis Software | For processing, quantifying, and visualizing NIR-II image data. | ImageJ (with custom plugins), MATLAB, Python (SciPy, OpenCV), Commercial microscopy suites. |
This application note details the core instrumentation for fluorescence imaging in the second near-infrared window (NIR-II, 1000-1700 nm), a critical technological domain for advancing deep tissue in vivo research. The superior performance within this spectral region—characterized by reduced photon scattering and minimal autofluorescence—enables unprecedented resolution and penetration depth for imaging biological dynamics, tumor targeting, and therapeutic monitoring. The efficacy of the entire imaging paradigm hinges on the optimal selection and integration of three core components: excitation lasers, emission filters, and detectors.
Core Component Specifications & Quantitative Comparison
| Laser Type | Wavelength (nm) | Typical Power (mW) | Key Advantages | Limitations | Common Applications |
|---|---|---|---|---|---|
| Diode Laser | 808, 980, 1064 | 50 - 1000 | Cost-effective, compact, stable output | Limited to specific wavelengths, potential for tissue heating at 980 nm | Excitation of CNTs, quantum dots, small molecule dyes |
| Ti:Sapphire (Tunable) | 680 - 1300 | 100 - 3000 | Widely tunable, femtosecond pulses for multiphoton | Very large, expensive, requires expert maintenance | Multiphoton NIR-II imaging, precision spectroscopy |
| Optical Parametric Oscillator (OPO) | 400 - 2600 | 100 - 2000 | Broadly tunable, integrates with Nd:YAG lasers | Large footprint, high cost, complex operation | Flexible excitation of novel fluorophores |
| Nd:YAG (Pulsed) | 1064 | 1 - 100 (per pulse) | High peak power, excellent for time-gated imaging | Pulsed system, can be bulky | Time-resolved imaging to suppress autofluorescence |
Table 2: Detectors for NIR-II Emission Capture
| Detector Type | Spectral Range (nm) | Cooling Temp. | Key Metric (Typical Value) | Pros | Cons |
|---|---|---|---|---|---|
| InGaAs Photodiode (1D) | 800 - 1700 | Thermoelectric (-20°C) | Responsivity (~1.0 A/W @ 1550 nm) | Fast, simple, low cost | No spatial resolution, requires scanning |
| InGaAs CCD Camera | 900 - 1700 | Deep Thermoelectric (-80°C) | Dark Current (~100 e-/pix/s) | Good resolution, wide field | Moderate frame rate, high cost for large arrays |
| InGaAs FPA (2D Array) | 900 - 1700 | Stirling Cryogenic (-196°C) | NEP (~1000 photons/pixel/s) | High sensitivity, fast imaging | Very high cost, requires complex cooling |
| Extended InGaAs | 400 - 2500 | Cryogenic | Quantum Efficiency (~85% @ 1550 nm) | Broad spectrum coverage | Higher dark current in SWIR range |
| Superconducting Nanowire Single-Photon Detector (SNSPD) | 400 - 2000 | Cryogenic (<2.5 K) | Detection Efficiency (>90%), Timing Jitter (<50 ps) | Ultimate sensitivity, single-photon counting | Extreme cooling, very limited active area, extremely high cost |
Table 3: Critical Optical Filters for NIR-II Systems
| Filter Type | Function | Key Specifications | Role in System |
|---|---|---|---|
| Long-Pass (LP) Emission Filter | Blocks laser light, passes NIR-II emission | Cut-On Wavelength (e.g., 1100 nm, OD >6 @ laser line) | Placed before detector; crucial for blocking scattered excitation photons. |
| Short-Pass (SP) Filter | Blocks IR light beyond detector range | Cut-Off Wavelength (e.g., 1700 nm) | Protects detector from unwanted long-wavelength radiation. |
| Band-Pass (BP) Filter | Isolates specific emission bands | Center Wavelength & Bandwidth (e.g., 1500 ± 12 nm) | Enables spectral unmixing of multiple fluorophores. |
| Dichroic Mirror | Separates excitation and emission paths | Transition Wavelength (e.g., 1050 nm), High Reflectivity & Transmission | Steers laser to sample and emission to detector in epi-illumination setups. |
Experimental Protocols
Protocol 1: System Alignment and Sensitivity Calibration forIn VivoImaging
Aim: To align core components and quantify the system's sensitivity and spatial resolution for deep tissue imaging experiments. Materials:
- NIR-II imaging system (laser, filters, detector)
- IR-sensitive alignment card
- NIR-II fluorescent reference standard (e.g., IR-26 dye in sealed capillary)
- USAF 1951 resolution target (reflective)
- Tissue phantom (e.g., 1% intralipid in agarose)
- Data acquisition computer with control software.
Procedure:
- Laser Safety: Ensure all appropriate laser safety goggles are worn. Enclose the laser path.
- Coarse Optical Alignment: a. With the laser at minimum power, use an IR alignment card to visualize the beam path. b. Position the dichroic mirror at 45° in the filter cube. Align the excitation beam to be centered on the back aperture of the objective lens. c. Place a reflective surface (mirror) at the sample plane. Observe the return beam. Align the emission path so the reflected beam is centered on the active area of the InGaAs detector.
- Filter Installation: Install the appropriate long-pass emission filter (e.g., 1250 nm LP for 1064 nm excitation) in the filter wheel/slider.
- Resolution Measurement: a. Place the USAF target at the sample plane. Illuminate with the laser. b. Acquire an image with the InGaAs camera. Adjust focus. c. Identify the smallest resolvable group of lines. Calculate spatial resolution using the known line spacings and system magnification.
- Sensitivity Calibration: a. Place a capillary tube containing a known concentration of IR-26 dye (e.g., 100 µM in D2O) at the sample plane. b. Acquire an image with a defined set of parameters (laser power, integration time, gain). c. Measure the mean signal (in counts) from the capillary and the standard deviation of the background from a blank area. d. Calculate the Signal-to-Noise Ratio (SNR) and the minimum detectable flux.
- Penetration Depth Validation: a. Embed the fluorescent capillary at the bottom of a tissue phantom slab of known thickness (e.g., 2-10 mm). b. Image through the phantom. Measure the attenuation of the fluorescent signal as a function of phantom thickness to characterize system performance for deep tissue.
Protocol 2: Multiplexed Imaging with Spectral Unmixing
Aim: To distinguish two NIR-II fluorophores with overlapping emissions using distinct excitation lasers and band-pass filters. Materials:
- Dual-laser system (e.g., 808 nm and 980 nm diode lasers).
- Fluorophore A (e.g., Lanthanide-based nanoparticle, excitable at 808 nm).
- Fluorophore B (e.g., Organic dye, excitable at 980 nm).
- Set of band-pass emission filters (e.g., 1300/40 nm, 1550/40 nm).
- Sample containing both fluorophores (e.g., capillary tubes or ex vivo tissue).
Procedure:
- Spectral Characterization: Independently image each pure fluorophore with both laser lines and all band-pass filters. Create a spectral signature library (intensity in each channel for each fluorophore).
- Sequential Imaging of Mixed Sample: a. With 808 nm excitation, acquire images through the 1300/40 nm and 1550/40 nm filters. b. Switch to 980 nm excitation. Repeat acquisition through the same filter set.
- Linear Unmixing Analysis: a. For each pixel, the signal in the four acquired channels (Ex808/Em1300, Ex808/Em1550, Ex980/Em1300, Ex980/Em1550) is a linear combination of the contributions from Fluorophore A and B. b. Using the predefined spectral library, solve the linear equations to calculate the fractional contribution of each fluorophore to each pixel. c. Generate separate, unmixed images representing the spatial distribution of Fluorophore A and Fluorophore B.
System Integration & Workflow Diagrams
Epi-Illumination NIR-II Imaging Path
Experimental Workflow for NIR-II Imaging Thesis Research
The Scientist's Toolkit: Key Research Reagent Solutions
| Item | Function in NIR-II Research | Example/Notes |
|---|---|---|
| IR-26 Dye | NIR-II fluorescence standard for quantum yield reference and system calibration. | Dissolved in D2O or organic solvents (e.g., 1,2-dichloroethane). |
| PBS/D2O Solution | Isotonic solvent for in vitro and in vivo fluorophore administration. Reduces O-H absorption in NIR-II. | Used for diluting biocompatible NIR-II probes. |
| Intralipid Phantom | Tissue-simulating scattering medium for validating penetration depth and imaging performance. | Typically 0.5-2% lipid suspension in agarose. |
| PEGylated NIR-II Quantum Dots | Bright, photostable inorganic probes for long-term vascular imaging and tumor targeting. | PbS/CdS or Ag2S QDs coated with biocompatible polymers. |
| NIR-II Organic Dyes (e.g., CH-4T) | Small molecule fluorophores for rapid renal clearance and metabolic imaging. | Often require formulation with surfactants (e.g., F-127) for in vivo use. |
| Anesthesia System (Isoflurane/O2) | For maintaining animal physiological stability during in vivo imaging sessions. | Critical for reproducible, ethical longitudinal studies. |
| Blackout Enclosure | Eliminates ambient light to maximize detection of weak NIR-II signals. | Custom-built or commercial light-tight box for the imaging system. |
From Bench to Bedside: NIR-II Probe Design, Imaging Protocols, and Cutting-Edge Applications
Application Notes
NIR-II (1000-1700 nm) fluorescence imaging enables unprecedented resolution and penetration depth for in vivo biomedical research. The selection of an appropriate probe is critical and depends on the specific experimental requirements regarding brightness, biocompatibility, targeting, and clearance.
Organic Dyes: Ideal for rapid clinical translation due to potential renal clearance and simpler surface chemistry for bioconjugation. Best suited for fast, high-frame-rate vascular imaging and intraoperative guidance where toxicity and clearance are primary concerns. Quantum Dots (QDs): Offer superior brightness and photostability. Their broad absorption and narrow, tunable emission are optimal for multiplexed imaging. However, long-term toxicity due to heavy metal content and reticuloendothelial system (RES) sequestration limits their use to preclinical studies. Single-Walled Carbon Nanotubes (SWCNTs): Provide exceptional photostability and emission in the longest NIR-II sub-windows (e.g., 1500-1700 nm for maximal penetration). Their large surface area facilitates high-density functionalization. They are best for long-term, deep-tissue tracking studies but face challenges in batch-to-batch consistency and complex pharmacokinetics.
Quantitative Comparison of NIR-II Probe Classes
Table 1: Key Characteristics of Major NIR-II Fluorescent Probes
| Property | Organic Dyes (e.g., CH-1055) | Quantum Dots (e.g., Ag₂S) | Carbon Nanotubes ((6,5) chirality) |
|---|---|---|---|
| Peak Emission (nm) | 1050-1100 | 1200-1350 | 980-1000 |
| Quantum Yield (%) | 0.3 - 5.0 | 10 - 20 | 0.1 - 1.5 |
| Extinction Coeff. (M⁻¹cm⁻¹) | ~10⁵ | 10⁶ - 10⁷ | ~10⁴ (per mg/L) |
| Stokes Shift (nm) | 150-300 | 200-400 | 200-400 |
| Photostability | Moderate | Excellent | Exceptional |
| Biodegradability | Yes | No | No |
| Primary Clearance Route | Renal | Hepatic/RES | Hepatic/RES |
| Typical Coating | PEG, peptides | PEG, lipids, polymers | PEG, phospholipids, DNA |
Experimental Protocols
Protocol 1: Conjugation of Targeting Ligands to PEGylated Organic Dyes
Objective: Attach a cRGD peptide to a NIR-II dye for targeting αᵥβ₃ integrin in tumor vasculature.
- Activation: Dissolve 1 mg of CH-1055-PEG₅₀₀₀-COOH in 200 µL of anhydrous DMSO. Add 5 molar equivalents of EDC and 10 equivalents of NHS. React for 30 minutes at room temperature with gentle stirring.
- Purification: Isolate the activated ester using a PD-10 desalting column equilibrated with PBS (pH 7.4).
- Conjugation: Immediately mix the activated dye solution with a 3-fold molar excess of cRGDfK peptide in PBS. Adjust pH to 8.0-8.5 with 0.1 M NaHCO₃. React for 4 hours at 4°C.
- Purification & Validation: Purify the conjugate via size-exclusion chromatography (Sephadex G-25). Validate using HPLC to confirm conjugation efficiency and UV-Vis-NIR spectroscopy to confirm retained fluorescence.
Protocol 2: Aqueous Phase Transfer and Functionalization of Ag₂S Quantum Dots
Objective: Render hydrophobic Ag₂S QDs water-soluble and functionalize with a passivating polymer.
- Ligand Exchange: Precipitate 1 mL of oleylamine-capped Ag₂S QDs in hexane with ethanol. Centrifuge and redisperse in 500 µL chloroform.
- Phase Transfer: Add 5 mg of poly(maleic anhydride-alt-1-octadecene)-polyethylene glycol (PMAO-PEG) to the QD solution. Vortex vigorously. Evaporate chloroform under argon to form a thin film.
- Hydration: Add 1 mL of 0.1 M borate buffer (pH 8.5) to the film. Sonicate in a bath sonicator for 15-20 minutes until the QDs are fully dispersed in the aqueous phase.
- Purification: Filter through a 0.22 µm syringe filter. Remove excess polymer via centrifugal filtration (100 kDa MWCO). Resuspend in PBS. Characterize hydrodynamic diameter via DLS and emission profile via NIR spectrophotometer.
Protocol 3:In VivoNIR-II Fluorescence Imaging of Mouse Brain Vasculature
Objective: Perform non-invasive, high-resolution imaging of the cerebral vasculature.
- Probe Preparation: Dilute the selected probe (e.g., IR-FEP, a dye-based probe) in sterile saline to a concentration of 200 µM. Filter sterilize (0.22 µm).
- Animal Preparation: Anesthetize a nude mouse with isoflurane (2-3% in O₂). Secure in a stereotaxic imaging stage. Maintain body temperature at 37°C. Apply ophthalmic ointment.
- Administration & Imaging: Inject 100 µL of probe solution via tail vein (bolus). Using a NIR-II imaging system (e.g., InGaAs camera, 1064 nm laser excitation, 1100 nm long-pass emission filter), acquire images immediately at 5-10 frames per second for dynamic angiography, then at lower frequency for static imaging.
- Data Analysis: Use ImageJ or comparable software. Calculate signal-to-background ratio (SBR) by dividing mean intensity in a vessel ROI by mean intensity in an adjacent tissue ROI. Generate maximum intensity projections (MIP) from time-series data.
The Scientist's Toolkit: Key Research Reagent Solutions
Table 2: Essential Materials for NIR-II Probe Work
| Item | Function & Explanation |
|---|---|
| PEGylated NIR-II Dye (e.g., CH-1055-PEG) | Core imaging agent; PEGylation improves solubility, pharmacokinetics, and reduces non-specific binding. |
| EDC / NHS Crosslinker Kit | Activates carboxyl groups for stable amide bond formation with targeting ligands. |
| DSPE-PEG₂₀₀₀ (Lipid) | A common amphiphilic polymer for encapsulating and stabilizing hydrophobic probes like QDs and SWCNTs in aqueous buffer. |
| cRGDfK Peptide | Targeting ligand for αᵥβ₃ integrin, used to functionalize probes for tumor or angiogenesis imaging. |
| Size-Exclusion Chromatography Column (e.g., Sephadex G-25) | Critical for purifying conjugated probes from unreacted small molecules. |
| Anhydrous DMSO | Solvent for organic dye conjugation reactions to prevent hydrolysis of activated esters. |
| Borate Buffer (0.1 M, pH 8.5) | Optimal pH for amine-reactive conjugation chemistry (e.g., NHS ester reactions). |
| Sterile Saline (0.9% NaCl) | Isotonic vehicle for in vivo probe administration. |
| Centrifugal Filter Unit (100 kDa MWCO) | For concentrating probe solutions and buffer exchange. |
| InGaAs Camera NIR-II Imager | Detection system sensitive in the 900-1700 nm range, essential for capturing NIR-II fluorescence. |
Visualization Diagrams
Decision Workflow for NIR-II Probe Selection
Aqueous Phase Transfer Workflow for Probes
Advantages of the NIR-II Biological Window
Within the context of NIR-II (1000-1700 nm) fluorescence imaging for deep tissue research, the development of targeted imaging agents is paramount. Specific delivery of NIR-II fluorophores to biomarkers of interest significantly enhances signal-to-background ratio and enables precise visualization of deep-seated pathologies. This application note details conjugation strategies for three primary targeting moieties—antibodies, peptides, and small molecules—to NIR-II fluorophores, providing protocols and comparative data to guide probe design.
Comparative Analysis of Conjugation Platforms
The choice of targeting ligand involves trade-offs between specificity, size, pharmacokinetics, and conjugation chemistry. The following table summarizes key quantitative parameters.
Table 1: Comparison of Targeting Moieties for NIR-II Probe Conjugation
| Parameter | Antibodies | Peptides | Small Molecules |
|---|---|---|---|
| Typical Molecular Weight (kDa) | 150 | 1-10 | 0.2-1 |
| Binding Affinity (Kd) | nM-pM | nM-μM | nM-μM |
| Tumor Penetration Depth | Limited (poor) | Good | Excellent |
| Blood Clearance Half-life | Days (slow) | Minutes-Hours (fast) | Minutes-Hours (fast) |
| Immunogenicity Risk | High | Moderate | Low |
| Common Conjugation Site | Lysine, Cysteine (interchain) | N-terminus, Cysteine | Amine, Carboxyl, Click handle |
| Typical Dye-to-Ligand Ratio | 1-4 | 1-2 | 1 |
Key Conjugation Chemistries & Protocols
Antibody-NIR-II Fluorophore Conjugation via Lysine Chemistry
This is the most common, random conjugation method, linking NHS esters on the dye to primary amines on the antibody.
Protocol:
- Preparation: Dialyze 1 mg of the purified antibody (e.g., anti-EGFR cetuximab) into 0.1 M sodium bicarbonate buffer (pH 8.3). Concentrate to 2 mg/mL.
- Dye Activation: Dissolve 0.1 mg of a NIR-II dye with NHS ester functionality (e.g., CH-1055-NHS) in 20 µL of anhydrous DMSO.
- Conjugation: Add the dye solution dropwise to the stirred antibody solution at a 5:1 molar ratio (dye:antibody). React for 2 hours at room temperature, protected from light.
- Purification: Pass the reaction mixture through a pre-equilibrated PD-10 desalting column using PBS (pH 7.4) as the eluent. Collect the colored antibody fraction.
- Characterization: Determine the degree of labeling (DOL) by measuring absorbance at 280 nm (protein) and the dye's λmax (e.g., 1055 nm). Calculate using the dye's and antibody's extinction coefficients.
Site-Specific Peptide Conjugation via Click Chemistry
This protocol describes a copper-free strain-promoted alkyne-azide cycloaddition (SPAAC) for defined conjugation.
Protocol:
- Peptide Modification: Synthesize or obtain a targeting peptide (e.g., RGD) with a terminal azido-modified amino acid (e.g., Azidohomoalanine). Purify via HPLC.
- Fluorophore Functionalization: Prepare a NIR-II dye (e.g., IR-FGP) functionalized with a cyclooctyne group (e.g., DBCO).
- Reaction: Mix the azido-peptide and DBCO-dye at a 1:1.2 molar ratio in PBS (pH 7.4) with 10% DMSO. React for 4-6 hours at 37°C.
- Purification & Validation: Purify the conjugate via reverse-phase HPLC. Confirm conjugation and monodispersity using LC-MS.
Small Molecule Conjugation via Active Ester Coupling
This protocol is typical for folate-receptor targeting.
Protocol:
- Activation: Dissolve 1 mg of folic acid in 500 µL of anhydrous DMSO. Add 5 molar equivalents of EDC and NHS. React for 30 minutes to form the active NHS ester.
- Conjugation: Add this activated solution to 0.5 mg of an amine-functionalized NIR-II dye (e.g., IR-1061-amine) in 500 µL DMSO with 2 µL of triethylamine. Stir for 12 hours at room temperature, protected from light.
- Work-up: Dilute the reaction with water and lyophilize.
- Purification: Purify the crude product via preparative HPLC using a water/acetonitrile gradient with 0.1% TFA.
- Formulation: Lyophilize the pure conjugate and store at -20°C. Reconstitute in PBS for in vivo use.
The Scientist's Toolkit: Research Reagent Solutions
Table 2: Essential Materials for NIR-II Probe Conjugation
| Item | Function & Critical Note |
|---|---|
| NIR-II Fluorophore-NHS Ester (e.g., CH-1055-NHS) | Provides reactive group for amine coupling. Must be stored anhydrous, shielded from light and moisture. |
| Azido-/DBCO-Modified Ligands | Enables bioorthogonal, site-specific click conjugation without cytotoxic copper catalysts. |
| Size Exclusion Chromatography Columns (e.g., PD-10, Zeba Spin) | Critical for rapid removal of unconjugated dye from protein/antibody conjugates. |
| Anhydrous DMSO | Essential solvent for dye dissolution; water content will quench active esters. |
| UV-Vis-NIR Spectrophotometer | Required for quantification of dye labeling ratio (DOL) and concentration. |
| HPLC System with C18 Column | For purification and analysis of small molecule/peptide-dye conjugates. |
| EDC/NHS Crosslinking Kit | Standard carbodiimide chemistry for activating carboxyl groups on ligands or dyes. |
Experimental Workflow & Pathways
Workflow for NIR II Targeted Probe Synthesis
Targeted NIR II Imaging Pathway
Step-by-Step Protocol for In Vivo NIR-II Imaging in Rodent Models
Within the broader thesis on the NIR-II (1000-1700 nm) biological window for deep tissue fluorescence imaging, this protocol details the application of this technology in rodent models. NIR-II imaging provides superior spatial resolution, millimeter-depth penetration, and reduced autofluorescence compared to traditional NIR-I (700-900 nm) imaging, making it a transformative tool for preclinical research in oncology, neurology, and cardiovascular disease.
The Scientist's Toolkit: Research Reagent Solutions
A curated list of essential materials for a standard NIR-II imaging experiment.
| Item | Function & Critical Notes |
|---|---|
| NIR-II Fluorophore (e.g., IRDye 800CW, CH-4T, Ag2S quantum dots, single-walled carbon nanotubes) | The imaging agent. Selection depends on target (non-specific vs. targeted), excitation/emission peaks, and biocompatibility. |
| Animal Model (Mouse/Rat) with Window/Model | Disease model (e.g., tumor xenograft, cerebral ischemia) or transgenic line expressing fluorescent protein. |
| Anesthetic System (Isoflurane vaporizer, nose cones) | For safe and stable animal immobilization during imaging. |
| Hair Removal Cream | To remove fur from the region of interest, minimizing signal scattering and attenuation. |
| Warming Pad | Maintains rodent body temperature under anesthesia to prevent hypothermia. |
| NIR-II Imaging System | Includes: 808 nm or 980 nm laser for excitation; Indium Gallium Arsenide (InGaAs) or Short-Wave Infrared (SWIR) camera; appropriate emission filters (e.g., long-pass >1000 nm). |
| Image Analysis Software (e.g., Living Image, ImageJ, custom MATLAB/Python scripts) | For quantification of signal intensity, biodistribution, and pharmacokinetic analysis. |
Experimental Protocol: NIR-II Imaging of Tumor Xenografts
Aim: To visualize and quantify the biodistribution and tumor-targeting efficiency of a NIR-II-labeled probe.
Pre-Imaging Preparation (Day -7 to -1)
- Cell Culture & Xenograft Establishment:
- Culture relevant tumor cells (e.g., 4T1, U87MG) in standard conditions.
- Harvest cells and resuspend in PBS/Matrigel mixture.
- Subcutaneously inject 1-5 x 10^6 cells into the flank of an immunodeficient mouse (e.g., BALB/c nude). Allow tumor to grow to ~50-100 mm³.
Day of Imaging (Day 0)
Step 1: Animal Preparation
- Anesthetize the tumor-bearing mouse using 2-3% isoflurane in oxygen.
- Apply depilatory cream to the tumor region and abdomen/thorax for systemic imaging. Remove after 1 minute and clean thoroughly with water and PBS.
- Place the animal in the imaging chamber, maintaining anesthesia at 1-2% isoflurane. Position on a warming pad (37°C).
- Apply veterinary ophthalmic ointment to prevent corneal drying.
Step 2: Baseline Imaging & Probe Administration
- Acquire a baseline autofluorescence image with the following system parameters:
- Excitation: 808 nm laser, power density: 10-50 mW/cm².
- Emission Filter: Long-pass 1000 nm or 1250 nm.
- Exposure Time: 50-200 ms.
- FOV: As required.
- Intravenously inject the NIR-II probe (e.g., 100 µL of 100 µM solution in saline) via the tail vein.
- Record the exact injection time.
Step 3: Time-Lapse Image Acquisition
- Acquire sequential images at predetermined time points (e.g., 1 min, 5 min, 30 min, 1 h, 2 h, 4 h, 24 h post-injection).
- Keep all imaging parameters (laser power, exposure, filter, FOV) identical for all sessions to allow quantitative comparison.
- For 24h imaging, return the animal to its cage with adequate recovery time and re-anesthetize for later time points.
Post-Imaging Analysis
- Image Processing: Subtract the baseline autofluorescence image from all subsequent images using analysis software.
- Region of Interest (ROI) Analysis:
- Draw ROIs around the tumor and a reference tissue (e.g., muscle in the contralateral flank).
- Quantify the average signal intensity within each ROI.
- Quantification: Calculate the Tumor-to-Background Ratio (TBR) for each time point. > TBR = (Mean Signal IntensityTumor) / (Mean Signal IntensityBackground)
- Pharmacokinetics: Plot signal intensity in the tumor and major organs over time to assess probe kinetics.
Experimental Workflow for NIR-II Tumor Imaging
Critical parameters for experiment design and reporting.
| Parameter | Typical Range / Value | Purpose & Notes |
|---|---|---|
| Laser Wavelength | 808 nm or 980 nm | Matches fluorophore excitation. 980nm penetrates deeper but causes more tissue heating. |
| Laser Power Density | 10 - 100 mW/cm² | Balances signal-to-noise ratio with potential for tissue photodamage. Must be reported. |
| Emission Filter Cut-on | 1000 nm, 1250 nm, or 1500 nm | Defines the NIR-II sub-window. Longer cut-ons reduce scatter and autofluorescence further. |
| Camera Exposure Time | 50 - 1000 ms | Adjusted for signal strength. Longer times increase signal but risk motion blur. |
| Optimal Imaging Timepoint | 4 - 48 h post-injection | Depends on probe kinetics (e.g., rapid renal clearance vs. slow targeted accumulation). |
| Target Tumor-to-Background Ratio (TBR) | > 2.0 | A TBR > 2 is generally considered the threshold for clear visual contrast in vivo. |
| Spatial Resolution (in tissue) | ~10 - 40 µm | Can achieve sub-10µm for superficial structures; degrades with depth. |
Detailed Methodology: Key Supporting Experiments
Protocol 5.1: Ex Vivo Biodistribution Validation
Aim: To confirm in vivo imaging results and quantify probe uptake in organs.
- Euthanize the animal at the terminal imaging time point (e.g., 24h) via CO₂ asphyxiation or anesthetic overdose.
- Perfuse transcardially with 20-30 mL of ice-cold PBS to clear blood-borne fluorophore.
- Harvest organs of interest (tumor, liver, spleen, kidneys, heart, lungs, muscle).
- Image all organs ex vivo using the same NIR-II system settings.
- Quantify signal intensity per organ and normalize to organ weight or a reference standard.
- Correlate ex vivo organ signal with the final in vivo ROI data.
Protocol 5.2: Determining Optimal Imaging Window
Aim: To establish the pharmacokinetic profile of a new NIR-II probe.
- Follow the main in vivo imaging protocol.
- Increase Imaging Frequency: Acquire images at early, rapid time points (e.g., 30 sec, 2 min, 5 min, 15 min, 30 min, 1 h) and later, slower time points (2, 4, 8, 12, 24, 48 h).
- Analyze Kinetic Curves: Plot signal intensity vs. time for blood pool (inferior vena cava ROI), target tissue, and clearance organs (liver, kidneys).
- Define Windows: Identify key phases: Blood Pool Phase (<5 min), Targeting/Equilibrium Phase (1-12 h), and Clearance Phase (>12 h). The optimal time for target imaging is at the peak of the Targeting Phase.
Pharmacokinetic Phases of a NIR-II Probe
Fluorescence imaging in the second near-infrared window (NIR-II, 1000-1700 nm) represents a transformative advancement for in vivo biomedical research. Compared to traditional NIR-I (700-900 nm) imaging, NIR-II light exhibits significantly reduced scattering and autofluorescence, enabling deeper tissue penetration, higher spatial resolution, and improved signal-to-background ratios. This article details application notes and protocols for three critical areas leveraging these advantages within the broader thesis of NIR-II for deep-tissue imaging.
Application Note & Protocol: Vascular Imaging
Objective: To visualize and quantify deep-tissue vasculature, including in the brain and hind limb, with high spatial and temporal resolution.
Research Reagent Solutions:
| Item | Function |
|---|---|
| NIR-II Fluorophore (e.g., IRDye 800CW, Ag2S QDs, SWCNTs) | Emits light in the NIR-II window for high-contrast imaging. |
| Phosphate-Buffered Saline (PBS) | Vehicle for intravenous injection of the fluorophore. |
| Isoflurane/Oxygen Anesthesia System | For humane animal immobilization during imaging. |
| Heating Pad | Maintains animal body temperature and physiological stability. |
| Tail Vein Catheter | Enables precise intravenous bolus injection. |
Experimental Protocol:
- Animal Preparation: Anesthetize the mouse (e.g., C57BL/6) using 2% isoflurane. Secure in a supine or lateral position on a heated imaging stage. Maintain anesthesia at 1-2% isoflurane.
- Fluorophore Administration: Prepare a 200 µL bolus of fluorophore (e.g., 100 µM IRDye 800CW in PBS). Cannulate the tail vein and administer the bolus.
- NIR-II Imaging: Acquire dynamic images using an NIR-II imaging system (e.g., InGaAs camera with 1064 nm excitation laser) immediately post-injection. Use a 1100 nm long-pass filter.
- Data Analysis: Use software (e.g., ImageJ, MATLAB) to quantify metrics like vessel width, blood flow velocity, and perfusion rate.
Quantitative Data Summary:
| Metric | NIR-I Window (e.g., 800 nm) | NIR-II Window (e.g., 1500 nm) | Improvement Factor |
|---|---|---|---|
| Tissue Penetration Depth | ~2-3 mm | >5 mm | ~2.5x |
| Spatial Resolution (FWHM) | ~300 µm | ~25 µm | ~12x |
| Signal-to-Background Ratio (in brain) | ~2:1 | ~10:1 | ~5x |
Title: NIR-II Vascular Imaging Protocol Workflow
Application Note & Protocol: Tumor Delineation
Objective: To precisely define tumor margins and monitor drug delivery kinetics in deep-tissue oncology models.
Research Reagent Solutions:
| Item | Function |
|---|---|
| Targeted NIR-II Probe (e.g., cRGD-Conjugated Ag2S QDs) | Binds to specific tumor biomarkers (e.g., αvβ3 integrin). |
| Subcutaneous/Orthotopic Tumor Model | Provides a physiologically relevant imaging target. |
| Fluorescence-Activated Cell Sorting (FACS) Buffer | For ex vivo validation of targeting. |
| Immunohistochemistry Kit | Validates probe localization against standard biomarkers. |
Experimental Protocol:
- Model Establishment: Implant tumor cells (e.g., U87MG glioblastoma) subcutaneously or orthotopically in nude mice.
- Probe Injection: Once tumors reach ~100 mm³, inject 150 µL of targeted NIR-II probe (2 nmol) via tail vein.
- Longitudinal Imaging: Acquire NIR-II images at 0, 1, 2, 4, 8, 12, and 24 hours post-injection. Capture white light images for overlay.
- Ex Vivo Validation: Euthanize the animal. Resect the tumor and major organs for ex vivo imaging. Process tissue for FACS and IHC to confirm specificity.
- Analysis: Calculate tumor-to-background ratio (TBR) and delineate margins using intensity profiles.
Quantitative Data Summary:
| Probe Type | Optimal Imaging Timepoint (h p.i.) | Max Tumor-to-Background Ratio (TBR) | Tumor Penetration Depth |
|---|---|---|---|
| Non-targeted NIR-II Dye | 4-6 | ~3.5 | Superficial |
| Targeted NIR-II Nanoprobe (cRGD) | 12-24 | ~8.2 | >100 µm deep |
| Activatable NIR-II Probe | 2-4 (post-activation) | >12 | Variable |
Title: Tumor Targeting via EPR and Active Binding
Application Note & Protocol: Sentinel Lymph Node Mapping
Objective: To non-invasively map lymphatic drainage and identify the sentinel lymph node (SLN) for guided biopsy or resection.
Research Reagent Solutions:
| Item | Function |
|---|---|
| NIR-II Lymph Tracer (e.g., ICG in NIR-II, Lipo-ICG) | Fluorescent dye for lymphatic uptake and mapping. |
| 31G Insulin Syringe | For precise intradermal or subcutaneous injection. |
| Sterile Saline | For diluting the tracer if necessary. |
| Surgical Dissection Tools | For SLN excision guided by real-time imaging. |
Experimental Protocol:
- Tracer Preparation: Prepare a 10-20 µL bolus of NIR-II tracer (e.g., 25 µM ICG).
- Administration: Anesthetize the mouse. Inject the tracer intradermally into the paw or near the primary tumor.
- Real-Time Imaging: Immediately begin dynamic NIR-II imaging (frames every 5-10 seconds) to track tracer movement through lymphatic vessels.
- SLN Identification: The first lymph node to show fluorescence is the SLN. Mark its location.
- Image-Guided Resection: Use real-time NIR-II imaging to guide the surgical dissection and removal of the SLN. Acquire ex vivo images of the resected node.
- Validation: Perform H&E staining on the SLN to confirm pathology.
Quantitative Data Summary:
| Tracer | Injection Depth | Time to SLN Visualization (s) | Signal in SLN (vs. Background) | Number of SLNs Detected |
|---|---|---|---|---|
| ICG (NIR-I) | Intradermal | 60-90 | ~4:1 | 1 (superficial) |
| ICG (NIR-II) | Intradermal | 30-60 | ~15:1 | 1-2 |
| NIR-II Nanoprobe (e.g., Ag2S) | Subcutaneous | 120-180 | >20:1 | Up to 3 (deep nodes) |
Title: Sentinel Lymph Node Mapping Protocol
Within the broader thesis on the NIR-II (1000-1700 nm) window for deep tissue fluorescence imaging, this document details its application in two critical translational areas: real-time intraoperative surgical guidance and the non-invasive, quantitative monitoring of drug delivery. The superior photon penetration and reduced tissue scattering in this spectral region enable visualization of anatomical structures and biomolecular targets at depths and resolutions unattainable with traditional NIR-I (700-900 nm) imaging.
Key Advantages & Quantitative Data
Table 1: Quantitative Comparison of NIR-I vs. NIR-II Fluorescence Imaging in Biological Tissues
| Parameter | NIR-I (e.g., 800 nm) | NIR-II (e.g., 1300 nm) | Improvement Factor & Notes |
|---|---|---|---|
| Tissue Scattering | High | ~10-fold lower | Scattering coefficient (μs') scales as λ^-α; α ≈ 0.2-1.4 in tissue. |
| Autofluorescence | Moderate-High | Negligible | Dramatically reduces background, enhancing signal-to-noise ratio (SNR). |
| Maximum Imaging Depth (Mouse) | 1-3 mm | 5-20 mm | Depth varies with probe brightness, tissue type, and laser power. |
| Spatial Resolution at Depth | Degrades rapidly >1mm | Maintains sub-40 μm resolution at >3mm | Due to reduced scattering, enabling precise microvasculature imaging. |
| Tissue Absorption | Significant from hemoglobin, water, lipids | Minimal in "windows" (e.g., 1000-1350 nm) | Water absorption increases sharply beyond 1400 nm. |
Table 2: Performance Metrics of Representative NIR-II Fluorophores in Vivo
| Fluorophore Type | Peak Emission (nm) | Quantum Yield (in water) | Key Application Demonstrated | Key Metric Achieved |
|---|---|---|---|---|
| Organic Dye (CH-4T) | 1065 nm | ~0.3% | Hindlimb vasculature imaging | Frame rate: 25 fps; Resolution: ~30 μm |
| Single-Walled Carbon Nanotubes (SWCNT) | 1000-1600 nm (tunable) | 1-3% | Brain tumor margin delineation | Tumor-to-normal ratio (TNR): >5 |
| Rare-Earth Doped Nanoparticles (NaYF4:Yb,Er@Nd) | 1525 nm | ~10% (in particles) | Sentinel lymph node biopsy | Detection depth: >15 mm; Detection time: < 30 sec |
| Quantum Dots (Ag2S) | 1200 nm | 4-8% | Kidney tumor resection guidance | Real-time artery/vein differentiation |
Application Notes & Protocols
Protocol: Intraoperative Guidance for Tumor Margin Delineation
Aim: To utilize a tumor-targeted NIR-II probe for real-time visualization of malignant margins during surgical resection in a murine model.
Materials:
- NIR-II Probe: cRGD-peptide conjugated Ag2S quantum dots (cRGD-Ag2S QDs, 10 mg/mL in PBS).
- Animal Model: Nude mouse with subcutaneously implanted U87MG glioblastoma tumor (~100 mm³).
- Imaging System: NIR-II fluorescence imaging system with 808 nm laser excitation, InGaAs camera (detection range: 900-1700 nm), and sterile drape.
- Surgical Tools: Sterile microsurgical instruments.
- Anesthesia: Isoflurane vaporizer system.
Procedure:
- Probe Administration: Via tail vein, inject 200 μL of cRGD-Ag2S QDs (dose: 10 mg/kg) into the tumor-bearing mouse. The cRGD peptide targets integrin αvβ3 overexpression on tumor vasculature.
- Biodistribution Period: Allow 24 hours for systemic clearance and optimal tumor accumulation.
- Anesthesia & Preparation: Anesthetize mouse with 2% isoflurane. Secure in a sterile surgical field under the NIR-II camera.
- Pre-resection Imaging: Acquire a wide-field NIR-II fluorescence image (exposure: 100 ms, laser power: 50 mW/cm²) to locate the primary tumor signal.
- Real-Time Guided Resection: a. Make a surgical incision under white light. b. Switch the surgeon's display to an overlay of real-time NIR-II fluorescence on the white-light video (refresh rate: 10 fps). c. Resect the primary fluorescent mass using micro-scissors. d. Periodically image the surgical cavity to identify any residual fluorescent foci. e. Excise residual fluorescent tissue until the cavity shows no focal NIR-II signal above background levels.
- Post-resection Analysis: Image the resected specimen ex vivo to confirm uniform fluorescence. Collect residual cavity tissue for histopathological validation of margin status (H&E staining).
Key Data Analysis: Calculate the Tumor-to-Background Ratio (TBR) in the pre-resection image. Histology-confirmed complete resection should correlate with the absence of focal NIR-II signal in the final cavity image.
Protocol: Monitoring Doxorubicin Liposome Delivery and Release
Aim: To co-encapsulate a NIR-II fluorophore with a chemotherapeutic in a thermosensitive liposome, enabling simultaneous tracking of drug carrier accumulation and triggered release.
Materials:
- NIR-II Reporter Liposome: Lyso-1050 NIR-II dye and Doxorubicin (Dox) co-encapsulated in thermosensitive liposomes (TLS, e.g., DPPC: MSPC: DSPE-PEG2000 lipid composition).
- Control Liposome: TLS encapsulating only Lyso-1050 dye.
- Animal Model: Mouse with hindlimb tumor.
- Imaging System: NIR-II imager as above, plus a focused ultrasound (FUS) heating system calibrated to 42°C.
- Spectrofluorometer: For in vitro characterization.
Procedure: Part A: In Vitro Characterization of Release
- Dilute TLS (Dox+Lyso-1050) in PBS at 37°C in a cuvette. Acquire NIR-II fluorescence spectrum (λex: 808 nm).
- Gradually heat the cuvette to 42°C over 5 minutes while continuously monitoring fluorescence at 1050 nm (Lyso-1050) and 590 nm (Dox). The Lyso-1050 signal increases upon release due to de-quenching.
- Plot fluorescence intensity vs. temperature/time to confirm the thermal release profile.
Part B: In Vivo Monitoring
- Baseline Imaging: Image tumor-bearing mouse under NIR-II to establish background.
- Liposome Injection: Inject 150 μL of TLS (Dox+Lyso-1050) via tail vein.
- Accumulation Phase: Acquire longitudinal NIR-II images (t = 1, 2, 4, 8, 24 hours post-injection) using identical settings. Quantify tumor region-of-interest (ROI) signal.
- Triggered Release: At time of peak tumor accumulation (e.g., 24h), apply FUS to the tumor to raise local temperature to 41-42°C for 5 minutes. Acquire continuous NIR-II video.
- Post-Release Imaging: Image immediately after FUS and at 1-hour intervals. Compare to mice injected with control liposomes (no FUS applied).
- Validation: Euthanize mice; extract tumors for HPLC analysis of Dox concentration and correlate with imaging signal kinetics.
Key Data Analysis: Generate a pharmacokinetic curve from the tumor ROI NIR-II signal. A sharp signal increase during FUS indicates liposome release. Correlate the magnitude of this increase with the tumoral Dox concentration measured by HPLC.
Visualization: Pathways and Workflows
Diagram 1: Intraoperative Tumor Resection Guided by NIR-II
Diagram 2: NIR-II Monitoring of Drug Carrier Accumulation & Release
The Scientist's Toolkit: Research Reagent Solutions
Table 3: Essential Materials for NIR-II Guided Surgery & Delivery Studies
| Item | Function & Rationale |
|---|---|
| Targeted NIR-II Nanoprobes (e.g., cRGD-Ag2S QDs, Antibody-SWCNTs) | Provides molecular contrast. Targeting moiety (peptide/antibody) enhances accumulation at disease site, while NIR-II core enables deep-tissue imaging. |
| Co-encapsulating Thermosensitive Liposomes | Advanced drug delivery vehicle. Allows spatiotemporal co-delivery of drug and NIR-II reporter, with release triggered by mild hyperthermia. |
| Lyso-1050 or Similar Environment-Sensing Dyes | NIR-II reporter molecule whose fluorescence is quenched inside liposomes and activated upon release, providing a direct optical readout of drug release. |
| NIR-II Fluorescence Imaging System | Core hardware. Typically includes a 808 nm or 980 nm laser for excitation, long-pass filters, and a liquid nitrogen-cooled or TE-cooled InGaAs camera for 900-1700 nm detection. |
| Integrated Focused Ultrasound (FUS) System | Enables localized, non-invasive heating of tissues to trigger release from thermosensitive drug carriers (e.g., at 42°C). |
| Small Animal Heating & Anesthesia Platform | Maintains animal viability and physiological temperature during long imaging sessions and surgeries. |
| Stereotactic Surgical Instruments | Allows for precise manipulation and resection under image guidance in small animal models. |
| Calibration Phantoms (e.g., IR-806 dye in capillary tubes, tissue-simulating phantoms) | Essential for system calibration, quantifying sensitivity, determining linear range, and standardizing measurements across experiments. |
Solving the Challenges: Expert Troubleshooting for NIR-II Image Quality and Probe Performance
Within the context of advancing deep tissue fluorescence imaging in the NIR-II window (1000-1700 nm), researchers confront significant artifacts that compromise data fidelity. This document details the primary challenges of poor signal, autofluorescence background noise, and probe aggregation, providing application notes and standardized protocols to mitigate these issues for researchers and drug development professionals.
Quantitative Analysis of Common Artifacts
The following table summarizes the impact of key artifacts on NIR-II imaging parameters, based on recent literature.
Table 1: Impact of Common Artifacts on NIR-II Imaging Metrics
| Artifact | Typical Cause | Effect on Signal-to-Background Ratio (SBR) | Effect on Spatial Resolution (in tissue) | Common in Probe Class |
|---|---|---|---|---|
| Poor Signal | Low quantum yield, poor excitation efficiency | Reduction by 50-80% | Minimal direct effect | Organic dyes, certain quantum dots |
| Background Noise | Tissue autofluorescence, scattering | Reduction by 40-70% | Degradation up to 2-3x | All, but minimized with >1100 nm emission |
| Probe Aggregation | Hydrophobic interactions, serum protein binding | Reduction by 60-90% | Severe degradation due to altered biodistribution | Carbon nanotubes, aggregation-caused quenching (ACQ) dyes |
Detailed Experimental Protocols
Protocol 2.1: System Calibration for SBR Optimization
Objective: To establish baseline system performance and quantify background levels. Materials: NIR-II imaging system, black calibration slide, PBS, IR-26 dye standard.
- Dark Current Measurement: Cap the detector, acquire 10 images (500 ms exposure). Calculate mean pixel value = system noise floor.
- Background Characterization: Image a black slide and a PBS-filled capillary tube. Quantify mean intensity in the NIR-II window.
- Standard Signal Reference: Prepare 100 µM IR-26 in DCM in a sealed capillary. Image with identical settings. Calculate system sensitivity (Signal / (Laser Power * Exposure Time)).
- SBR Calculation: SBR = (Signalsample - Backgroundblack) / (Backgroundtissue - Backgroundblack).
Protocol 2.2: Evaluating & Mitigating Probe Aggregation
Objective: To assess aggregation state of NIR-II probes in biological buffers and implement mitigation strategies. Materials: Probe (e.g., CH1055-PEG), fetal bovine serum (FBS), dynamic light scattering (DLS) instrument, 100 kDa filter.
- Pre-filtration: Pass probe solution (1 mL, 100 µM) through a 100 kDa MWCO filter. Centrifuge at 5000 x g for 10 min.
- Aggregation Challenge: Incubate filtered probe (50 µL) with 450 µL of 10% FBS in PBS at 37°C for 1 hour.
- DLS Measurement: Load 60 µL of sample into DLS cuvette. Perform 5 measurements, 60 sec each. Report hydrodynamic diameter (Z-average).
- Critical Threshold: Aggregation is significant if Z-average increases >30% from filtered baseline or exceeds 20 nm for small-molecule dyes.
The Scientist's Toolkit: Research Reagent Solutions
Table 2: Essential Reagents for Mitigating NIR-II Imaging Artifacts
| Item | Function | Example Product/Catalog |
|---|---|---|
| NIR-II Quantum Dots (PbS/CdS) | High-quantum-yield probe for strong signal; emission tunable >1300 nm. | PbS/CdS QDs, λ_em=1550 nm |
| CH-4T PEGylated Derivative | Small-molecule organic dye with built-in PEG for reduced aggregation. | CH1055-PEG5k |
| DSPE-mPEG(5000) | Lipid-PEG conjugate for coating hydrophobic probes to prevent aggregation. | Avanti Polar Lipids, 880150 |
| IRDye QC-1 Dark Quencher | Used in control experiments to validate specific signal. | LI-COR Biosciences, 1141-01 |
| Intralipid 20% | Tissue phantom component for simulating scattering background. | Fresenius Kabi |
| Cyclohexanedione (CHD) | Reagent for suppressing liver background autofluorescence via reducing Schiff bases. | Sigma-Aldrich, 185693 |
Visualization of Pathways and Workflows
Diagram 1: NIR-II Probe Artifact Mitigation Logic
Diagram 2: Pre-in Vivo Probe QA Workflow
Fluorescence imaging in the second near-infrared window (NIR-II, 1000-1700 nm) has emerged as a transformative modality for deep-tissue biomedical research. The reduced photon scattering and minimal autofluorescence in this spectral region enable unprecedented resolution at depths of several millimeters. However, the full potential of NIR-II imaging is only realized through meticulous optimization of acquisition parameters and post-processing techniques. This application note provides detailed protocols for optimizing the critical triumvirate of laser power, exposure time, and spectral unmixing within the context of a thesis focused on advancing deep-tissue, multiplexed imaging for drug development and pre-clinical research.
The interplay between laser power and exposure time directly dictates signal-to-noise ratio (SNR), while defining the boundary for photobleaching and potential phototoxicity. Optimal settings are probe- and tissue-dependent.
Table 1: Optimization Matrix for Key Imaging Parameters
| Parameter | Typical Range (NIR-II) | Primary Effect | Trade-off Consideration |
|---|---|---|---|
| Laser Power | 10 - 200 mW/mm² | Linear increase in fluorescence signal (until saturation). | Higher power accelerates photobleaching and may cause tissue heating/damage. |
| Exposure Time | 10 - 500 ms | Linear increase in integrated signal. | Longer exposures increase motion blur and total light dose. |
| Spectral Unmixing Threshold | 0.5 - 5% of max signal | Defines detectable component; higher values reduce crosstalk. | Over-thresholding can eliminate genuine weak signals from deep tissue. |
| Recommended SNR Target | > 10 dB | For reliable detection and unmixing. | Achieved by balancing Power × Time. |
Experimental Protocols
Protocol 1: Systematic Calibration of Laser Power and Exposure Time
Objective: To establish the maximum permissible exposure (MPE) for a specific NIR-II fluorophore-tissue system without inducing photobleaching or damage. Materials: NIR-II imaging system (e.g., InGaAs camera, 808/980/1064 nm laser), animal model (e.g., mouse with cranial window or subcutaneous tumor), NIR-II fluorophore (e.g., IRDye 800CW, CH-4T, Ag2S quantum dots). Procedure:
- Baseline Acquisition: Administer the fluorophore and position the subject. Set laser power to a low baseline (e.g., 20 mW/mm²) and exposure time to 100 ms. Capture a reference image (Image_0).
- Power Series: Fix exposure time at 100 ms. Increment laser power in 5 steps (e.g., 50, 100, 150, 200 mW/mm²). Capture an image at each step, allowing a 10-second delay between acquisitions to mitigate heating.
- Time Series: At the power level yielding SNR ~15 dB from Step 2, fix the laser power. Increment exposure time in 5 steps (e.g., 50, 100, 200, 300, 400 ms). Capture an image at each step.
- Analysis: Plot mean fluorescence intensity (ROI) vs. Power and vs. Time. Fit with a linear model. The optimal point is the highest value on the product curve (Power × Time) before the signal plateaus (indicating saturation or onset of bleaching). This point defines the Optimal Light Dose.
Protocol 2: Spectral Unmixing for Multiplexed NIR-II Imaging
Objective: To isolate the unique signal of two or more spectrally overlapping NIR-II fluorophores in deep tissue. Materials: As above, plus at least two NIR-II fluorophores with distinct emission profiles (e.g., 1050 nm peak vs. 1300 nm peak). Procedure:
- Spectral Library Creation:
- Image each fluorophore in vivo or in a tissue-simulating phantom (e.g., intralipid) separately under identical optical settings.
- For each fluorophore, acquire a full emission spectrum (λ-scan) or capture images across multiple emission filters (e.g., 1100nm LP, 1300nm LP, 1500nm LP).
- Extract the mean spectral signature (intensity per channel) for each pure fluorophore. This forms the reference library.
- Multiplexed Image Acquisition:
- Administer the cocktail of fluorophores (e.g., targeting different biomarkers).
- Acquire the multiplexed image set using the same filter set or spectral scan as in Step 1.
- Linear Unmixing Computation:
- For each pixel, solve the linear equation:
I_total(λ) = a*F1(λ) + b*F2(λ) + ... + c*Autofluorescence(λ) - Where
I_totalis the measured signal,F1, F2are reference spectra, anda, bare the unmixed abundances to be solved (typically via non-negative least squares algorithm). - Apply a threshold (see Table 1) to suppress noise-derived artifacts.
- For each pixel, solve the linear equation:
- Validation: Validate unmixing accuracy by comparing the distribution of unmixed signals with known biological patterns or ex vivo validation.
The Scientist's Toolkit
Table 2: Essential Research Reagent Solutions for NIR-II Imaging
| Item | Function & Rationale |
|---|---|
| NIR-II Fluorophores (e.g., CH-4T, LZ-1105, Ag2S/Ag2Se QDs, Single-Wall Carbon Nanotubes) | Provides emission within the NIR-II window; choice dictates brightness, stability, and functionalization chemistry. |
| Tissue-Simulating Phantoms (e.g., Intralipid, India Ink, Agarose) | Calibrates imaging depth and scattering properties; essential for system characterization and unmixing library generation. |
| Dedicated NIR-II Imaging System (InGaAs/InSb Camera, NIR Lasers, Long-pass Filters) | InGaAs cameras (900-1700 nm) are standard; requires cooling to -80°C to reduce dark noise. Optical components must be NIR-optimized. |
| Spectral Unmixing Software (e.g., ENVI, MATLAB with Image Processing Toolbox, InForm) | Performs the computational separation of overlapping spectra; critical for multiplexed imaging. |
| Sterile PBS or Formulation Buffer | For reconstitution and dilution of fluorophore conjugates to ensure biocompatibility and consistent dosing. |
Visualization of Workflows
Title: NIR-II Imaging Optimization Workflow
Title: Linear Spectral Unmixing Process
Within the burgeoning field of deep-tissue fluorescence imaging, the NIR-II window (1000-1700 nm) offers significant advantages, including reduced photon scattering, minimal autofluorescence, and deeper penetration. The central thesis of this research domain posits that unlocking the full potential of in vivo NIR-II imaging is contingent on the development of probes with exceptional brightness, stability, and biocompatibility. These three pillars are interdependent; a brilliant probe is ineffective if it rapidly degrades in vivo, and a stable probe is useless if it is cytotoxic or exhibits poor pharmacokinetics. This Application Note details protocols and strategies for quantifying and enhancing these critical performance parameters to advance NIR-II imaging research and drug development.
Quantitative Metrics & Characterization
Performance evaluation of NIR-II probes requires standardized quantitative measurements. Key metrics are summarized below.
Table 1: Key Quantitative Metrics for NIR-II Probe Evaluation
| Metric | Definition / Calculation | Target Value (Exemplary) | Measurement Protocol |
|---|---|---|---|
| Brightness (ε × Φ) | Molar extinction coefficient (ε, M⁻¹cm⁻¹) × Fluorescence quantum yield (Φ, %) | > 1 × 10⁵ M⁻¹cm⁻¹·% | Protocol 2.1 & 2.2 |
| Photostability (t₁/₂) | Time for fluorescence intensity to decay to half under constant irradiation | > 300 s (at relevant power density) | Protocol 2.3 |
| Serum Stability | % of intact probe after incubation in serum (e.g., 24h, 37°C) | > 90% intact | Protocol 2.4 (HPLC/MS) |
| Hydrodynamic Diameter (Dₕ) | Effective size in physiological solution, measured by DLS | < 10 nm for renal clearance | Protocol 2.5 |
| Cytotoxicity (IC₅₀/CC₅₀) | Concentration causing 50% inhibition of cell viability | > 100 µM (high CC₅₀) | Protocol 2.6 (MTT/CCK-8) |
Detailed Experimental Protocols
Protocol 2.1: Measuring Molar Extinction Coefficient (ε)
Objective: Determine the absorption strength of the probe.
- Prepare a dilution series (e.g., 5 concentrations) of the probe in a transparent solvent (e.g., PBS, DMSO).
- Record UV-Vis-NIR absorption spectra for each concentration using a spectrophotometer equipped with an InGaAs detector.
- Plot absorbance at the peak wavelength (e.g., 1064 nm) vs. concentration.
- Apply the Beer-Lambert law (A = ε × l × c). The slope of the linear fit is (ε × l), where l is the pathlength (usually 1 cm). Calculate ε (M⁻¹cm⁻¹).
Protocol 2.2: Determining NIR-II Fluorescence Quantum Yield (Φ)
Objective: Quantify the fluorescence efficiency of the probe relative to a standard.
- Standard Selection: Use a known NIR-II dye with a reported Φ in your solvent (e.g., IR-26 in DCM, Φ = 0.05%).
- Sample Preparation: Prepare probe and standard solutions with matched absorbance (< 0.1) at the excitation wavelength to minimize inner filter effects.
- Spectral Acquisition: Using a NIR-II fluorescence spectrometer, excite both samples at the same wavelength and power. Record the full emission spectrum (e.g., 1100-1700 nm).
- Calculation: Integrate the corrected emission spectra. Calculate Φ using the equation: Φsample = Φstandard × (IntegratedAreasample / IntegratedAreastandard) × (RefractiveIndexsolvent²sample / RefractiveIndexsolvent²standard).
Protocol 2.3: Assessing Photostability
Objective: Measure the probe's resistance to photobleaching under simulated imaging conditions.
- Prepare a probe solution in PBS (OD ~0.1 at excitation wavelength) in a quartz cuvette.
- Place in a fluorescence system with continuous laser excitation at a defined power density (e.g., 100 mW/cm² at 808 nm).
- Record fluorescence intensity at the emission maximum (e.g., 1300 nm) at regular time intervals (e.g., every 10 s) for a set duration (e.g., 30 min).
- Plot normalized intensity (I/I₀) vs. time. Calculate the half-life (t₁/₂) of fluorescence decay via exponential fitting.
Protocol 2.4: Evaluating Serum Stability via HPLC
Objective: Determine probe integrity in biological medium.
- Incubate the probe (e.g., 10 µM) in 50% fetal bovine serum (FBS) in PBS at 37°C.
- At defined time points (0, 1, 4, 8, 24 h), aliquot 100 µL of the mixture.
- Precipitate proteins by adding 200 µL of acetonitrile, vortex, and centrifuge at 14,000 rpm for 10 min.
- Inject the supernatant into an HPLC system equipped with a photodiode array (PDA) and/or mass spectrometer (MS).
- Analyze chromatograms for the parent probe peak. Calculate % remaining intact over time.
Protocol 2.5: Measuring Hydrodynamic Size & Zeta Potential
Objective: Characterize probe size and surface charge in solution.
- Prepare a 0.1 mg/mL solution of the probe in filtered PBS or DI water.
- For Dynamic Light Scattering (DLS): Load sample into a cuvette. Measure intensity-based size distribution. Report Z-average diameter (Dₕ) and polydispersity index (PDI).
- For Zeta Potential: Load sample into a folded capillary cell. Measure electrophoretic mobility and calculate zeta potential via the Smoluchowski equation. A high negative or positive zeta potential (>|±30| mV) suggests good colloidal stability.
Protocol 2.6: In Vitro Cytotoxicity Assay (CCK-8)
Objective: Assess probe biocompatibility with mammalian cells.
- Seed cells (e.g., HEK293, HeLa) in a 96-well plate at 5,000 cells/well and culture for 24 h.
- Treat cells with a concentration gradient of the probe (e.g., 0, 1, 10, 50, 100 µM) in complete medium. Include medium-only and cell-only controls.
- Incubate for 24 or 48 h at 37°C.
- Add 10 µL of CCK-8 reagent to each well and incubate for 1-4 h.
- Measure absorbance at 450 nm using a plate reader.
- Calculate cell viability: % Viability = (ODsample - ODblank) / (ODcontrol - ODblank) × 100%. Determine CC₅₀ (concentration causing 50% cell death) via non-linear regression.
Pathways & Workflows
Title: Probe Development and Validation Workflow
Title: Probe-Target Interaction and Signal Generation
The Scientist's Toolkit: Research Reagent Solutions
Table 2: Essential Materials for NIR-II Probe Evaluation
| Item / Reagent | Function / Purpose | Example Product / Specification |
|---|---|---|
| NIR-II Quantum Yield Standard | Reference for calculating fluorescence quantum yield (Φ). | IR-26 (in DCM, Φ=0.05%), IR-1061. |
| NIR-II Fluorescence Spectrometer | Instrument for measuring emission spectra in the 900-1700+ nm range. | Systems with InGaAs detector array, grating monochromator, and laser excitation. |
| InGaAs Photodetector | Sensitive detector for weak NIR-II signals; essential for building custom imaging setups. | Cooled, single-point or array detectors (e.g., from Hamamatsu, Teledyne Judson). |
| Dialysis Membranes / Filters | For probe purification, buffer exchange, and serum stability sample preparation. | MWCO 3.5kDa - 100kDa dialysis tubing, 10kDa centrifugal filters. |
| CCK-8 / MTT Cell Viability Kit | Simple, colorimetric assay for quantifying cytotoxicity. | Commercial kits (Dojindo, Sigma-Aldrich). |
| Size Exclusion Chromatography (SEC) Columns | For separating probe aggregates from monomers, critical for DLS sample prep. | e.g., Superdex 200 Increase, Sephadex columns. |
| Phantom Materials (e.g., Intralipid) | Scattering media for simulating tissue optical properties in benchtop imaging. | 1-20% Intralipid solution in agarose. |
| Animal Serum (FBS) | Biological medium for testing probe stability in a protein-rich environment. | Heat-inactivated, sterile-filtered Fetal Bovine Serum. |
Data Processing and Analysis Best Practices for Quantification
Within the burgeoning field of NIR-II (1000-1700 nm) fluorescence imaging for deep tissue research, robust data quantification is paramount. Accurate extraction of signal intensity, pharmacokinetic profiles, and biodistribution data from complex in vivo datasets is critical for advancing therapeutic development and understanding disease mechanisms. This document outlines standardized protocols and best practices for processing and analyzing NIR-II imaging data, ensuring reproducible and reliable quantification.
Data Acquisition Pre-Processing & Calibration Protocol
Raw NIR-II images require systematic pre-processing to correct for instrumental and environmental variables before quantification.
Protocol: Flat-Field Correction & Spectral Unmixing
- Capture Reference Images: Acquire a set of images under identical camera settings immediately before or after the experimental session.
- Dark Image: Cap the lens to record camera noise and dark current. Acquire 10 frames and average.
- Flat-Field Image: Image a uniform fluorescent reference slide (e.g., IR-26 dye in epoxy) or a diffusely reflecting standard under the same excitation used in vivo.
- Apply Correction: Perform pixel-wise correction on all subsequent experimental images:
Corrected Image = (Raw Image - Dark Average) / (Flat-Field Average - Dark Average). - Spectral Unmixing (for multiplexing): If using multiple NIR-II fluorophores with overlapping emissions, acquire reference spectral profiles for each probe from pure samples. Use linear unmixing algorithms (e.g., non-negative least squares) within imaging software to decompose mixed signals in each pixel.
Region-of-Interest (ROI) Analysis & Signal Quantification
Consistent ROI definition is essential for comparing signals across time points and between subjects.
Protocol: Standardized ROI Definition and Intensity Extraction
- Image Registration: Use anatomical landmarks or affine transformation algorithms to align all time-series images from a single subject to a reference frame (e.g., t=0).
- ROI Delineation:
- Target Tissue ROI: Manually or semi-automatically draw around the signal boundary in the target tissue (e.g., tumor). Use a fixed threshold (e.g., 2x standard deviation above background) applied consistently across all images.
- Background ROI: Place a uniform-sized ROI in an area devoid of specific fluorescence (e.g., contralateral muscle tissue or outside the animal). Avoid major blood vessels.
- Intensity Calculation: Extract the mean pixel intensity (MPI) and total flux (sum of all pixel intensities) for each ROI. Calculate the target Signal-to-Background Ratio (SBR):
SBR = (MPI_target - MPI_background) / MPI_background. Record the area (pixels or mm²) of the target ROI.
Pharmacokinetic & Biodistribution Quantification
Translating imaging signals into quantitative pharmacokinetic (PK) parameters requires modeling against calibration standards.
Protocol: Ex Vivo Calibration for Absolute Quantification
- Prepare Calibration Standards: Serially dilute the administered NIR-II probe in relevant biological matrices (e.g., blood plasma, tissue homogenate).
- Image Standards: Place standards in a black-walled plate and image them ex vivo using the same settings as the in vivo study. Generate a calibration curve plotting MPI versus known concentration.
- Quantify In Vivo Data: Convert in vivo ROI MPI values to estimated tissue concentration using the calibration curve.
- Calculate PK Parameters: From the time-concentration curve, extract key parameters:
- Area Under the Curve (AUC): Total exposure.
- Max Concentration (Cmax): Peak signal.
- Time to Cmax (Tmax): Time of peak signal.
- Clearance Half-life (t1/2): Calculated from the terminal slope.
Data Processing Workflow for NIR-II Quantification
Statistical Analysis & Reproducibility Framework
Employ statistical methods appropriate for the experimental design to ensure findings are robust.
Protocol: Statistical Workflow for Group Comparisons
- Normality Test: First, apply the Shapiro-Wilk test to assess if quantitative data (e.g., AUC, Cmax) within each group are normally distributed.
- Variance Homogeneity: Use Levene's test.
- Choose Statistical Test:
- For two-group comparison of normally distributed data with equal variance: Unpaired two-tailed Student's t-test.
- For non-normal data or unequal variance: Mann-Whitney U test.
- For multiple groups (>2) with normal data: One-way ANOVA followed by a post-hoc test (e.g., Tukey's HSD).
- For longitudinal measurements within the same subjects: Repeated measures ANOVA.
- Report Results: Always report the exact p-value, test used, sample size (n), and measures of central tendency (mean/median) with dispersion (SD/SEM/IQR).
Table 1: Core Quantitative Outputs from NIR-II Imaging Analysis
| Metric | Formula/Description | Primary Application | Typical Units |
|---|---|---|---|
| Mean Pixel Intensity (MPI) | Average value of all pixels within a defined ROI. | Basic signal strength measurement. | Counts per pixel (a.u.) |
| Signal-to-Background Ratio (SBR) | (MPItarget - MPIbackground) / MPI_background. | Measures specific signal contrast. | Dimensionless ratio |
| Total Flux | Sum of intensity of all pixels in the ROI. | Proportional to total fluorophore amount in the ROI. | Total counts (a.u.) |
| Area of Uptake | Area of pixels above a defined threshold. | Spatial extent of signal, e.g., tumor coverage. | mm² or pixels |
| Area Under the Curve (AUC) | Integral of the time-signal intensity curve. | Total exposure/dose delivered to tissue. | a.u. × time |
| Time to Peak (Tmax) | Time post-injection when signal intensity is maximum. | Kinetics of accumulation. | Minutes/hours |
| Contrast-to-Noise Ratio (CNR) | (MPItarget - MPIbackground) / SD_background. | Assesses detectability against noise. | Dimensionless ratio |
The Scientist's Toolkit
Table 2: Essential Reagents & Materials for NIR-II Quantification Experiments
| Item | Function in Quantification | Example/Notes |
|---|---|---|
| NIR-II Fluorescent Probes | Biological target labeling and signal generation. | Organic dyes (e.g., CH-4T), quantum dots, single-walled carbon nanotubes (SWCNTs). Must have known excitation/emission peaks. |
| Fluorescent Reference Standard | Creating flat-field images and validating system performance. | Solid epoxy blocks with IR-26 dye; stable, uniform emitters. |
| Spectrally-matched Phantom | Generating calibration curves for concentration quantification. | Tissue-mimicking phantoms (e.g., Intralipid, India ink) doped with known probe concentrations. |
| Image Co-registration Software | Aligning time-series and multi-modal images for accurate ROI tracking. | Open-source (ImageJ with TurboReg/StackReg) or commercial (Living Image, IVIS Spectrum). |
| Linear Unmixing Algorithm | Resolving signals from multiple spectrally-overlapping fluorophores. | Built into most advanced imaging systems (e.g., LICOR Pearl, Odyssey). |
| Statistical Analysis Package | Performing rigorous statistical tests on derived quantitative data. | GraphPad Prism, R, Python (SciPy/Statsmodels). |
NIR-II Signal Generation & Detection Pathway
Safety Considerations and Regulatory Pathways for Clinical Translation
The clinical translation of NIR-II (1000-1700 nm) fluorescence imaging agents represents a paradigm shift for deep-tissue surgical guidance, disease detection, and therapeutic monitoring. This application note delineates the critical safety assessments and regulatory strategies required to advance these novel agents from preclinical research to human trials, framed within a thesis on advancing NIR-II imaging for clinical oncology.
Key Safety Considerations for NIR-II Imaging Agents
Material Toxicology
The safety profile is fundamentally governed by the chemical composition of the probe (organic dye, quantum dot, carbon nanotube, rare-earth-doped nanoparticle). Key risk factors include:
- Long-term biodistribution and clearance: Inorganic components may exhibit prolonged tissue retention.
- Potential for dissociation and release of toxic ions: e.g., Cadmium from quantum dots, rare earth ions.
- Immune system activation: Complement activation-related pseudoallergy (CARPA), cytokine release.
- Phototoxicity: Though NIR light is low-energy, high irradiance or probe-mediated thermal effects are possible.
Pharmacokinetics & Pharmacodynamics (PK/PD)
Quantitative understanding of absorption, distribution, metabolism, and excretion (ADME) is non-negotiable. Critical parameters include:
- Blood half-life: Impacts imaging window and potential for off-target exposure.
- Target-to-Background Ratio (TBR): Defines efficacy and required dose.
- Primary clearance pathways: Hepatic vs. renal clearance dictates toxicity risks (e.g., hepatotoxicity vs. potential renal filtration issues).
Radiation Safety (Optical)
Despite being non-ionizing, laser safety must be rigorously addressed.
- Maximum Permissible Exposure (MPE): Calculations for skin and eye must comply with IEC 60825-1 and ANSI Z136.1 standards.
- Thermal hazard assessment: Especially for high-power, continuous-wave imaging systems.
Quantitative Safety & Regulatory Benchmark Data
Table 1: Comparative Safety Profiles of Select NIR-II Probe Classes
| Probe Class | Example Material | Typical Coating | Hydrodynamic Size (nm) | Primary Clearance Route | Key Toxicity Concerns | Clinical Stage (As of 2024) |
|---|---|---|---|---|---|---|
| Organic Dyes | IRDye 800CW, CH-1055 | PEG, Sulfonate | 1-2 | Renal | Low; potential for off-target binding | IRDye 800CW: Phase III (Multiple) |
| Quantum Dots | Ag₂S, PbS QDs | PEG, SiO₂, ZWitterion | 5-15 | Hepatic (RES) | Heavy metal ion leaching, long-term retention | Preclinical |
| Carbon Nanotubes | Single-walled CNTs | PEG, Phospholipid | 100-500 | Hepatic (RES) | Fiber-like pathogenicity, oxidative stress | Preclinical |
| Rare-Earth NPs | NaYF₄:Yb,Er | PEG, SiO₂ | 20-100 | Hepatic (RES) | Retention in spleen/liver, ion dissociation | Preclinical |
| Dye-Loaded Nanoparticles | ICG-loaded PLGA | Polymer (PLGA) | 80-200 | Hepatic/RES | Polymer degradation products | Early Clinical (Non-NIR-II analogs) |
Table 2: Core Elements of an Investigational New Drug (IND) Application for an Imaging Agent
| Module | Section | Critical Content for NIR-II Agent |
|---|---|---|
| 1. Admin Info | Forms, Cover Letter | - |
| 2. Summary | Overall IND Summary | Integrated overview of CMC, nonclinical, clinical plans. |
| 3. CMC | Composition, Manufacture, Controls | Detailed chemical structure, nanomaterial characterization (DLS, TEM, HPLC), stability data, impurity profiles. |
| 4. Nonclinical | Pharmacology & Toxicology | In vitro target binding; In vivo efficacy (TBR data); GLP toxicology in 2 species (rodent + non-rodent); ADME/PK with quantitative biodistribution (%ID/g). |
| 5. Clinical | Protocol, Investigator Brochure | First-in-human study protocol: dose escalation, patient selection, safety monitoring, imaging parameters. |
Experimental Protocols for Critical Safety Assessments
Protocol 4.1: ComprehensiveIn VivoPharmacokinetics and Biodistribution Study
Objective: To quantify the absorption, distribution, metabolism, and excretion of a candidate NIR-II imaging agent in a rodent model. Materials:
- Candidate NIR-II probe (sterile, GMP-grade if available).
- Animal model (e.g., nude mice with/without xenograft tumors).
- NIR-II fluorescence imaging system.
- Scale, surgical tools, Eppendorf tubes.
- ICP-MS or gamma counter (if probe is radiolabeled). Procedure:
- Dosing: Administer probe via intended clinical route (e.g., IV bolus) at low, mid, and high proposed dose levels (n=5 animals/group/time point).
- Longitudinal Imaging: Anesthetize animals and acquire whole-body NIR-II images at pre-determined time points (e.g., 5 min, 1h, 4h, 24h, 48h, 7d, 30d). Maintain consistent imaging parameters (laser power, exposure, FOV).
- Ex Vivo Biodistribution: Euthanize animals at key time points (e.g., 24h and 7d). Harvest major organs (heart, liver, spleen, lungs, kidneys, brain, muscle, bone, blood, tumor) and weigh.
- Fluorescence Quantification: Image all organs ex vivo using the same NIR-II system. Quantify fluorescence intensity per organ using region-of-interest (ROI) analysis.
- Data Analysis: Calculate % injected dose per gram of tissue (%ID/g) by comparing organ fluorescence to a standard curve of the probe. Plot PK curves (blood concentration vs. time) and biodistribution bar graphs. Determine terminal half-life and area under the curve (AUC).
Protocol 4.2: GLP-Compliant Repeat-Dose Toxicology Study
Objective: To identify target organ toxicities and establish a No-Observed-Adverse-Effect Level (NOAEL) for the imaging agent. Materials:
- GMP-grade NIR-II probe.
- Rodent (rat) and non-rodent (e.g., minipig) species.
- Clinical pathology analyzers (hematology, clinical chemistry).
- Histopathology equipment. Procedure:
- Study Design: Two species, with dose groups including vehicle control, low (imaging-effective dose), mid (low multiple), and high dose (maximally feasible dose). Administration route = clinical route. Dosing frequency informed by PK (e.g., single dose, or repeated if multiple clinical uses are planned).
- In-Life Observations: Daily clinical observations, detailed physical exams weekly, body weight, food consumption.
- Clinical Pathology: Collect blood for hematology and serum chemistry at study mid-point and termination. Collect urine for urinalysis at termination.
- Necropsy & Histopathology: Perform full gross necropsy on all animals. Weigh and preserve all major organs in formalin. Process tissues to slides, stain with H&E, and conduct a blinded microscopic examination by a board-certified veterinary pathologist.
- Reporting: Generate a final GLP report detailing all findings, establishing the NOAEL, and recommending a starting dose for human trials based on allometric scaling or pharmacokinetic modeling.
Regulatory Pathway Workflow & Strategy
Diagram Title: Regulatory Pathway from Preclinical to FDA Approval
The Scientist's Toolkit: Key Research Reagent Solutions
Table 3: Essential Reagents & Materials for NIR-II Probe Safety Assessment
| Category | Item / Solution | Function & Relevance to Safety/Regulation |
|---|---|---|
| Probe Characterization | GMP-Grade Precursors | High-purity starting materials ensure reproducible synthesis and low batch-to-batch variability, a key CMC requirement. |
| Size Exclusion Chromatography (SEC) Columns | For precise separation and analysis of probe aggregates vs. monomers; aggregates can alter PK and immunogenicity. | |
| Dynamic Light Scattering (DLS) & Zeta Potential Analyzer | Measures hydrodynamic size and surface charge, critical for predicting clearance pathways and stability in serum. | |
| In Vitro Assays | Hemolysis Assay Kit | Quantifies red blood cell lysis, an early screen for acute material toxicity. |
| Limulus Amebocyte Lysate (LAL) Assay | Detects bacterial endotoxins; endotoxin limits are strictly regulated for injectables. | |
| Cytokine ELISA Panel (e.g., TNF-α, IL-6, IL-1β) | Assesses immune system activation and potential for cytokine release syndrome. | |
| In Vivo Studies | Near-Infrared Fluorescence Imaging System (NIR-II Capable) | Core tool for longitudinal PK, biodistribution, and efficacy studies. Requires calibration standards. |
| Isoflurane Anesthesia System | For safe and consistent animal immobilization during longitudinal imaging sessions. | |
| Sterile, Endotoxin-Free Saline/Formulation Buffers | For preparing injectable doses; avoids confounding safety signals from contaminants. | |
| Toxicology | Clinical Pathology Services (GLP-compliant) | Essential for hematology, clinical chemistry, and urinalysis in regulatory toxicology studies. |
| Histopathology & Slide Scanning Services | Provides the GLP-compliant tissue processing, staining, and expert pathological assessment required for IND. | |
| Data & Compliance | Electronic Lab Notebook (ELN) | Critical for maintaining data integrity, traceability, and reproducibility—foundational for regulatory filings. |
| Statistical Analysis Software (e.g., SAS, JMP) | Required for rigorous analysis of PK/PD and toxicology data to GLP standards. |
NIR-II vs. Traditional Modalities: A Quantitative Validation of Performance and Clinical Potential
This application note serves as a core technical chapter in a thesis dedicated to advancing deep-tissue fluorescence imaging via the second near-infrared (NIR-II, 1000-1700 nm) window. The primary thesis posits that NIR-II fluorescence imaging offers a unique combination of resolution, penetration depth, and safety for in vivo structural imaging, complementing or surpassing established modalities. This document provides a rigorous, quantitative comparison and detailed protocols to validate this claim.
Comparative Performance Metrics
The following table synthesizes key performance characteristics of each imaging modality, highlighting the unique advantages of the NIR-II window for structural visualization of deep tissues.
Table 1: Quantitative Comparison of Structural Imaging Modalities
| Parameter | NIR-I (700-900 nm) | NIR-II (1000-1700 nm) | Ultrasound (US) | Magnetic Resonance Imaging (MRI) |
|---|---|---|---|---|
| Spatial Resolution | 1-3 mm (at >5 mm depth) | 10-50 µm (superficial), < 500 µm (at 5-10 mm depth) | 50-500 µm (depth-dependent) | 50-500 µm (preclinical); 1-2 mm (clinical) |
| Penetration Depth | 1-3 mm (high scatter) | 5-20 mm (reduced scatter & autofluorescence) | Centimeters (bone obstructs) | Unlimited (whole body) |
| Temporal Resolution | Milliseconds to seconds | Milliseconds to seconds | Milliseconds (real-time) | Seconds to minutes |
| Primary Contrast Mechanism | Fluorophore emission | Fluorophore/Probe emission | Tissue acoustic impedance | Proton density, T1/T2 relaxation |
| Quantitative Ability | Moderate (affected by attenuation) | High (lower attenuation) | High (for flow/velocity) | High (for volume, diffusion) |
| Ionizing Radiation | No | No | No | No |
| Key Limitation | High tissue scattering & autofluorescence | Limited clinical probe availability | Poor bone/air penetration, operator-dependent | Low throughput, high cost, low molecular sensitivity |
Experimental Protocols
Protocol 2.1: In Vivo Comparative Imaging of Vasculature
Objective: To compare the deep-tissue vascular imaging capability of NIR-II vs. NIR-I fluorescence using a murine hindlimb model. Materials: NIR-II fluorophore (e.g., IRDye 800CW, after FDA approval for NIR-I, or Ag2S quantum dots for NIR-II), NIR-I fluorophore (e.g., ICG), anesthetic, hair removal cream, NIR-II imaging system, NIR-I imaging system. Procedure:
- Anesthetize mouse (e.g., 2% isoflurane) and depilate hindlimb region.
- NIR-I Protocol: Inject 2 nmol of ICG via tail vein. Acquire images at 800 nm emission using standard NIR-I camera at 0, 1, 5, 10, 30 min post-injection.
- NIR-II Protocol: Inject 2 nmol of NIR-II probe (e.g., Ag2S QDs). Acquire images at 1500 nm long-pass filter using an InGaAs camera.
- Use identical laser power density (e.g., 100 mW/cm²) and field of view for both setups.
- Process images: Apply identical background subtraction and normalize intensity for qualitative comparison. Quantify vessel-to-background ratio (VBR) and full-width half maximum (FWHM) of a selected vessel cross-section.
Protocol 2.2: Multimodal Co-registration with MRI
Objective: To validate NIR-II structural findings against the anatomical gold standard (MRI). Materials: Tumor-bearing mouse, NIR-II probe targeting tumor vasculature (e.g., RGD-conjugated dye), MRI contrast agent (e.g., Gd-DOTA), small animal MRI system, registration software (e.g., 3D Slicer). Procedure:
- Acquire baseline T2-weighted MRI scan for anatomical reference.
- Inject MRI contrast agent and acquire dynamic contrast-enhanced (DCE) MRI.
- After 24h washout, inject NIR-II probe and perform NIR-II fluorescence imaging.
- Co-registration: Segment tumor volume from T2-MRI. Use fiduciary markers or anatomical landmarks to rigidly align the 3D fluorescence tomography reconstruction (or maximum intensity projection from multiple angles) to the MRI volume.
- Analysis: Calculate the Dice similarity coefficient between the hyper-intense region in DCE-MRI (perfused volume) and the segmented NIR-II signal region.
The Scientist's Toolkit: Research Reagent Solutions
Table 2: Essential Reagents for NIR-II Deep Tissue Imaging Research
| Item | Function & Rationale |
|---|---|
| NIR-II Fluorophores (e.g., Ag2S/Ag2Se QDs, SWCNTs, Organic Dyes) | Emit in 1000-1700 nm window; reduced scattering and negligible autofluorescence enable deep, high-contrast imaging. |
| Targeting Ligands (e.g., cRGD, Antibodies, Peptides) | Conjugated to fluorophores for specific molecular imaging of structures like tumor vasculature or inflamed endothelium. |
| Indium Gallium Arsenide (InGaAs) Camera | Essential detector for NIR-II light; cooled versions required for low-noise acquisition in this spectral range. |
| Dichroic Mirrors & Long-pass Filters (e.g., 1000LP, 1500LP) | Isolate NIR-II emission from excitation laser light and from any residual NIR-I fluorescence. |
| Tissue-Phantom Materials (e.g., Intralipid, India Ink) | Mimic tissue scattering and absorption properties for system calibration and quantification protocol development. |
| MRI Contrast Agents (Gd-based) | Provide standard anatomical and functional (perfusion) reference for validating NIR-II imaging data in multimodal studies. |
Visualizing Key Concepts & Workflows
Title: Thesis Framework for NIR-II Modality Comparison
Title: Multimodal Comparative Imaging Experimental Workflow
Within the broader thesis on the NIR-II window (1000-1700 nm) for deep tissue fluorescence imaging, quantifying the advantages of different imaging modalities is paramount. This document provides application notes and standardized protocols for evaluating key performance metrics—penetration depth and resolution—across prevalent biomedical imaging techniques, with a focus on establishing the NIR-II window's superior performance for in vivo applications.
Quantitative Comparison of Imaging Modalities
The following table summarizes the typical penetration depth and resolution metrics for key imaging modalities, contextualizing the NIR-II fluorescence advantage.
Table 1: Penetration Depth and Resolution Metrics Across Modalities
| Modality | Typical Penetration Depth in Tissue | Effective Spatial Resolution | Primary Contrast Mechanism | Key Limitation for Deep Tissue |
|---|---|---|---|---|
| Brightfield Microscopy | < 100 µm | ~200 nm | Absorption, scattering | No optical sectioning; shallow penetration. |
| Confocal Fluorescence | < 200 µm | ~200 nm | Fluorescence (VIS-NIR-I) | Scattering limits depth; phototoxicity. |
| Two-Photon Microscopy | ~500-1000 µm | ~300 nm | Non-linear fluorescence | Expensive; depth still limited by scattering. |
| Ultrasound (US) | > 10 cm | 50-500 µm | Sound wave reflection | Poor molecular specificity; low resolution deep. |
| Magnetic Resonance Imaging (MRI) | No limit | 25-100 µm (preclinical) | Nuclear spin relaxation | Low sensitivity; expensive; slow acquisition. |
| X-ray Computed Tomography (CT) | No limit | 50-200 µm | X-ray attenuation | Ionizing radiation; poor soft-tissue contrast. |
| Positron Emission Tomography (PET) | No limit | 1-2 mm | Radiolabeled tracer decay | Ionizing radiation; poor anatomical detail. |
| NIR-I Fluorescence (700-900 nm) | 1-3 mm | 1-10 mm (diffuse) | Fluorescence emission | High scattering & autofluorescence. |
| NIR-II Fluorescence (1000-1700 nm) | 3-8 mm | ~10-50 µm (FMT) | Fluorescence emission | Need for specialized detectors/contrast. |
Note: Resolutions for diffuse optical techniques (NIR-I/II) are highly system and reconstruction-dependent. NIR-II provides significantly reduced scattering and autofluorescence.
Experimental Protocols
Protocol 2.1: Standardized Measurement of Penetration Depth for NIR-II Probes
Objective: Quantify the maximum detectable depth of a NIR-II fluorophore through tissue-mimicking phantoms.
Materials:
- NIR-II imaging system (e.g., InGaAs camera with 1064 nm laser excitation)
- Tissue-mimicking phantom (1% Intralipid in agarose, µs' ~ 10 cm⁻¹)
- Capillary tubes or small glass vials
- NIR-II fluorophore (e.g., IRDye 800CW, Ag2S quantum dots, CH-4T)
- Caliper or precision translation stage
Procedure:
- Phantom Preparation: Prepare a rectangular agarose-Intralipid phantom. Create a vertical channel using a thin rod, which will later house the sample tube.
- Sample Preparation: Prepare a solution of the NIR-II fluorophore at a standardized concentration (e.g., 100 µM) in PBS. Load into a thin capillary tube.
- Baseline Imaging: Image the capillary tube placed directly on the phantom surface (0 mm depth). Acquire signal intensity (counts/sec).
- Depth Progression: Incrementally lower the capillary tube into the channel using the translation stage. Image at each depth increment (e.g., 1 mm steps).
- Data Analysis: Plot fluorescence intensity (normalized to surface signal) vs. depth. The penetration depth is defined as the depth at which the signal-to-noise ratio (SNR) drops to 2.
Protocol 2.2: Comparative Resolution Assessment Using a USAF 1951 Target
Objective: Systematically compare the resolution of NIR-I vs. NIR-II fluorescence imaging through scattering media.
Materials:
- NIR-I and NIR-II compatible imaging systems.
- USAF 1951 resolution test target (chrome on glass).
- Scattering solution (e.g., 1% Intralipid).
- NIR-I dye (e.g., Cy7) and NIR-II dye (e.g., IR-1061).
- Cuvette or chamber to hold scattering solution.
Procedure:
- Target Preparation: Coat the USAF target with a thin, even layer of fluorescent dye (different dyes for separate experiments).
- Direct Imaging: Image the target directly with each system to establish the baseline, unscattered resolution limit.
- Scattering Media Introduction: Place a chamber containing increasing depths of Intralipid solution (0.5 mm to 5 mm) between the target and the objective/detector.
- Image Acquisition: Acquire images at each scattering depth for both NIR-I and NIR-II systems using identical exposure times and power densities.
- Analysis: Identify the highest resolvable group/element for each image. Plot resolvable spatial frequency (lp/mm) against scattering depth. The curve demonstrates the preservation of resolution in the NIR-II window.
Protocol 2.3: In Vivo Validation of NIR-II Deep-Tissue Imaging
Objective: Demonstrate superior vasculature imaging depth and resolution in a mouse model using a NIR-II contrast agent.
Materials:
- Athymic nude mouse.
- NIR-II imaging system with 1064 nm excitation.
- Indocyanine Green (ICG) or other clinically approved NIR-II agent.
- Isoflurane anesthesia system.
- Tail vein catheter.
- Animal warming pad.
Procedure:
- Animal Preparation: Anesthetize the mouse and secure it in a supine position on the imaging stage. Maintain body temperature.
- Pre-injection Baseline: Acquire a pre-injection image under NIR-II illumination to assess autofluorescence.
- Contrast Agent Administration: Inject ICG (200 µL of 100 µM solution) via the tail vein catheter.
- Time-Series Imaging: Acquire dynamic images immediately post-injection (vascular phase) for 10-15 minutes.
- Depth Analysis: Image the cerebral vasculature or hindlimb vasculature. Use software to measure the SNR of deeply located vessels (e.g., sagittal sinus in the brain). Compare with literature values for NIR-I imaging under similar conditions.
Visualizations
Title: NIR-II Light Interaction with Tissue for Deep Imaging
Title: Imaging Modality Selection Logic Flow
The Scientist's Toolkit: Research Reagent Solutions
Table 2: Essential Materials for NIR-II Deep Tissue Imaging Research
| Item | Function & Rationale | Example Product/Catalog |
|---|---|---|
| NIR-II Fluorophores | Emit light in the 1000-1700 nm window; essential contrast agents with reduced scattering. | IRDye 800CW (LI-COR), Ag2S Quantum Dots (NN-Labs), CH-4T small molecule. |
| Tissue-Mimicking Phantom | Provides standardized, reproducible scattering medium for in vitro depth and resolution calibration. | 1-2% Intralipid in agarose; commercial solid phantoms (e.g., from Gammex). |
| InGaAs or SWIR Camera | Detects NIR-II photons with high sensitivity. Silicon detectors are insensitive beyond ~1000 nm. | Teledyne Princeton Instruments NIRvana, Sony IMX990/991 SenSWIR, Xenics Cheetah. |
| 1064 nm or 808 nm Laser | Common excitation sources for NIR-II fluorophores, offering deeper penetration than visible light. | CNI Laser 1064 nm DPSS, Thorlabs fiber-coupled laser diodes. |
| Long-Pass Optical Filters | Blocks excitation and NIR-I light, allowing only NIR-II emission to reach the detector. | Thorlabs or Semrock long-pass filters (>1200 nm, >1500 nm). |
| Animal Model (e.g., nude mouse) | In vivo model for validating imaging depth, pharmacokinetics, and targeting efficacy. | Athymic Foxn1nu mice for low background in dorsal skinfold or cranial windows. |
| Image Analysis Software | For quantifying intensity vs. depth, calculating SNR, and performing 3D reconstructions. | ImageJ with custom macros, Living Image (PerkinElmer), MATLAB, Python (scikit-image). |
Application Notes
The effectiveness of fluorescence-guided surgery and diagnostic imaging is critically dependent on achieving a high tumor-to-background ratio (TBR). Conventional near-infrared-I (NIR-I, ~700-900 nm) fluorescence imaging, while an advancement over visible light, suffers from significant photon scattering, tissue autofluorescence, and limited penetration depth, often resulting in suboptimal TBR. The second near-infrared window (NIR-II, 1000-1700 nm) offers a transformative solution. Within the context of advancing deep tissue imaging research, this case study quantifies the superior TBR achievable with NIR-II probes compared to NIR-I standards.
The fundamental advantage stems from reduced scattering of longer wavelengths and a dramatically minimized autofluorescence background in the NIR-II region. This leads to clearer delineation of tumor margins and deeper visualization of lesions. Quantitative comparisons consistently demonstrate that NIR-II imaging can achieve TBR values 2- to 5-fold higher than those obtained with NIR-I agents targeting the same biomarkers, such as integrin αvβ3 or folate receptors, in murine models of breast, glioblastoma, and colon cancer.
Protocol: Comparative In Vivo TBR Measurement for NIR-I and NIR-II Fluorophores
Objective: To quantitatively compare the tumor-to-background ratio (TBR) of a NIR-I dye (e.g., ICG) and a NIR-II contrast agent (e.g., IRDye800CW or a biocompatible NIR-II nanoparticle like Ag₂S quantum dots) in a subcutaneous tumor mouse model.
Materials:
- Animal Model: Nude mice with subcutaneously implanted tumor xenografts (e.g., U87MG, 4T1).
- Imaging System:
- NIR-I Imager: e.g., IVIS Spectrum or equivalent, equipped with 745 nm excitation and 800 nm emission filters.
- NIR-II Imager: A commercially available or custom-built NIR-II imaging system with a 808 nm or 980 nm laser and an InGaAs camera with a 1000 nm long-pass emission filter.
- Fluorophores:
- NIR-I: Indocyanine Green (ICG) or ICG conjugated to a targeting ligand (e.g., cRGD-ICG). Dissolve in saline/DMSO mix.
- NIR-II: Targeted NIR-II probe (e.g., cRGD-conjugated Ag₂S Quantum Dots). Disperse in PBS.
Procedure:
Animal Preparation:
- House mice under standard conditions. Anesthetize the mouse using 2% isoflurane and place it on a warming stage (37°C) within the imaging system.
Baseline Imaging:
- Acquire a pre-injection fluorescence image in both the NIR-I and NIR-II channels. Use identical exposure times and camera settings for all subsequent images.
Probe Administration:
- Inject the NIR-I probe (e.g., 2 nmol in 100 µL saline) via the tail vein. Wait 24 hours for clearance and target accumulation.
- Perform NIR-I imaging. Euthanize the mouse.
- In a separate, identically prepared cohort, inject the NIR-II probe (e.g., 200 µL of 50 µM nanoparticle solution). Wait the optimized time (e.g., 6-24 h).
- Perform NIR-II imaging.
Image Acquisition & Analysis:
- NIR-I: Acquire images using standard ICG settings. Draw regions of interest (ROIs) over the tumor and an equivalent area on contralateral normal tissue.
- NIR-II: Acquire images. Apply identical ROIs from the NIR-I analysis (or draw new ones for the same anatomical locations).
- Quantification: For each image, record the mean fluorescence intensity (MFI) within the tumor ROI (T) and the background tissue ROI (B).
- Calculation: Compute TBR as TBR = MFITumor / MFIBackground.
Table 1: Quantitative Comparison of TBR in Mouse Models
| Fluorophore | Emission Window | Target | Tumor Model | Optimal Imaging Time Post-Injection | Average TBR (±SD) | Reference |
|---|---|---|---|---|---|---|
| ICG | NIR-I (~820 nm) | Passive (EPR) | 4T1 (Breast) | 24 h | 2.1 ± 0.3 | (Standard Benchmark) |
| cRGD-ICG | NIR-I (~820 nm) | Integrin αvβ3 | U87MG (Glioblastoma) | 24 h | 3.5 ± 0.5 | Antaris et al., 2017 |
| cRGD-IRDye800CW | NIR-I (~800 nm) | Integrin αvβ3 | U87MG (Glioblastoma) | 24 h | 4.0 ± 0.6 | Zhao et al., 2020 |
| cRGD-Ag₂S QDs | NIR-II (1250 nm) | Integrin αvβ3 | U87MG (Glioblastoma) | 6 h | 12.5 ± 1.8 | Hong et al., 2012 |
| CH1055-PEG | NIR-II (1055 nm) | Passive (EPR) | 4T1 (Breast) | 24 h | 8.3 ± 0.9 | Antaris et al., 2016 |
The Scientist's Toolkit: Research Reagent Solutions
| Item | Function in NIR-II TBR Studies |
|---|---|
| Targeted NIR-II Nanoparticles (e.g., Ag₂S, PbS/CdS QDs, SWCNTs) | Core fluorophores emitting in NIR-II; conjugated to targeting ligands (peptides, antibodies) for specific tumor accumulation. |
| Small-Molecule NIR-II Dyes (e.g., CH1055, FD-1080) | Organic fluorophores with defined chemical structures, offering potential for clinical translation and renal clearance. |
| NIR-II Fluorescent Imaging System | InGaAs camera with thermoelectric or liquid nitrogen cooling, paired with a 808 nm or 980 nm laser for deep tissue excitation. |
| Spectral Unmixing Software | Critical for separating the specific NIR-II signal from any residual autofluorescence or other spectral contributions in vivo. |
| Tumor-Bearing Mouse Models | Essential for in vivo validation. Common models include subcutaneous (simple) and orthotopic (clinically relevant) xenografts. |
Diagram: NIR-II Mechanism for Superior TBR
Diagram: In Vivo TBR Measurement Protocol
The integration of near-infrared window II (NIR-II, 1000-1700 nm) fluorescence imaging with established clinical modalities—Positron Emission Tomography (PET), Computed Tomography (CT), and Photoacoustic Imaging (PAI)—represents a frontier in deep tissue biomedical research. Within the broader thesis of exploiting the NIR-II window for superior photon penetration and reduced scattering, this multimodal paradigm synergizes the high sensitivity and functional data of NIR-II with the anatomical precision of CT, the metabolic quantification of PET, and the hemodynamic mapping of photoacoustics. This convergence enables unprecedented longitudinal tracking of disease progression, drug biodistribution, and therapeutic response from the whole-organ down to the cellular level.
Core Principles & Quantitative Advantages
The rationale for integration is grounded in the complementary physical principles and quantitative output of each modality.
Table 1: Core Characteristics of Integrated Imaging Modalities
| Modality | Physical Principle | Primary Output | Penetration Depth | Spatial Resolution | Key Quantitative Metrics | Temporal Resolution |
|---|---|---|---|---|---|---|
| NIR-II Fluorescence | Emission from excited fluorophores (1000-1700 nm) | 2D/3D optical intensity maps | 5-10 mm (up to 2-3 cm in brain) | 10-50 µm | Signal-to-Background Ratio (SBR), Fluorescence Intensity, Kinetics | Seconds to minutes |
| PET | Detection of gamma rays from positron-emitting radiotracers | 3D radiotracer concentration maps | Unlimited (whole body) | 1-2 mm | Standardized Uptake Value (SUV), %ID/g, Binding Potential | Minutes |
| CT | X-ray attenuation by tissue | 3D anatomical density maps | Unlimited (whole body) | 50-200 µm | Hounsfield Units (HU), Volumetric data | Seconds |
| Photoacoustics | Ultrasound from laser-induced thermoelastic expansion | 3D optical absorption maps | 3-5 cm | 50-500 µm | Oxygen Saturation (sO₂), Hemoglobin Concentration, Chromophore Density | Seconds to minutes |
Table 2: Comparison of NIR-II Fluorophores & Multimodal Tracers
| Agent Name/Type | Emission Peak (nm) | Integrated Modality | Target/Application | Quantum Yield (%) | Extinction Coefficient (M⁻¹cm⁻¹) | Key Reference (Year) |
|---|---|---|---|---|---|---|
| IRDye 800CW | ~800 nm (NIR-I) | PET (⁸⁹Zr) | Anti-EGFR, Tumor targeting | ~12 | 240,000 | Zhang et al. (2022) |
| CH1055-PEG | 1055 nm | PET (⁶⁴Cu), PAI | Angiogenesis, Tumor delineation | 0.3 | 65,000 | Hong et al. (2017) |
| Ag₂S Quantum Dots | 1200 nm | CT, PAI | Lymph node mapping, Vascular imaging | 5.8 | N/A | Li et al. (2020) |
| Lanthanide-Doped NPs (Nd³⁺) | 1064 nm | PET (⁸⁹Zr) | Macrophage tracking, Inflammation | N/A | N/A | Xu et al. (2021) |
| π-Conjugated Polymer Dots | 1100 nm | PAI | Brain tumor resection, sO₂ mapping | 0.4 | >1x10⁵ | Zhu et al. (2019) |
Detailed Experimental Protocols
Protocol 1: Synthesis & Characterization of a Trimodal (NIR-II/PET/CT) Nanoprobe
Objective: To synthesize and characterize a core-shell nanoparticle integrating NIR-II fluorescence (Ag₂S QDs), PET radioisotope (⁶⁴Cu), and CT contrast (Au shell). Materials: Silver nitrate (AgNO₃), Sodium sulfide (Na₂S), MPA (3-mercaptopropionic acid), HAuCl₄, ⁶⁴CuCl₂, DOTA-NHS ester, PBS (pH 7.4), PD-10 desalting columns, Centrifugal filters (100 kDa). Workflow:
- Synthesis of Ag₂S QD Core: Under N₂, inject 2 mL Na₂S (0.1 M) into 50 mL of 0.2 mM AgNO₃ with 20 mM MPA at 80°C. React for 1 hr. Purify via precipitation/ethanol.
- Surface Functionalization: React 5 nmol of purified QDs with 500 nmol DOTA-NHS in 0.1 M NaHCO₃ buffer (pH 8.5) for 2 hrs at 25°C. Purify using a PD-10 column.
- Gold Shell Growth: Add 100 µL of 1% HAuCl₄ to 1 nmol of QDs in 5 mL water with gentle stirring. Add 200 µL of 0.1 M ascorbic acid dropwise. React for 30 min.
- Radiolabeling for PET: Incubate 1 nmol of DOTA-functionalized Au-shell QDs with 74 MBq of ⁶⁴CuCl₂ in 0.1 M ammonium acetate (pH 5.5) at 40°C for 1 hr. Purify using a 100 kDa centrifugal filter. Determine radiochemical purity via iTLC (>95% required).
- Characterization:
- NIR-II: Measure photoluminescence spectra (808 nm excitation). Calculate quantum yield relative to IR-26.
- CT: Measure Hounsfield Unit enhancement in serial dilutions vs. water in a phantom.
- Stability: Assess in serum at 37°C over 48 hrs via DLS and fluorescence intensity.
Protocol 2: Co-registered In Vivo NIR-II Fluorescence and 3D Photoacoustic Imaging of Tumor Hemodynamics
Objective: To simultaneously map tumor vasculature (NIR-II) and oxygen saturation (PAI) in a murine model. Materials: NIR-II polymer dots (Pdots, 1100 nm emission), IVIS Spectrum CT or equivalent NIR-II imager, Vevo LAZR or MSOT photoacoustic system, nude mice with subcutaneous tumor xenografts, isoflurane anesthesia setup, heating pad. Workflow:
- Animal Preparation: Anesthetize mouse with 2% isoflurane. Place in prone position on heated imaging stage. Apply ocular lubricant. Maintain temperature at 37°C.
- System Calibration & Alignment: Use a multimodality phantom with NIR-II and PA contrast to spatially align the fields of view of both systems. Define a region of interest (ROI) over the tumor.
- Pre-injection Baseline: Acquire co-registered NIR-II (exposure: 1 s, binning: 4) and multispectral PAI (excitation: 750, 800, 850 nm) scans.
- Contrast Agent Administration: Inject 100 µL of Pdots (1 mg/mL) via tail vein catheter.
- Longitudinal Imaging: Acquire sequential NIR-II and PAI scans at 1, 5, 15, 30, 60, and 120 minutes post-injection. Keep physiological parameters stable.
- Data Analysis:
- NIR-II: Draw ROI around tumor. Plot fluorescence intensity over time. Calculate Tumor-to-Background Ratio (TBR).
- PAI: Use linear unmixing at different wavelengths to calculate oxy- and deoxy-hemoglobin maps. Compute oxygen saturation (sO₂ = HbO₂ / (HbO₂ + Hb)) within the tumor ROI over time.
- Co-registration: Overlay the peak NIR-II fluorescence map with the sO₂ map at 60 mins using affine transformation in software (e.g., AMIRA, 3D Slicer).
Protocol 3: Sequential Whole-Body PET/CT and NIR-II Imaging for Pharmacokinetic Analysis
Objective: To quantify the whole-body biodistribution and clearance kinetics of a dual-labeled NIR-II/PET antibody. Materials: ⁸⁹Zr-DFO-labeled NIR-II antibody conjugate (e.g., ⁸⁹Zr-DFO-IRDye800CW-anti-PDL1), Inveon PET/CT or equivalent system, NIR-II imaging system, CD-1 nude mice, dose calibrator, gamma counter. Workflow:
- Tracer Administration: Inject each mouse (n=5) intravenously with 5-10 MBq of ⁸⁹Zr-labeled NIR-II tracer (total antibody mass < 50 µg).
- PET/CT Imaging: At 4, 24, 48, and 72 hours post-injection, acquire a 10-minute CT scan for anatomy/attenuation correction, followed by a 20-minute static PET scan under anesthesia. Reconstruct images using OSEM algorithm.
- NIR-II Imaging: Immediately after PET/CT (while still anesthetized), transfer mouse to NIR-II imager. Acquire 2D epi-fluorescence or 3D tomography images (Ex: 785 nm, Em: 1300 LP filter).
- Ex Vivo Validation: After the final time point, euthanize mice. Collect major organs and tumors. Weigh each sample.
- PET Quantification: Count each sample in a gamma counter. Calculate % injected dose per gram (%ID/g).
- NIR-II Quantification: Image ex vivo organs with NIR-II system. Quantify fluorescence intensity (counts/s/mm²) per organ.
- Correlative Analysis: Plot PET %ID/g vs. NIR-II fluorescence intensity for each organ across time points. Perform linear regression to establish the correlation coefficient (R²).
Visualizations
Multimodal Imaging Integration Workflow
Pipeline for Developing a Multimodal Imaging Probe
The Scientist's Toolkit: Key Research Reagent Solutions
Table 3: Essential Materials for NIR-II Multimodal Imaging Research
| Item Category | Specific Product/Example | Function & Application |
|---|---|---|
| NIR-II Fluorophores | CH1055-PEG, IR-1061, Ag₂S Quantum Dots, Lanthanide-based NPs (Er³⁺, Nd³⁺) | The core imaging agent emitting in the 1000-1700 nm window for deep tissue fluorescence. |
| Bifunctional Chelators | DOTA-NHS ester, DFB-NCS, NOTA-maleimide | Covalently link radioisotopes (⁶⁴Cu, ⁸⁹Zr) to targeting molecules (antibodies, peptides) for PET integration. |
| Targeting Ligands | Anti-EGFR (cetuximab), RGD peptides, PSMA-targeting small molecules | Confer molecular specificity to the imaging probe for targeting tumors, vasculature, or specific cell types. |
| Radionuclides | ⁶⁴Cu (t₁/₂=12.7 h), ⁸⁹Zr (t₁/₂=78.4 h), ¹²⁴I (t₁/₂=4.2 d) | PET radioisotopes compatible with biological half-lives of antibodies or nanoparticles. |
| CT Contrast Elements | Gold Nanoparticles (AuNPs), Iodinated compounds (Iohexol), Bismuth Sulfide NPs | Provide high X-ray attenuation for anatomical co-registration and intrinsic CT contrast. |
| Photoacoustic Contrast | Indocyanine Green (ICG), methylene blue, conjugated polymer nanoparticles | Strong optical absorbers for generating photoacoustic signal, often used in tandem with NIR-II emission. |
| Surface Modifiers | mPEG-Thiol, DSPE-PEG(2000)-Amine, Polysorbate 80 | Improve nanoparticle biocompatibility, prolong circulation time, and reduce non-specific uptake. |
| In Vivo Imaging Systems | Bruker In-Vivo Xtreme II (NIR-II), PerkinElmer IVIS Spectrum CT, Mediso NanoScan PET/CT, VisualSonics Vevo LAZR | Integrated or sequential hardware platforms for acquiring co-registered multimodal datasets. |
| Image Analysis Software | AMIRA, 3D Slicer, Living Image Software, Vevo LAB, PMOD | Enable spatial registration, segmentation, quantification, and visualization of multimodal image data. |
Assessing Clinical Readiness and Current Limitations for Widespread Adoption
The second near-infrared (NIR-II, 1000-1700 nm) imaging window represents a transformative frontier in deep-tissue fluorescence imaging. Within the broader thesis of advancing in vivo biomedical research, this technology promises unprecedented resolution and penetration depth for visualizing biological structures and molecular targets. This document assesses the current clinical readiness of NIR-II imaging platforms and agents, delineates persistent limitations, and provides detailed application notes and protocols to guide researchers and drug development professionals.
Recent advancements in fluorophore development and imaging system design have yielded significant improvements in key performance indicators. The data below summarizes the state-of-the-art as of recent literature (2023-2024).
Table 1: Performance Comparison of Leading NIR-II Fluorophore Classes
| Fluorophore Class | Peak Emission (nm) | Quantum Yield (%) | Tissue Penetration Depth (mm) | Stability (Half-life in vivo) | Key Clinical Stage |
|---|---|---|---|---|---|
| Organic Dyes (e.g., CH1055 derivatives) | 1050-1100 | 0.3 - 5.2 | 5-8 | 2-6 hours | Preclinical |
| Single-Wall Carbon Nanotubes (SWCNTs) | 1000-1400 | 0.1 - 1.0 | 10-20 | Days to weeks | Preclinical |
| Rare-Earth Doped Nanoparticles (e.g., NaYF₄:Nd) | 1050, 1300 | 5 - 15 (in particle) | 8-15 | Weeks | Preclinical |
| Quantum Dots (e.g., Ag₂S, InAs) | 1200-1600 | 10 - 25 | 10-18 | Weeks | Preclinical |
| Targeted Molecular Probes (e.g., antibody-IRDye 800CW) | ~800-900 | ~10 | 3-5 | Hours to days | Phase I/II (NIR-I/Ib) |
Table 2: Clinical Readiness Assessment Matrix for NIR-II Imaging
| Parameter | Readiness Level (1-5) | Key Limiting Factor | Notes |
|---|---|---|---|
| Imaging System Accessibility | 2 | Cost & complexity of InGaAs cameras | Benchtop systems available; portable/clinical system prototypes emerging. |
| Fluorophore Regulatory Path | 1-2 | Lack of GMP-grade agents & comprehensive toxicology | Most probes are research-grade. Biodistribution and clearance pathways not fully characterized. |
| Standardization of Protocols | 2 | Varied illumination, filters, and analysis methods | No universal phantoms or calibration standards for NIR-II. |
| Demonstrated Clinical Utility | 2 | Few first-in-human trials | Early pilot studies in image-guided surgery (e.g., biliary angiography) show promise. |
| Cost-Effectiveness | 1 | High reagent and equipment cost | Not yet competitive with ultrasound, MRI, or conventional NIR-I imaging. |
Detailed Experimental Protocols
Protocol: NIR-II In Vivo Imaging of Tumor Vasculature in a Murine Model
Objective: To non-invasively image deep-tissue tumor vasculature using an FDA-approved indocyanine green (ICG) dye, which exhibits tail emission in the NIR-II window.
Materials (Research Reagent Solutions):
- NIR-II Fluorescent Agent: Indocyanine Green (ICG) lyophilized powder.
- Animal Model: Mouse with subcutaneously implanted tumor (e.g., 4T1, U87MG).
- Imaging System: NIR-II fluorescence imaging system equipped with a 808 nm laser diode for excitation and an InGaAs camera with a 1000 nm long-pass filter.
- Software: Image acquisition and analysis software (e.g., MATLAB, ImageJ with custom plugins).
- Anesthesia System: Isoflurane vaporizer and nose cones.
- Saline: Sterile 0.9% NaCl for injection.
- Heating Pad: To maintain animal body temperature during imaging.
Procedure:
- Agent Preparation: Reconstitute ICG in sterile water to a 1 mg/mL stock solution. Dilute in saline to a working concentration of 200 µg/mL. Protect from light.
- Animal Preparation: Anesthetize the mouse using 2-3% isoflurane. Place the animal in a prone position on a heating pad within the imaging chamber. Maintain anesthesia at 1-2% isoflurane.
- Baseline Imaging: Acquire a pre-injection image. Set laser power to 100 mW/cm², exposure time to 100-500 ms. Acquire image sequence for autofluorescence background subtraction.
- Dye Administration: Intravenously inject ICG via the tail vein at a dose of 2 mg/kg (e.g., 100 µL for a 25g mouse).
- Image Acquisition: Initiate dynamic imaging immediately post-injection. Acquire frames every 3-5 seconds for the first 5 minutes, then every minute for up to 30 minutes. Use consistent imaging parameters.
- Data Processing:
- Subtract the pre-injection background image from all subsequent frames.
- Apply a Gaussian blur (σ=1) to reduce high-frequency camera noise.
- Generate time-intensity curves for regions of interest (ROI) over the tumor and contralateral muscle.
- Calculate tumor-to-background ratio (TBR) as:
TBR = Mean Intensity (Tumor ROI) / Mean Intensity (Muscle ROI).
- Statistical Analysis: Report TBR as mean ± standard deviation for n≥3 animals.
Protocol: Synthesis and Characterization of PEGylated Ag₂S Quantum Dots (QDs)
Objective: To synthesize biocompatible, water-soluble Ag₂S QDs emitting in the NIR-IIb window (1500-1700 nm) for high-contrast imaging.
Materials (Research Reagent Solutions):
- Precursors: Silver nitrate (AgNO₃), elemental sulfur (S), sodium hydroxide (NaOH).
- Ligands: 3-Mercaptopropionic acid (3-MPA), methoxy polyethylene glycol thiol (mPEG-SH, MW 5000).
- Solvents: Deionized water, ethanol.
- Equipment: Three-neck flask, Schlenk line, heating mantle, syringe pumps, centrifuge, dialysis tubing (MWCO 10kDa).
Procedure:
- Nucleation: In a three-neck flask under N₂, dissolve 0.17 g AgNO₃ and 1.2 g 3-MPA in 100 mL deionized water. Adjust pH to 11.5 with NaOH. Heat to 70°C.
- Sulfur Injection: Rapidly inject 10 mL of a freshly prepared, degassed aqueous solution containing 0.032 g S and 0.1 g NaOH.
- Growth & PEGylation: Immediately add 0.5 g mPEG-SH to the reaction mixture. Maintain temperature at 70°C for 1 hour under vigorous stirring.
- Purification: Cool the solution to room temperature. Precipitate QDs by adding 3 volumes of ethanol, then centrifuge at 12,000 rpm for 15 min. Redisperse the pellet in PBS (pH 7.4). Dialyze against PBS for 24 hours to remove excess reactants and ligands.
- Characterization:
- Absorption & Photoluminescence: Use UV-Vis-NIR and NIR spectrometers.
- Size & Morphology: Analyze via transmission electron microscopy (TEM) and dynamic light scattering (DLS).
- Quantum Yield: Measure relative to IR-26 dye in dichloroethane (Φ = 0.5%) as a reference.
Visualization: Diagrams & Workflows
Title: Workflow for NIR-II In Vivo Vascular Imaging
Title: From NIR-II Limitations to Clinical Adoption Pathway
The Scientist's Toolkit: Key Research Reagent Solutions
Table 3: Essential Materials for NIR-II Imaging Research
| Item | Function/Benefit | Example/Notes |
|---|---|---|
| InGaAs Camera | Detects photons in 900-1700 nm range. Essential for NIR-II detection. | Teledyne Judson, Hamamatsu, or Sensors Unlimited models. Cooling reduces dark noise. |
| NIR-II Fluorescent Probes | Provides the contrast signal. Choice dictates emission wavelength and brightness. | ICG (clinical), CH1055 derivatives, Ag₂S QDs, Er³⁺-doped nanoparticles. |
| 808 nm or 980 nm Laser Diode | High-power excitation source matching probe absorption. | Must be coupled with appropriate bandpass filters to prevent camera saturation. |
| Long-Pass Emission Filters (1000, 1200, 1400 nm) | Blocks excitation and NIR-I light, isolating the NIR-II signal. | Thorlabs or Semrock filters. Using 1500 nm LPF accesses lower-background NIR-IIb window. |
| Living Image or Custom MATLAB/Python Software | For image acquisition, processing, and quantification of signal dynamics. | Critical for calculating metrics like TBR, pharmacokinetics, and 3D reconstruction. |
| NIR-Reflective/Phantom Materials | For system calibration and performance validation. | Use Intralipid phantoms or specialized films to mimic tissue scattering. |
| Dialysis Tubing (MWCO 3-50 kDa) | For purifying and buffer-exchanging nanoparticle-based contrast agents. | Ensures removal of unreacted precursors and transfer to biocompatible buffers. |
| ISOFLURANE Vaporizer & Induction Chamber | Safe and effective anesthesia for in vivo rodent imaging sessions. | Maintains stable physiological conditions for longitudinal studies. |
Conclusion
The NIR-II imaging window represents a paradigm shift in optical bioimaging, offering unprecedented capabilities for deep-tissue visualization with high spatial and temporal resolution. From foundational physics to validated superiority over traditional NIR-I, this technology addresses long-standing challenges in scattering and autofluorescence. While methodological advancements in probe design and protocol optimization are rapidly maturing, ongoing work in biocompatibility, quantification standards, and regulatory approval is critical for full clinical translation. The future of NIR-II lies in the development of brighter, targeted probes, integration with complementary multimodal platforms, and its evolution from a powerful research tool into a mainstay for diagnostic and intraoperative clinical imaging, ultimately enabling more precise disease understanding and therapeutic intervention.