The Definitive Guide to PCR Annealing Temperature Optimization: From Theory to Practice for Flawless Results
This comprehensive guide provides researchers, scientists, and drug development professionals with a complete framework for optimizing PCR annealing temperature within master mixes.
The Definitive Guide to PCR Annealing Temperature Optimization: From Theory to Practice for Flawless Results
Abstract
This comprehensive guide provides researchers, scientists, and drug development professionals with a complete framework for optimizing PCR annealing temperature within master mixes. We cover the foundational science of primer-template hybridization, methodological approaches for empirical testing, systematic troubleshooting for common amplification issues, and validation strategies to ensure robust, reproducible results. By integrating theory with practical application, this article empowers you to maximize specificity, yield, and efficiency in any PCR-based assay, from basic research to clinical diagnostics.
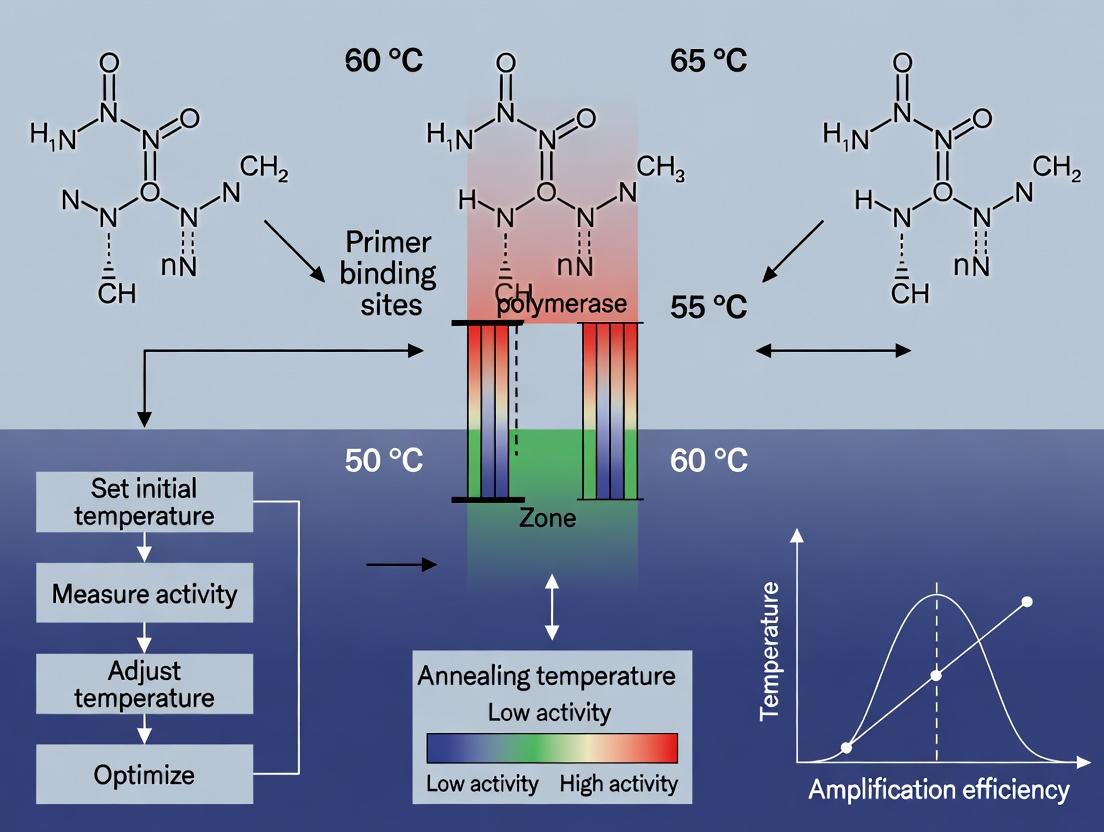
Understanding the Science: Why Annealing Temperature is Critical for PCR Specificity and Efficiency
Troubleshooting Guides & FAQs
Q1: My PCR yields no product or very faint bands. What annealing temperature-related issues should I investigate first? A: This is a classic symptom of suboptimal annealing temperature. If the temperature is too high, primers cannot bind. If it is too low, non-specific binding occurs, reducing yield of the desired product. First, perform a temperature gradient PCR (see Protocol 1). Also, verify primer Tm calculations using an up-to-date formula (e.g., NN model) and ensure the annealing temperature is typically set 3–5°C below the lower Tm of the primer pair for initial testing.
Q2: I get multiple non-specific bands. How can I adjust the annealing temperature to improve specificity? A: Non-specific amplification indicates insufficient stringency. Increase the annealing temperature in increments of 1–2°C. A higher temperature favors only the perfect primer-template matches. If the problem persists after increasing by 4–6°C, redesign primers with a higher Tm or use a hot-start polymerase to prevent primer-dimer formation during setup.
Q3: How do I determine the exact annealing temperature for a new primer set in a standardized master mix? A: The most reliable method is empirical determination via a thermal gradient PCR. Standard protocols recommend starting with a calculated Tm and testing a range of ±5°C around it. The optimal temperature is the highest one that yields robust, specific amplification. See Protocol 1 for a detailed methodology.
Q4: Does the composition of my commercial master mix affect the optimal annealing temperature? A: Yes. Master mix components like MgCl2 concentration, buffer pH, and the specific polymerase used can influence effective primer binding. The optimal annealing temperature determined for one master mix may not be directly transferable to another. Always re-optimize when switching master mix formulations. Consult Table 1 for component comparisons.
Q5: Why do my qPCR assays have low amplification efficiency, and how is annealing temperature involved? A: In qPCR, low efficiency (<90% or >110%) often stems from poor primer binding kinetics due to incorrect annealing temperature. An optimal temperature ensures 100% efficiency where product doubles each cycle. Run a standard curve with an annealing temperature gradient to find the temperature yielding an efficiency closest to 100%.
Experimental Protocols
Protocol 1: Determination of Optimal Annealing Temperature via Gradient PCR
Objective: To empirically determine the optimal annealing temperature for a specific primer-template pair within a given master mix.
Materials: See "The Scientist's Toolkit" table.
Method:
- Prepare a standard PCR master mix according to the manufacturer's instructions for a single 25 µL reaction, excluding template and primers.
- Add template DNA (e.g., 10-100 ng genomic DNA) and primers (final concentration typically 0.2-0.5 µM each).
- Aliquot the master mix equally across 8-12 tubes or wells of a gradient thermal cycler block.
- Set the thermal cycler's annealing step to a gradient spanning a calculated range (e.g., 55°C to 70°C). A typical cycling program is:
- Initial Denaturation: 95°C for 2-5 min.
- 35 Cycles:
- Denaturation: 95°C for 30 sec.
- Annealing: Gradient range for 30 sec.
- Extension: 72°C for 1 min/kb.
- Final Extension: 72°C for 5 min.
- Hold: 4°C.
- Analyze PCR products by agarose gel electrophoresis (1-2% gel). The optimal annealing temperature is the highest temperature that produces a single, intense band of the expected size.
Data Presentation
Table 1: Effect of Annealing Temperature on PCR Yield and Specificity
| Annealing Temp. (°C) | Product Yield (ng/µL) | Specificity (Band Clarity) | Recommended Action |
|---|---|---|---|
| ≤ (Tm - 7°C) | High | Poor (Multiple bands) | Increase Temperature |
| (Tm - 5°C) to (Tm - 3°C) | High | Excellent (Single, sharp band) | Optimal Range |
| ≈ Tm | Moderate | Good | Acceptable |
| ≥ (Tm + 3°C) | Low to None | N/A (No product) | Decrease Temperature |
Table 2: Master Mix Components Affecting Annealing Stringency
| Component | Standard Concentration | Function | Impact on Annealing |
|---|---|---|---|
| MgCl₂ | 1.5 - 3.0 mM | Cofactor for polymerase; stabilizes DNA duplex. | Higher [Mg2+] stabilizes primer binding, allowing lower effective Ta. |
| Salt (KCl) | 50 mM | Reduces electrostatic repulsion. | Similar to Mg2+, higher [K+] permits lower Ta. |
| Buffer pH | 8.0 - 8.5 | Optimal enzyme activity. | Deviation can affect primer-template stability. |
| Polymerase Type | N/A | Catalyzes DNA synthesis. | Hot-start enzymes allow true temperature-specific binding. |
The Scientist's Toolkit: Research Reagent Solutions
| Item | Function in Annealing Optimization |
|---|---|
| Gradient Thermal Cycler | Allows a single PCR run to test a spectrum of annealing temperatures simultaneously. |
| Hot-Start DNA Polymerase | Reduces non-specific amplification and primer-dimer formation prior to the first denaturation step, improving stringency. |
| High-Fidelity (HF) Buffer | Often optimized with additives to provide robust, specific amplification under standard conditions. |
| Tm Calculator Software | Uses nearest-neighbor (NN) algorithms to calculate precise primer Tm values, providing a starting point for experiments. |
| Quantitative PCR (qPCR) System | Enables real-time monitoring of amplification efficiency across different annealing temperatures via melt curve analysis. |
Visualizations
Title: Workflow for Empirical Annealing Temperature Optimization
Title: Primer Binding Specificity at Low vs. Optimal Annealing Temperatures
Troubleshooting & FAQs
Q1: My PCR reactions consistently yield no product or non-specific bands when using a calculated Tm for primer annealing. What are the primary culprits? A1: This is often due to inaccurate Tm calculation inputs or master mix incompatibility.
- Cause 1: Incorrect Salt/Monovalent Ion Concentration in Calculation. The Tm formula is highly sensitive to [Na⁺] or [K⁺]. Using the default 50 mM from many online calculators while your master mix uses 100 mM will overestimate the Tm, leading to poor annealing.
- Fix: Use the exact cation concentration from your master mix protocol in the nearest-neighbor formula. See Table 1.
- Cause 2: Assumed vs. Actual Primer Concentration. Calculations assume equimolar primer-template ratios. If primer concentration is too low, effective Tm drops.
- Fix: Verify primer concentration spectroscopically (A260) and use the final nM concentration in the reaction mix for calculation.
- Cause 3: Oversimplified Calculation for Long Probes/Oligos. The Wallace Rule (Tm = 2°C(A+T) + 4°C(G+C)) is invalid for sequences >30nt. For probes, LNA/DNA chimeras, or long oligos, nearest-neighbor methods are mandatory.
Q2: How do I adjust the annealing temperature when moving a primer pair from a standard PCR mix to a specialized "hot-start" or "high-fidelity" master mix? A2: The adjustment is not for the mix type per se, but for the specific buffer composition.
- Step 1: Obtain the exact buffer formulation (e.g., [KCl], [MgSO₄], [MgCl₂], [DMSO], [Betaine]) from the master mix manufacturer's datasheet.
- Step 2: Recalculate Tm using these new parameters, prioritizing a formula that incorporates [Mg²⁺] (e.g., Salt-Adjusted or Biophysics calculators). See Protocol 1.
- Step 3: Perform a gradient PCR (± 5°C around the newly calculated Tm) to empirically determine the optimal annealing temperature for that specific master mix system.
Q3: For qPCR probe-based assays (e.g., TaqMan), which Tm is more critical: primer Tm or probe Tm, and how should they relate? A3: Both are critical but have different optimization goals.
- Probe Tm: Must be 5-10°C higher than the primer annealing temperature. This ensures the probe is fully hybridized before primer extension begins, allowing for efficient 5' nuclease cleavage by the polymerase.
- Primer Tm: The pair should have closely matched Tms (± 1°C) for efficient co-annealing.
- Workflow: First, design primers with a calculated Tm (nearest-neighbor). Then, design the probe within the amplicon with a Tm 5-10°C higher using the same calculation parameters. Validate with a temperature gradient.
Q4: Why do my calculated and experimentally observed Tms for the same duplex differ significantly (>5°C)? A4: Theoretical calculations assume ideal conditions. Key discrepancies arise from:
- Fluorescent Dyes/Quenchers: Conjugated dyes (FAM, CY5) can stabilize or destabilize duplexes. Use manufacturer-provided correction factors.
- Modified Bases (LOCKED NUCLEIC ACIDS - LNAs): LNA incorporation dramatically increases Tm (~+2 to +8°C per LNA base). Specialized LNA Tm calculators that account for position and number of modifications are required.
- Experimental Method Variance: UV-melting curve Tm (defined as 50% duplex dissociation) may differ from functional Tm in PCR. Ensure your empirical test (e.g., SYBR Green melting curve) uses the same salt and oligo concentration as your calculation.
Data Presentation
Table 1: Comparison of Tm Calculation Formulas and Their Applicability
| Formula Name | Key Equation (Simplified) | Optimal Use Case | Critical Input Parameters | Limitations for Master Mix Optimization |
|---|---|---|---|---|
| Wallace Rule | Tm = 2°C(A+T) + 4°C(G+C) | Quick estimate for short (<25nt) DNA primers in standard salt. | Nucleotide count. | Ignores sequence context, salt, additives. Invalid for mixes with Mg²⁺, DMSO. |
| Basic Salt-Adjusted | Tm = 81.5 + 16.6log₁₀[Na⁺] + 0.41(%GC) - (675/N) | Standard DNA-DNA hybrids of length N in Na⁺ buffer. | [Na⁺], %GC, oligo length (N). | Does not model [Mg²⁺], which is the critical cation in most PCR master mixes. |
| Nearest-Neighbor (Schwarz et al.) | Tm = ΔH° / (ΔS° + R ln(Cₜ)) - 273.15 + 16.6*log₁₀[Na⁺] | Gold standard for accuracy. DNA or RNA duplexes. | Full sequence, [Na⁺], oligo concentration (Cₜ). | Default [Na⁺] adjustment may not be accurate for high [Mg²⁺] buffers. |
| Mg²⁺-Adjusted (Owczarzy et al.) | Complex empirical polynomial based on [Mg²⁺], [dNTPs], [Tris]. | Critical for PCR. Most accurate for modern master mixes. | Full sequence, [Mg²⁺], [dNTPs], [K⁺], oligo concentration. | Requires precise knowledge of master mix buffer composition. |
Experimental Protocols
Protocol 1: Empirical Determination of Optimal Annealing Temperature for a Novel Master Mix
Objective: To experimentally validate and refine the calculated Tm for a primer pair within a specific commercial master mix.
Materials: Primer pair, target DNA template, commercial master mix (specify: e.g., Hot-Start High-Fidelity Mix X), thermal cycler with gradient function.
Methodology:
- Theoretical Calculation: Calculate the Tm for each primer using the Mg²⁺-Adjusted Nearest-Neighbor method. Input the exact [Mg²⁺], [K⁺], and [dNTP] values from the master mix datasheet. Set the primer concentration to the final nM used in the reaction.
- Reaction Setup: Prepare a single master reaction mix containing: 1X Master Mix, forward/reverse primer (e.g., 500 nM each), template DNA (recommended amount), nuclease-free water to volume.
- Gradient PCR: Aliquot the master mix into PCR tubes. Program the thermal cycler with a gradient spanning ± 7°C around the calculated lower Tm of the primer pair. (Example: If calculated Tm is 62°C, set gradient from 55°C to 69°C).
- Analysis: Run agarose gel electrophoresis on all gradient products. The optimal annealing temperature is the highest temperature that yields a single, intense band of the correct size.
- Validation: Use this empirically determined temperature for all subsequent experiments with this primer/master mix combination.
Mandatory Visualization
Title: Tm Calculation & Empirical Optimization Workflow
Title: Factors Increasing DNA Duplex Melting Temperature
The Scientist's Toolkit: Research Reagent Solutions
| Reagent / Material | Function in Tm Context | Key Considerations for Optimization |
|---|---|---|
| High-Fidelity Hot-Start Master Mix | Provides buffer, Mg²⁺, dNTPs, and thermostable polymerase. Hot-start prevents non-specific priming. | Critical: Obtain detailed buffer specs ([Mg²⁺], [K⁺]) for accurate Tm calculation. Different blends affect primer stringency. |
| MgCl₂ or MgSO₄ Stock Solution | Source of Mg²⁺ ions, critical for polymerase activity and duplex stability. | Often included in master mix. If adding separately, it dramatically alters Tm; recalculate after any adjustment. |
| DMSO (Dimethyl Sulfoxide) | Additive that reduces secondary structure, especially in GC-rich targets. Lowers effective Tm. | Typically used at 3-10%. If used, include in Tm calculation or use an empirical gradient as it alters duplex stability. |
| Betaine | Additive that equalizes the stability of AT and GC bonds, improving amplification of difficult templates. | Can modify observed Tm. Some master mixes include it. Requires empirical testing if concentration is variable. |
| LCGreen or SYBR Green I Dye | For melting curve analysis to determine experimental Tm of amplicons or probes. | Dyes themselves stabilize duplex (raise observed Tm). Use specialized calculators for dye-labeled probes. |
| LNA-modified Oligonucleotides | Probes or primers with locked ribose backbone for drastically increased binding affinity (Tm). | Mandatory: Use vendor-specific or specialized LNA Tm prediction tools. Standard formulas fail completely. |
Master Mix Components and Their Impact on Effective Annealing Temperature
Within the broader thesis on Optimizing Annealing Temperature for Master Mix Research, this technical support center addresses the critical interplay between master mix formulation and the experimentally observed annealing temperature (Ta). The theoretical Ta calculated from primer sequence is often adjusted in practice, as the master mix's specific components directly influence the reaction's effective Ta. Understanding and troubleshooting these effects is crucial for robust PCR, qPCR, and RT-qPCR in research and drug development.
Troubleshooting Guides
Problem 1: Non-Specific Amplification or Primer-Dimer Formation
Q: My positive control shows a correct band, but my test reactions have multiple bands or a primer-dimer smear, even when using a calculated Ta. What master mix-related factors should I check? A: This indicates the effective Ta in your reaction is too low, allowing primers to bind non-specifically.
- Primary Cause (Master Mix): The concentration and type of magnesium ion (Mg²⁺). Mg²⁺ is a co-factor for polymerase and stabilizes nucleic acid duplexes. Higher Mg²⁺ concentration decreases the effective Ta by stabilizing primer-template binding, including mismatched bindings.
- Troubleshooting Steps:
- Verify Mg²⁺ Concentration: Check if your master mix contains standard (e.g., 1.5 mM) or optimized Mg²⁺. For high-fidelity polymerases, the concentration may differ.
- Perform a Mg²⁺ Titration: Set up a gradient from 1.0 mM to 3.0 mM Mg²⁺ alongside a temperature gradient to find the optimal combination.
- Consider Additives: If your master mix lacks PCR enhancers like betaine or DMSO, secondary structures in the template can impede binding, de facto increasing the required Ta. Adding these can increase specificity, allowing you to use a higher effective Ta.
Problem 2: Low Yield or Amplification Failure
Q: I see faint or no product, even with a positive control template. I've confirmed primer integrity. Could my master mix be the issue? A: Yes, this can suggest the effective Ta is too high for stable primer binding, often influenced by master mix components.
- Primary Cause (Master Mix): The presence of PCR enhancers or organic solvents like DMSO, glycerol, or formamide. These additives reduce DNA melting temperature (Tm) by destabilizing base pairing. Therefore, the presence of these additives effectively lowers the optimal Ta.
- Troubleshooting Steps:
- Audit Additives: Review the master mix formulation. A mix containing 5% DMSO effectively lowers the Tm (and thus optimal Ta) of primers by ~5-6°C.
- Adjust Protocol: If your protocol was optimized with a basic buffer and you switch to an "enhanced" or "GC-rich" master mix, lower your thermal cycler's set Ta by 2-5°C.
- Check Polymerase: Different master mixes use different polymerases (e.g., Taq vs. high-fidelity). Polymerase processivity and buffer systems vary, affecting optimal Ta.
Problem 3: Inconsistent Results Between Master Mix Brands
Q: When I switch to a different commercial master mix, my previously optimized PCR protocol yields different results. Why? A: Commercial master mixes have proprietary formulations that significantly alter reaction stringency and effective Ta.
- Primary Cause (Master Mix): Differing concentrations of Mg²⁺, KCl, (NH₄)₂SO₄, and proprietary enhancers. Salt concentration directly affects duplex stability: KCl stabilizes duplexes at lower concentrations but can destabilize them at high concentrations; (NH₄)₂SO₄ tends to allow more specific priming at a given Ta.
- Troubleshooting Steps:
- Do Not Assume Equivalence: Never assume a 1:1 substitution without validation.
- Perform a Temperature Gradient: Always run a Ta gradient (e.g., ± 5°C from calculated Tm) when validating a new master mix.
- Consult Manufacturer Data: Use the manufacturer's recommended method for calculating/optimizing Ta, as it is often tailored to their specific formulation.
Frequently Asked Questions (FAQs)
Q1: How much does 1 mM of MgCl₂ change the effective annealing temperature? A: Empirically, an increase of 0.5-1.0 mM MgCl₂ can decrease the optimal Ta by 1-2°C due to increased duplex stability. The exact shift depends on primer sequence and template.
Q2: I am using a hot-start polymerase master mix. Does this affect how I determine the annealing temperature? A: The hot-start mechanism itself does not directly alter the Ta. However, these master mixes often contain optimized buffer formulations (e.g., higher Mg²⁺, enhancers) to maximize polymerase performance post-activation. Therefore, the effective Ta is defined by this buffer composition, not the hot-start feature. Follow the manufacturer's guidelines.
Q3: For quantitative PCR (qPCR), how do master mix components impact the annealing/extension step? A: In qPCR using SYBR Green or probe-based mixes, the same principles apply. Additionally, the fluorescent dye (SYBR Green I) itself can slightly stabilize DNA duplexes, potentially lowering the effective Ta by ~0.5-2°C compared to a non-dye PCR. Probe-based mixes are less affected by this. Fast-cycling master mixes with specialized salts/polymerases may also have a narrower optimal Ta range.
Q4: What is the most reliable method to find the true effective Ta with my specific master mix and primers? A: The gold standard is to perform a combined gradient experiment: a two-dimensional matrix testing a range of Mg²⁺ concentrations (if adjustable) against a gradient of annealing temperatures. The optimal combination yields the highest specific product yield with minimal background.
Data Presentation
Table 1: Impact of Common Master Mix Components on Effective Annealing Temperature
| Component | Typical Concentration Range | Effect on Duplex Stability | Direction of Effect on Optimal Ta | Approximate Magnitude of Ta Shift* |
|---|---|---|---|---|
| MgCl₂ | 1.0 - 3.0 mM | Increases stability | Decreases Optimal Ta | +1.0 mM → -1 to -2°C |
| KCl | 10 - 100 mM | Low conc.: increases stabilityHigh conc.: can decrease | Variable (often decreases) | ± 1-3°C |
| (NH₄)₂SO₄ | 15 - 30 mM | Promotes specific binding | Allows higher Ta for specificity | Enables +2-4°C vs. KCl |
| DMSO | 2 - 10% | Decreases stability (denaturant) | Decreases Optimal Ta | +5% → -5 to -6°C |
| Betaine | 0.5 - 2.0 M | Equalizes Tm of AT/GC pairs, reduces secondary structure | Context-dependent (stabilizes) | Normalizes Ta for GC-rich targets |
| SYBR Green I | 0.5X - 1X | Slightly increases stability | Slightly decreases Optimal Ta | 1X → -0.5 to -2°C |
*Magnitude is approximate and primer-sequence dependent. Empirical optimization is required.
Table 2: Troubleshooting Checklist Based on Symptom and Suspected Master Mix Cause
| PCR Symptom | Suspected Master Mix Factor | Immediate Action | Long-term Optimization |
|---|---|---|---|
| Non-specific bands/primer-dimer | Mg²⁺ too high | Lower Mg²⁺ concentration if possible | Perform Mg²⁺/Ta gradient |
| Low yield/no product | Mg²⁺ too low; Additives present | Increase Mg²⁺; Lower Ta by 3-5°C if using enhancers | Switch to a master mix without enhancers for initial optimization |
| Inefficient qPCR (high Cq) | Incompatible Ta for mix | Run a Ta gradient (e.g., 55-65°C) | Validate primers with a master mix-specific Ta calculation tool |
| Drop-out (missing amplicon) | Enhancers altering effective Ta | Remove or titrate additives like DMSO | Optimize with a universal buffer first, then adapt to enhanced mixes |
Experimental Protocols
Protocol 1: Two-Dimensional Optimization of Annealing Temperature and Mg²⁺ Concentration
Objective: To empirically determine the optimal combination of Annealing Temperature (Ta) and MgCl₂ concentration for a specific primer-template pair using a standard master mix base.
Materials:
- See "The Scientist's Toolkit" below.
- Template DNA (10-50 ng/µL)
- Forward and Reverse Primers (10 µM each)
- Nuclease-free water
- Thermal cycler capable of running gradient PCR
Methodology:
- Prepare a 2X base master mix without Mg²⁺ containing buffer, dNTPs, polymerase, and water.
- Prepare a 25 mM stock solution of MgCl₂.
- Set up a matrix of 9 PCR tubes. You will test 3 Mg²⁺ concentrations (1.5 mM, 2.0 mM, 2.5 mM final) against 3 Ta values (calculated Tm -3°C, Tm, Tm +3°C).
- For each tube, create the reaction mix:
- 12.5 µL 2X base master mix
- Variable µL MgCl₂ stock (to achieve target final concentration in 25 µL)
- 1.0 µL Forward Primer (10 µM)
- 1.0 µL Reverse Primer (10 µM)
- 1.0 µL Template DNA
- Nuclease-free water to 25 µL final volume.
- Run PCR with a cycling profile: Initial denaturation (95°C, 2 min); 35 cycles of Denaturation (95°C, 30s), Annealing (gradient temperatures, 30s), Extension (72°C, 1 min/kb); Final extension (72°C, 5 min).
- Analyze products by agarose gel electrophoresis (2% gel). The condition producing the brightest, single correct band with minimal background indicates the optimal Mg²⁺/Ta combination.
Protocol 2: Validating a New Commercial Master Mix
Objective: To determine the effective annealing temperature window for an existing assay when transitioning to a new commercial master mix.
Materials:
- New commercial master mix (2X)
- Validated primer pair and positive control template from original assay.
- Nuclease-free water.
- Gradient thermal cycler.
Methodology:
- Calculate the Tm of your primers using the formula recommended by the master mix manufacturer (often a modified Breslauer or Schwarzenburg method).
- Set up 8 PCR reactions on a temperature gradient block spanning from Tm -5°C to Tm +2°C.
- Per reaction, mix:
- 12.5 µL 2X commercial master mix
- 1.0 µL Forward Primer (10 µM)
- 1.0 µL Reverse Primer (10 µM)
- 1.0 µL Template DNA
- 9.5 µL Nuclease-free water.
- Total: 25 µL.
- Run the PCR using the cycling conditions recommended by the master mix manufacturer (especially hold times and ramp rates).
- Analyze by gel electrophoresis or qPCR analysis (Cq, amplification efficiency, melt curve). The optimal Ta is the lowest temperature that yields maximum specific product with no non-specific amplification.
Visualizations
Title: Master Mix Dictates Effective Ta to Control PCR
Title: Troubleshooting PCR via Master Mix & Ta
The Scientist's Toolkit
Table 3: Essential Research Reagent Solutions for Master Mix & Ta Optimization
| Item | Function in Optimization | Key Consideration |
|---|---|---|
| Standard Taq Polymerase (with separate MgCl₂) | Provides flexibility to adjust Mg²⁺ concentration independently of the polymerase unit. | Essential for 2D Mg²⁺/Ta optimization protocols. Avoid pre-mixed Mg²⁺ for these experiments. |
| PCR-Grade MgCl₂ Solution (25 mM / 50 mM) | Stock solution for precise titration of Mg²⁺ concentration in 0.25 - 0.5 mM increments. | Concentration must be verified; contamination with nucleases can ruin reactions. |
| PCR Enhancer Suite (DMSO, Betaine, GC-Rich Solutions) | Used to troubleshoot difficult templates (high GC%, secondary structure). Each alters effective Ta differently. | Always optimize Ta after adding an enhancer. Start with manufacturer's recommended concentration. |
| Commercial Universal PCR Master Mix (2X) | A standardized, consistent baseline for primer validation and initial assay development. | Provides a benchmark for performance when troubleshooting problems with specialized mixes. |
| Gradient Thermal Cycler | Allows simultaneous testing of multiple annealing temperatures in a single run. | Critical for efficient empirical Ta determination. Ensure the block gradient is accurately calibrated. |
| High-Sensitivity DNA Stain (e.g., GelRed, SYBR Safe) | For accurate visualization of PCR products on gels, especially faint bands and primer-dimer. | More sensitive than ethidium bromide, allowing better assessment of specificity and yield. |
| qPCR Master Mix (SYBR Green & Probe-Based) | For quantitative applications. Formulations differ; SYBR Green mixes may slightly lower effective Ta vs. probe mixes. | The chosen mix dictates the optimal Ta. Probe-based assays are generally more tolerant of minor Ta shifts. |
Troubleshooting Guides & FAQs
Q1: My PCR shows non-specific bands (primer-dimers or multiple products). How can I improve specificity? A: This is a classic sign of sub-optimal annealing temperature. To resolve:
- Perform a gradient PCR to empirically determine the optimal annealing temperature for your primer-template pair. Start with a gradient spanning 5–10°C below to 5°C above the calculated Tm of your primers.
- Increase the annealing temperature in increments of 1–2°C in subsequent experiments. Higher temperatures favor specific primer binding.
- Ensure your master mix contains optimized salt concentrations (Mg²⁺ is critical). High Mg²⁺ can reduce specificity.
- Use a hot-start polymerase to inhibit activity at room temperature, preventing primer-dimer formation during setup.
Q2: My PCR yield is low or absent. What should I check? A: Low yield often results from excessive stringency or reagent issues.
- Lower the annealing temperature. Too high a temperature prevents efficient primer binding. Try decreasing by 2–4°C.
- Check Mg²⁺ concentration. Mg²⁺ is a co-factor for polymerase. Increase concentration by 0.5 mM increments if the master mix allows adjustment.
- Verify primer and template quality/quantity. Ensure primers are not degraded and template is intact and at an adequate concentration (typically 10–100 ng genomic DNA per 50 µL reaction).
- Check polymerase activity. Use a control template and primer set to verify the master mix is functional.
Q3: How do I balance specificity and yield when optimizing a new assay? A: The balance is achieved through systematic optimization of annealing temperature (Ta) within the context of your specific master mix formulation. Follow this protocol:
- Calculate the melting temperature (Tm) of both primers using the formula specified by your master mix provider (often the modified Breslauer method).
- Set up a gradient PCR with an annealing temperature range from (Tm - 5°C) to (Tm + 5°C).
- Run the products on a high-resolution gel or capillary electrophoresis system.
- Analyze results: The optimal Ta is the highest temperature that produces the maximum yield of your specific target product.
Q4: My master mix claims "universal conditions." Why do I still need optimization? A: "Universal" conditions are a compromise based on average primer behavior. Specificity and yield are fundamentally determined by the unique sequence and Tm of your specific primers, the complexity of your template (e.g., genomic DNA vs. cDNA), and the presence of homologous sequences. Optimization tailors the reaction to your specific experimental context.
Table 1: Effect of Annealing Temperature on PCR Outcomes
| Annealing Temperature | Specificity (Relative Score) | Yield (ng/µL) | Recommended Use Case |
|---|---|---|---|
| Low (Tm - 5°C) | Low (High off-target risk) | High (>50) | Difficult templates, degenerate primers |
| Calculated Tm | Moderate | Moderate (20-50) | Initial screening, simple templates |
| Optimal (Empirical) | High | High (>45) | Standard assays, validation |
| High (Tm + 5°C) | Very High | Low (<10) | High-fidelity needs, multiplex PCR |
Table 2: Key Components of a Standard PCR Master Mix
| Component | Typical Concentration | Function in Specificity/Yield Balance |
|---|---|---|
| MgCl₂ | 1.5 - 4.0 mM | Critical cofactor. Higher conc. increases yield but can reduce specificity. |
| dNTPs | 200 µM each | Substrates for synthesis. Imbalance can reduce yield and fidelity. |
| Polymerase | 0.5 - 2.5 U/50 µL | Enzyme. Hot-start variants greatly improve specificity by preventing pre-extension. |
| Buffer (pH) | 8.0 - 9.5 (Tris-based) | Maintains optimal enzyme activity and influences primer annealing. |
| Salt (KCl) | 50-100 mM | Stabilizes primer-template binding; affects stringency. |
Experimental Protocol: Gradient PCR for Annealing Temperature Optimization
Objective: To empirically determine the optimal annealing temperature for a given primer set and template using a thermal cycler with a gradient function.
Materials:
- Template DNA
- Forward and Reverse Primers
- Optimized PCR Master Mix (e.g., Hot Start, Mg²⁺ adjustable)
- Nuclease-free water
- Gradient Thermal Cycler
Procedure:
- Calculate Tm: Determine the Tm for your primer pair using the algorithm recommended for your master mix.
- Prepare Reaction Mix: On ice, combine the following in a sterile tube for a single 50 µL reaction:
- Nuclease-free water: to 50 µL final volume
- 2X Master Mix: 25 µL
- Forward Primer (10 µM): 2.5 µL
- Reverse Primer (10 µM): 2.5 µL
- Template DNA: 1-5 µL (containing 10-100 ng total)
- Aliquot: Mix gently and aliquot equal volumes into 8 PCR tubes.
- Set Gradient: Place tubes in the thermal cycler. Program the gradient block to cover a range from (Tm - 5°C) to (Tm + 2°C) across the 8 tubes.
- Run PCR: Use a standard cycling protocol:
- Initial Denaturation: 95°C for 2-5 min.
- 35 Cycles: [Denature: 95°C, 30 sec; Anneal: Gradient, 30 sec; Extend: 72°C, 1 min/kb].
- Final Extension: 72°C, 5 min.
- Hold: 4°C.
- Analyze: Run all products on an agarose gel. Identify the tube/temperature that yields the brightest correct band with minimal background.
The Scientist's Toolkit: Research Reagent Solutions
Table 3: Essential Materials for Annealing Temperature Optimization
| Item | Function |
|---|---|
| Hot-Start PCR Master Mix | Contains polymerase chemically modified or antibody-bound to remain inactive until high temperature is reached, drastically reducing non-specific amplification and primer-dimer formation during setup. |
| Gradient Thermal Cycler | Allows a single PCR run to test a range of annealing temperatures across different blocks, enabling rapid empirical optimization. |
| High-Fidelity DNA Polymerase | Enzymes with proofreading activity (3'→5' exonuclease) for applications requiring ultra-high specificity and low error rates, such as cloning. |
| qPCR/SYBR Green Master Mix | For real-time quantification. Optimization of annealing temperature is crucial to ensure fluorescence signal comes only from the specific product, not primer-dimers. |
| MgCl₂ Supplement Solution | Allows fine-tuning of Mg²⁺ concentration independently of the master mix to optimize yield and specificity after Ta is set. |
Visualization: Experimental Workflow & Conceptual Balance
Diagram Title: PCR Annealing Temperature Optimization Workflow
Diagram Title: Specificity vs. Yield Trade-Off Relationship
How Mismatches Influence Optimal Annealing Conditions
Technical Support Center: Troubleshooting & FAQs
Frequently Asked Questions (FAQs)
Q1: Why does my PCR yield decrease sharply when I introduce a single mismatch in my primer? A1: A single mismatch, especially near the 3' end, destabilizes primer-template binding. This lowers the effective melting temperature (Tm) of the primer. If the annealing temperature (Ta) is not adjusted downward, the primer may not anneal efficiently, leading to poor yield. Consult the mismatch penalty table below and recalculate your Ta.
Q2: How much should I lower my annealing temperature for a primer with mismatches? A2: The required adjustment depends on the mismatch type, position, and number. Use the following penalty table to adjust the calculated Tm of your primer, then set Ta = Tm - (3°C to 5°C).
Table 1: Approximate Tm Penalty per Mismatch
| Mismatch Type & Position | ΔTm Penalty (°C) | Notes |
|---|---|---|
| G-T (or C-A) wobble, internal | -0.5 to -2.0 | Least destabilizing mismatch. |
| A-C, G-A, etc., internal | -2.0 to -4.0 | More destabilizing than wobble. |
| Mismatch at 3'-terminal base | -4.0 to -6.0 | Severely reduces polymerase extension efficiency. |
| Each additional mismatch | Additive effect | Penalties are roughly cumulative. |
Q3: My qPCR assay for a SNP shows poor discrimination between alleles. What annealing temperature optimization strategy should I use? A3: For allele-specific PCR, optimal discrimination requires a precise Ta. Implement a gradient PCR with a narrow range (e.g., 2-3°C intervals) around the Tm of the matched primer. The optimal Ta is often the highest temperature where the correct allele amplifies efficiently while the mismatched allele is suppressed.
Q4: Non-specific amplification bands appear when I use primers with multiple planned mismatches (e.g., for site-directed mutagenesis). How can I fix this? A4: Multiple mismatches lower primer specificity. Increase stringency: 1) Use a hot-start polymerase, 2) Optimize MgCl2 concentration (try lowering it), 3) Use a touchdown PCR protocol to favor specific binding early in the cycle, or 4) Increase annealing temperature stepwise after the first few cycles.
Experimental Protocols
Protocol 1: Empirical Determination of Optimal Annealing Temperature for Mismatched Primers
Objective: To empirically determine the optimal Ta for a primer-template pair containing known mismatches. Materials: Template DNA, matched & mismatched primers, standard PCR master mix, gradient thermal cycler. Methodology:
- Calculate the theoretical Tm for both the perfectly matched and mismatched primer using a reliable algorithm (e.g., NN method).
- Set up a gradient PCR with an annealing temperature range from 5°C below the mismatched Tm to 2°C above the matched Tm.
- Run the PCR. Analyze products via agarose gel electrophoresis.
- The optimal Ta is the highest temperature that produces a strong, specific band for the mismatched primer. Compare to the matched control.
Protocol 2: Touchdown PCR for Enhancing Specificity with Mismatched Primers
Objective: To amplify a target using primers with mismatches while minimizing off-target binding. Materials: Template DNA, primers, hot-start PCR master mix. Methodology:
- Set the initial annealing temperature 8-10°C above the estimated Tm of the mismatched primer.
- Program the cycler to decrease the annealing temperature by 1°C every cycle for the first 10-12 cycles (e.g., from 72°C down to 62°C).
- Continue for an additional 25-30 cycles at the final, lower annealing temperature.
- This approach selectively enriches the correct target fragment during the high-stringency early cycles.
Visualizations
Title: Annealing Temp Optimization Workflow for Mismatched Primers
Title: Touchdown PCR Logic for Specificity with Mismatches
The Scientist's Toolkit: Research Reagent Solutions
Table 2: Essential Materials for Annealing Optimization Studies
| Item | Function & Relevance |
|---|---|
| High-Fidelity Hot-Start Polymerase | Reduces non-specific amplification and primer-dimer formation during reaction setup, critical when using lower, mismatch-optimized Ta. |
| Gradient Thermal Cycler | Allows empirical testing of a range of annealing temperatures in a single experiment, essential for pinpointing optimal Ta. |
| qPCR Master Mix with Intercalating Dye | Enables real-time monitoring of amplification efficiency and specificity across different Ta values without post-PCR steps. |
| Commercial Tm Calculator Software | Uses nearest-neighbor (NN) algorithms to provide the most accurate theoretical Tm, forming the baseline for mismatch adjustments. |
| MgCl2 Stock Solution (variable conc.) | Mg2+ concentration affects primer binding stringency. Optimization is often needed after changing Ta. |
| Nuclease-Free Water | A critical reagent; impurities can inhibit polymerase, skewing optimization results. |
A Step-by-Step Protocol: Practical Methods for Determining Optimal Annealing Temperature
Troubleshooting Guides and FAQs
Q1: My PCR reaction yields no product or non-specific bands despite using the software-predicted Tm. What are the primary causes? A: This is often due to an inaccurate primer Tm calculation input. Ensure you have selected the correct formula (e.g., SantaLucia vs. Wallace Rule) and salt correction method within the software. Verify the primer concentration entered matches your experimental setup. Non-specific binding can also occur if the predicted annealing temperature is too low.
Q2: How do I reconcile differences in Tm values between the basic formula (Wallace Rule) and more advanced algorithms? A: The Wallace Rule (Tm = 2°C(A+T) + 4°C(G+C)) is a rough estimate for short primers. Advanced algorithms (e.g., SantaLucia's Nearest-Neighbor) account for sequence context, salt, and primer concentration. Always use the advanced software prediction as your primary guide, but be prepared to perform a temperature gradient PCR to find the optimal annealing temperature empirically.
Q3: When using a commercial master mix, should I use the Tm provided by the software or follow the master mix protocol's recommendation? A: Start with the master mix protocol's recommendation, as it is optimized for their specific buffer chemistry and polymerase. However, this is a starting point. If amplification is poor, calculate the Tm using software with parameters (like Mg2+ concentration) that match the master mix, and perform a gradient PCR centered on this value.
Q4: My qPCR efficiency is below 90% or above 110%. How can Tm calculations help troubleshoot this? A: Poor qPCR efficiency frequently stems from suboptimal primer annealing. Re-calculate Tm using the exact buffer conditions from your qPCR master mix. Design primers with a Tm ideally between 58-62°C and within 1°C of each other. Secondary structure or dimer formation predicted by the software can also impact efficiency.
Q5: For touchdown PCR, how do I determine the starting and ending temperatures for the annealing step? A: Set the starting annealing temperature 5-10°C above the calculated Tm of your primer pair. The ending temperature should be 5-10°C below the Tm. The decrement per cycle is typically 0.3-1.0°C. Software can help predict the Tm, but the gradient must span a range to ensure specific binding is achieved.
Key Experimental Protocol: Annealing Temperature Optimization Gradient PCR
Objective: Empirically determine the optimal annealing temperature (Ta) for a primer pair in a specific master mix. Materials: PCR master mix, template DNA, forward/reverse primers, nuclease-free water, thermal cycler. Method:
- Calculate the Tm for each primer using software (e.g., IDT OligoAnalyzer, ThermoFisher Tm Calculator) with parameters set to match your master mix (Mg2+, salt, primer concentration).
- Prepare a single PCR master mix containing all components.
- Aliquot the master mix into PCR tubes.
- Set the thermal cycler to run a gradient across a range, typically Tm ± 5-7°C. For example, if Tm is 60°C, set a gradient from 53°C to 67°C.
- Run the PCR program.
- Analyze products via agarose gel electrophoresis. The correct product should appear as a single, sharp band at the highest temperature that yields robust amplification.
Data Presentation: Comparison of Tm Calculation Methods
| Method/Software | Formula/Algorithm | Considers [Na+]/[K+] | Considers [Mg2+] | Considers Primer Conc. | Best For |
|---|---|---|---|---|---|
| Wallace Rule | Tm=2(A+T)+4(G+C) | No | No | No | Quick estimate only |
| Basic SantaLucia | Nearest-Neighbor | Yes | No | No | Standard PCR in simple buffers |
| IDT OligoAnalyzer | Nearest-Neighbor | Yes | Yes (optional) | Yes | High-fidelity & qPCR master mixes |
| ThermoFisher Tm Calc | Modified NN (Breslauer) | Yes | Yes | Yes | Matching proprietary buffers |
| Primer3Plus | SantaLucia NN | Yes | Via salt correction | Yes | Initial primer design |
The Scientist's Toolkit: Research Reagent Solutions
| Item | Function in Ta Optimization |
|---|---|
| High-Fidelity PCR Master Mix | Pre-mixed, optimized buffer/polymerase for specific applications (e.g., GC-rich targets). Provides a consistent baseline for Ta testing. |
| MgCl₂ Solution (Separate) | Allows empirical adjustment of Mg2+ concentration, which directly influences primer Tm and polymerase fidelity. |
| Gradient Thermal Cycler | Enables simultaneous testing of a range of annealing temperatures in a single experiment. |
| DNA Polymerase with Robust Buffer | Some polymerases (e.g., Taq, Phusion) have different buffer optima, affecting the effective Tm. |
| qPCR SYBR Green Master Mix | Contains additives for qPCR; its optimized buffer requires precise Tm matching for efficient amplification. |
| Tm Prediction Software | Utilizes nearest-neighbor thermodynamics to calculate theoretical Tm under user-defined conditions. |
Visualizations
Title: Ta Optimization Workflow
Title: Post-Gel Analysis Decision Tree
Technical Support Center
Troubleshooting Guides & FAQs
Q1: During my temperature gradient PCR to optimize annealing temperature (Ta), I get no product in any wells. What is the primary cause and solution?
A: The most common cause is an incorrect temperature gradient range that does not bracket the true primer Tm. First, calculate the Tm of both primers using your master mix's specified formula (often different from online calculators). Ensure the gradient block is calibrated. Perform a positive control with a known working Ta. If the issue persists, verify primer and template quality and concentration.
Q2: My temperature gradient PCR shows smearing or non-specific bands. How do I improve specificity?
A: This indicates the Ta is too low. Adjust your gradient range to higher temperatures, typically starting 3-5°C below the lowest calculated Tm and ending 2°C above the highest calculated Tm. Ensure Mg2+ concentration in your master mix is optimal, as excess Mg2+ reduces specificity. A thermal gradient with a "touchdown" protocol can also help.
Q3: The product yield varies significantly across the gradient block, but the optimal temperature is unclear. How should I interpret the results?
A: Quantify the results using gel electrophoresis with a quantitative stain or, preferably, a qPCR melt curve analysis if available. The optimal Ta is the highest temperature that yields a robust, specific product. See Table 1 for interpretation guidelines.
Q4: I observe inconsistent results between duplicate reactions on the same gradient block. What could be wrong?
A: This suggests poor thermal uniformity across the block. Contact your instrument manufacturer for a performance verification test. Ensure the block is clean and the PCR plates are properly seated and sealed. Use a master mix with high fidelity and consistency. Consider running a gradient with a known template to validate block performance.
Q5: How does master mix composition impact my temperature gradient optimization results?
A: Critically. Different polymerases and buffer formulations have distinct optimal annealing temperature ranges and Mg2+ dependencies. The optimal Ta determined is specific to the master mix used. See "The Scientist's Toolkit" below for key components.
Data Presentation
Table 1: Interpretation of Temperature Gradient PCR Results
| Gel Band Pattern | Likely Ta Issue | Recommended Action |
|---|---|---|
| No product in any lane | Gradient range too high | Lower entire range by 7-10°C; verify template integrity |
| Strong product in low-T lanes, smearing in mid-T, none in high-T | Range too low & wide | Center new range 5°C above current strongest product lane |
| Sharp, specific band in only 1-2 lanes | Optimal range found | Use the highest Ta with strong yield for specific amplification |
| Consistent weak yield across all lanes | Possible inhibitor or suboptimal [Mg2+] | Check purity of template; test Mg2+ adjustment per master mix protocol |
Table 2: Example Gradient Setup for a Primer Pair with Tm of 58°C & 62°C
| Well Position | Set Annealing Temp (°C) | Expected Outcome | Notes |
|---|---|---|---|
| A1-H1 | 52.0 | Non-specific bands/smear | Lower bound test |
| A2-H2 | 54.5 | Bands should begin to clarify | |
| A3-H3 | 57.0 | Possible optimal for low-Tm primer | |
| A4-H4 | 59.5 | Likely optimal balance | Midpoint of primer Tms |
| A5-H5 | 62.0 | Likely optimal for high-Tm primer | |
| A6-H6 | 64.5 | Yield may drop | |
| A7-H7 | 67.0 | Possible product loss | Upper bound test |
Experimental Protocols
Protocol: Temperature Gradient PCR for Annealing Temperature Optimization
Objective: To determine the optimal annealing temperature (Ta) for a specific primer pair and template using a standardized master mix.
Materials: See "The Scientist's Toolkit" below.
Method:
- Calculate Primers Tm: Use the formula provided by your master mix manufacturer. Note the Tm for both forward and reverse primers.
- Define Gradient Range: Set the thermal cycler's gradient function. The range should span at least 10°C, typically from 3-5°C below the lower Tm to 3-5°C above the higher Tm.
- Prepare Master Mix: In a nuclease-free tube on ice, combine components in the following order for a single 25 µL reaction:
- Nuclease-free water: to 25 µL final volume.
- 2X Standardized Master Mix: 12.5 µL.
- Forward Primer (10 µM): 0.5 µL.
- Reverse Primer (10 µM): 0.5 µL.
- Template DNA (10-100 ng total): 1.0 µL. Mix thoroughly by gentle vortexing and brief centrifugation.
- Dispense and Run: Aliquot 25 µL of master mix into each well of a row across the gradient block. Seal the plate. Run the following cycling protocol:
- Initial Denaturation: 95°C for 2-5 min (per master mix spec).
- Denaturation: 95°C for 30 sec.
- Annealing: Gradient range (e.g., 52-67°C) for 30 sec. → Key Step
- Extension: 72°C for 1 min/kb.
- Repeat steps 2-4 for 35 cycles.
- Final Extension: 72°C for 5 min.
- Hold: 4°C.
- Analysis: Run products on a 1-2% agarose gel stained with ethidium bromide or SYBR-safe. Image and document the yield and specificity in each well.
Mandatory Visualization
Title: Workflow for PCR Annealing Temperature Optimization
Title: Impact of Annealing Temperature on PCR Results
The Scientist's Toolkit: Research Reagent Solutions
Table 3: Essential Materials for Temperature Gradient PCR Optimization
| Item | Function in Optimization | Key Consideration |
|---|---|---|
| Standardized Hot-Start Master Mix | Contains polymerase, dNTPs, MgCl2, and optimized buffers in a consistent formulation. Eliminates prep variability, allowing focus on Ta. | Choose one with a robust buffer for a wide Ta range and fidelity enzymes for cloning. |
| Nuclease-Free Water | Reconstitutes and dilutes reagents without degrading primers or template. | Essential for reproducibility; avoid DEPC-treated water with certain enzymes. |
| Validated Primer Pairs | Specifically designed to amplify the target sequence. | QC via HPLC or PAGE; resuspend and store accurately to ensure consistent concentration. |
| Template DNA (Control) | A known, clean sample to test primer efficiency and gradient. | Use at optimal concentration (e.g., 10-100 ng genomic DNA per 25 µL rxn). |
| Thermal Cycler with Gradient Function | Precisely creates a temperature range across the block for parallel Ta testing. | Must be regularly calibrated. Block format dictates experiment scale (96-well, 48-well). |
| Quantitative Analysis Method | Measures yield and specificity (e.g., agarose gel with sensitive stain, capillary electrophoresis). | Enables objective selection of optimal Ta, not just visual estimation. |
Technical Support & Troubleshooting Center
FAQs & Troubleshooting Guides
Q1: My gradient PCR gel shows successful amplification at all temperatures, including the no-template control (NTC). What went wrong? A: This indicates pervasive contamination or primer-dimer formation.
- Troubleshooting Steps:
- Assess NTC Band: If the NTC band is the same size as your target, it's likely amplicon contamination. Discard all reagents, decontaminate workspaces and equipment, and prepare fresh master mixes.
- Check Band Size: If the NTC band is lower/smeared (~50-150bp), it's primer-dimer. Increase the annealing temperature gradient's range. Redesign primers if dimerization persists.
- Verify Protocol: Ensure you used a hot-start polymerase to minimize non-specific activity during setup.
Q2: The melt curve from my gradient PCR shows multiple peaks for a single product. How do I interpret this? A: Multiple peaks indicate non-specific amplification or primer-dimer interference.
- Action Guide:
- Correlate with Gel: Run the product on a gel. A single, clean band with a multi-peak melt curve suggests a pure product with different domains melting at different temperatures (can be normal for some amplicons).
- Multiple Bands on Gel: If the gel shows multiple bands, optimize annealing temperature. Select the gradient well where the melt curve is a single, sharp peak and gel band is strongest and specific.
- Check Primer Specificity: Use in silico tools (e.g., BLAST, primer-BLAST) to verify primer specificity for your template.
Q3: How do I precisely determine the optimal annealing temperature (Ta) from a gradient PCR? A: The optimal Ta is not just the highest temperature yielding a product, but the one yielding the maximum specific product with minimal non-specific artifacts.
- Step-by-Step Protocol:
- Run Gradient PCR: Perform PCR with a thermal gradient spanning at least a 10°C range (e.g., 55°C to 65°C).
- Analyze by Gel Electrophoresis: Image the gel and score band intensity and specificity.
- Analyze Melt Curves: For each gradient well, assess the melt curve for a single, sharp peak.
- Synthesize Data: Use the table below to integrate results and select the optimal Ta.
Integrated Analysis Table: Gradient PCR Results for Ta Optimization
| Gradient Well | Annealing Temp (°C) | Gel Band Intensity (1-5) | Gel Band Specificity | Melt Curve Peak (Single/Multiple) | SYBR Green RFU (Peak Height) | Verdict |
|---|---|---|---|---|---|---|
| 1 | 55.0 | 4 | Low (smearing) | Multiple | 450 | Reject: Non-specific |
| 2 | 57.5 | 5 | Medium (faint non-specific) | Single (broad) | 1200 | Suboptimal |
| 3 | 60.0 | 5 | High (single, crisp) | Single (sharp) | 1850 | Optimal |
| 4 | 62.5 | 3 | High | Single (sharp) | 900 | Acceptable (lower yield) |
| 5 | 65.0 | 1 | High | N/A | 300 | Reject: Yield too low |
| NTC | N/A | 0 (if clean) | N/A | N/A | <100 | Pass |
Q4: My melt curve is broad or shallow, not a sharp peak. What does this mean for my assay optimization? A: A broad melt curve suggests heterogeneous PCR products or suboptimal reaction conditions.
- Solutions:
- Optimize Mg2+ Concentration: Titrate MgCl₂ (1.5mM - 4mM) in your master mix. Too much Mg2+ can reduce curve sharpness.
- Check Primer Quality: Ensure primers are purified and resuspended accurately.
- Review Cycling Parameters: Ensure a slow, controlled ramp rate during the melt curve step (e.g., 0.1°C/sec) for higher resolution.
Experimental Protocol: Determining Optimal Annealing Temperature via Gradient PCR with Melt Curve Analysis
Objective: To establish the optimal annealing temperature for a SYBR Green-based qPCR assay within the context of master mix research.
Materials: See "Research Reagent Solutions" below.
Methodology:
- Prepare Gradient PCR Plate: Dilute template cDNA to a consistent concentration. Dispense a standardized master mix (polymerase, buffer, dNTPs, SYBR Green I dye, primers, water) into a qPCR plate. Add template to all wells except NTCs.
- Program Thermal Cycler:
- Stage 1: Polymerase Activation: 95°C for 2 min.
- Stage 2: Amplification (40 cycles):
- Denaturation: 95°C for 15 sec.
- Annealing: Gradient from 55°C to 65°C for 30 sec. (Data collection at end of step).
- Extension: 72°C for 30 sec.
- Stage 3: Melt Curve Analysis: 95°C for 15 sec → 60°C for 1 min → Ramp to 95°C at 0.1°C/sec with continuous data acquisition.
- Post-Run Analysis:
- Examine Amplification Plots: Confirm similar Cq values and efficiency across replicates for a given temperature.
- Generate Melt Curves: Plot the negative derivative of fluorescence (-d(RFU)/dT) vs. Temperature.
- Run Gel Electrophoresis: Pool replicates from each temperature, run on a 2% agarose gel with a DNA ladder, stain, and image.
- Data Synthesis: Integrate gel and melt curve data using the table above to select the optimal Ta.
The Scientist's Toolkit: Research Reagent Solutions
| Reagent/Material | Function in Ta Optimization |
|---|---|
| Hot-Start DNA Polymerase | Prevents non-specific amplification and primer-dimer formation during reaction setup, critical for clean gradient results. |
| SYBR Green I Dye | Intercalates into dsDNA, allowing for real-time quantification and subsequent melt curve analysis. |
| Gradient-Capable Thermal Cycler | Enables simultaneous testing of multiple annealing temperatures in a single run. |
| Optical qPCR Plate & Seals | Ensures consistent thermal conductivity and prevents evaporation during high-resolution melt (HRM) steps. |
| Agarose & Gel Electrophoresis System | Provides visual confirmation of amplicon size, specificity, and yield complementary to melt curve data. |
| DNA Binding Dye (e.g., Ethidium Bromide, SYBR Safe) | For post-PCR gel visualization of amplified products. |
| Molecular Biology Grade Water | Nuclease-free water to prevent degradation of reagents and template. |
| Validated Primer Pairs | Primers with high specificity and efficiency are fundamental for a successful optimization experiment. |
Visualization: Gradient PCR Optimization Workflow
Title: Gradient PCR Optimization Decision Workflow
Visualization: Interpreting Melt Curve & Gel Data
Title: Melt Curve and Gel Data Interpretation Guide
Technical Support Center
Troubleshooting Guide: Annealing Temperature Optimization
Q1: My qPCR amplification of a GC-rich target (75% GC) shows poor efficiency and late Cq values, even after a standard gradient test. What specific adjustments should I make?
A: GC-rich templates form stable secondary structures that impede polymerase progression. Standard gradient tests often fail to resolve these issues. Implement a combined approach:
- Use a specialized master mix containing additives like DMSO (3-5%), betaine (1-1.3 M), or 7-deaza-dGTP. These destabilize secondary structures.
- Perform a thermal gradient with a two-step protocol: Combine a high annealing/extension temperature (e.g., 68-72°C) with the additive-enhanced master mix.
- Apply a touchdown PCR protocol prior to qPCR to favor specific amplification.
Experimental Protocol: Optimizing for GC-Rich Targets
- Prepare four identical qPCR reactions with your GC-rich target using a master mix compatible with additives.
- Spike each reaction with a different additive:
- Tube A: 3% DMSO (v/v final)
- Tube B: 1 M Betaine (final)
- Tube C: 1:1 mix of dGTP:7-deaza-dGTP
- Tube D: No additive (control)
- Run a thermal gradient from 65°C to 72°C for the combined annealing/extension step.
- Analyze amplification efficiency (E) and Cq. Select the condition yielding the lowest Cq and E closest to 100%.
Q2: In my multiplex PCR, I am getting uneven amplification of targets and primer-dimer formation. How can I balance primer annealing temperatures effectively?
A: Primer dimer and uneven amplification stem from Tm mismatch and cross-hybridization. The goal is to harmonize primer Tms and minimize interactions.
Experimental Protocol: Multiplex Primer Balancing
- In-silico Design: Use software to check for cross-complementarity (especially at 3' ends). Re-design if necessary.
- Empirical Tm Determination: Run a singleplex temperature gradient for each primer pair individually using SYBR Green to find its optimal Tm.
- Consensus Tm Calculation: Calculate the average optimal Tm from step 2.
- Multiplex Test: Set up the multiplex reaction with an annealing temperature 3-5°C below the lowest optimal Tm from the singleplex assays. Run a narrow gradient (e.g., ±2°C) around this point.
- Master Mix: Use a hot-start, multiplex-optimized master mix with enhanced specificity buffers.
Q3: After optimizing annealing temperature for my simplex qPCR assay, I now want to convert it to a multiplex assay. What is the step-by-step process?
A: Converting simplex to multiplex requires systematic validation to ensure no loss of performance.
Experimental Protocol: Simplex to Multiplex Conversion
- Re-optimize Primer/Probe Concentrations: Titrate each primer (e.g., 50-900 nM) and probe (e.g., 50-300 nM) in the multiplex context to find concentrations that yield matched Cq values and maximum RFU.
- Validate Specificity: Run single-template controls to ensure each primer/probe set only amplifies its intended target in the multiplex mix.
- Determine LOD and Efficiency: Perform a dilution series with the multiplex assay. Generate standard curves for each target to confirm amplification efficiency (90-110%) and that the limit of detection (LOD) is not compromised compared to simplex.
- Final Gradient: Perform a final narrow annealing temperature gradient (e.g., 1°C increments) to fine-tune the multiplex condition.
Frequently Asked Questions (FAQs)
Q4: What is the recommended starting point for annealing temperature when using a universal master mix with an unknown primer set? A: Begin 3-5°C below the calculated Tm of the primer with the lowest Tm. Run a broad gradient (e.g., 55°C to 70°C) to empirically determine the optimal temperature, defined by the lowest Cq and highest RFU.
Q5: How much can additives like DMSO shift the optimal annealing temperature? A: DMSO and similar additives lower the effective Tm of the duplex. When adding 3-5% DMSO, reduce your calculated or previously optimal annealing temperature by 2-4°C as a starting point for re-optimization.
Q6: My multiplex qPCR shows good amplification but a loss of 1-2 logs in dynamic range for one target. What's the cause? A: This indicates amplification competition. The more efficiently amplifying target is out-competing the other for reagents. Re-titrate primer/probe concentrations for the weaker target, increasing them relative to the stronger one. Also, ensure the master mix has sufficient polymerase and dNTPs for multiplexing.
Q7: Should I use a two-step or three-step qPCR protocol for complex templates? A:
- Three-step (denature, anneal, extend): Beneficial for multiplex assays with primer pairs of significantly different Tms, or when the annealing temperature is low (<60°C). Provides a dedicated, higher-temperature extension for complete amplicon synthesis.
- Two-step (denature, combined anneal/extend): Preferred for simplex and most multiplex assays. Use when the primer Tm is high (e.g., >60°C). It is faster and reduces the chance of non-specific product formation by maintaining a higher temperature throughout. For GC-rich targets, a two-step protocol at 68-72°C is often ideal.
Q8: How do I interpret a melt curve with multiple peaks after a SYBR Green multiplex assay? A: Multiple peaks typically indicate non-specific amplification or primer-dimer. This is unacceptable for multiplex SYBR Green assays where each target must be distinguished by Tm. You must re-design primers to improve specificity, increase annealing temperature, or switch to a probe-based detection (TaqMan) for that target.
Table 1: Effect of Additives on GC-Rich Target qPCR Performance
| Additive | Concentration Tested | Optimal Annealing/Extension Temp Shift (Δ) | Average ΔCq vs. Control | Recommended For |
|---|---|---|---|---|
| None (Control) | - | 0°C | 0.0 | Standard templates |
| DMSO | 3-5% (v/v) | -2 to -4°C | -3.5 | GC-rich, secondary structures |
| Betaine | 1-1.3 M | -1 to -2°C | -2.8 | High GC content, long amplicons |
| 7-deaza-dGTP | 50% substitution | +0 to +1°C | -4.1 | Extremely GC-rich (>80%) regions |
| Formamide | 1-3% (v/v) | -3 to -5°C | -2.2 | Alternative to DMSO |
Table 2: Multiplex PCR Optimization Parameters
| Optimization Step | Typical Range Tested | Key Performance Indicator (KPI) | Success Criteria |
|---|---|---|---|
| Primer Titration | 50 - 900 nM | Cq value, Amplification Efficiency | Cq < 30, Efficiency 90-110%, matched across targets |
| Probe Titration | 50 - 300 nM | Fluorescence (RFU) | High, clean RFU increase, no background rise |
| Annealing Temp | Tm(lowest pair) -5 to +2°C | Specificity (melt curve/gel), Cq | Single peak/band, lowest composite Cq |
| Master Mix Volume | 1.0x - 1.5x | Cq, Endpoint Fluorescence | No inhibition, robust signal |
Experimental Workflow Diagrams
Title: GC-Rich Target qPCR Optimization Workflow
Title: Simplex to Multiplex qPCR Conversion Steps
The Scientist's Toolkit: Research Reagent Solutions
| Item | Function in Optimization | Key Consideration |
|---|---|---|
| Hot-Start DNA Polymerase | Prevents non-specific amplification (primer-dimer) during reaction setup by requiring heat activation. | Essential for multiplex and high-sensitivity qPCR. |
| GC-Rich/Multiplex Optimized Master Mix | Contains specialized buffers, salts, and polymerase formulations to amplify difficult templates and multiple targets. | Choose based on template type (GC-rich) or assay complexity (multiplex). |
| PCR Additives (DMSO, Betaine) | Destabilize DNA secondary structures, lower effective Tm, improve polymerase processivity on complex templates. | Requires re-optimization of annealing temperature. Titrate to avoid inhibition. |
| dNTPs including 7-deaza-dGTP | Standard dNTPs for general PCR. 7-deaza-dGTP reduces base-pairing strength in GC-rich regions, aiding denaturation. | Partial substitution (e.g., 50:50 dGTP:7-deaza-dGTP) is often optimal. |
| Qubit Fluorometer & HS Assay Kits | Accurately quantifies low amounts of DNA template and primers prior to reaction setup. | Critical for robust standard curves and reproducible primer titration in multiplex. |
| Nuclease-Free Water | Solvent for primer/resuspension and reaction assembly. Free of RNases, DNases, and PCR inhibitors. | Do not substitute with DEPC-treated water meant for RNA work. |
| Optical qPCR Plates/Seals | Ensure consistent thermal conductivity and prevent well-to-well contamination and evaporation. | Use plates/seals recommended by your thermocycler manufacturer. |
Technical Support Center
Troubleshooting Guide & FAQs
Q1: Why is my PCR yield low despite using DMSO and betaine? A: This is often due to suboptimal Mg2+ concentration. DMSO and betaine alter DNA duplex stability, changing the optimal Mg2+ requirement. If Mg2+ is too low, polymerase activity is insufficient; if too high, non-specific binding increases. Solution: Perform a Mg2+ titration from 1.0 mM to 4.0 mM in 0.5 mM increments while keeping DMSO (e.g., 5%) and betaine (e.g., 1 M) constant.
Q2: I am getting non-specific bands. How can I adjust additives to improve specificity? A: Non-specific amplification indicates that the annealing temperature is too low for the current reaction conditions. Both DMSO and betaine lower the effective melting temperature (Tm) of primers. Solution: First, increase the annealing temperature by 2-3°C. If non-specificity persists, reduce DMSO concentration by 1% increments (do not exceed 10% total) or reduce betaine from a standard 1 M to 0.8 M. Ensure Mg2+ is not above 3.5 mM.
Q3: My reaction failed completely (no product). What is the first additive to check? A: Check DMSO concentration first. DMSO is a potent polymerase inhibitor at high concentrations. >10% v/v often leads to complete failure. Solution: Dilute the master mix to reduce DMSO to 3-6% range. If the problem continues, verify that betaine is not precipitating; warm the stock to 50°C and vortex before use.
Q4: How do I systematically optimize all three additives (DMSO, betaine, Mg2+) for a new assay? A: Use a staggered matrix optimization. First, fix Mg2+ at a standard 1.5 mM and titrate DMSO (0%, 3%, 5%, 7%) and betaine (0 M, 0.5 M, 1.0 M). Identify the best combo for yield. Then, titrate Mg2+ (1.0, 1.5, 2.0, 2.5, 3.0, 3.5 mM) with the chosen additive concentrations.
Table 1: Effect of Additives on Apparent Tm and Optimal Mg2+
| Additive & Concentration | ΔTm (°C)* | Recommended Mg2+ Adjustment | Typical Yield Impact |
|---|---|---|---|
| DMSO 3% (v/v) | -1.5 to -2.5 | +0.25 to +0.5 mM | Slight Increase |
| DMSO 5% (v/v) | -3.0 to -4.5 | +0.5 to +0.75 mM | Moderate Increase |
| DMSO 8% (v/v) | -5.0 to -7.0 | +0.75 to +1.0 mM | Variable, Risk of Inhibition |
| Betaine 0.5 M | -2.0 to -3.0 | +0.1 to +0.3 mM | Slight Increase |
| Betaine 1.0 M | -4.0 to -6.0 | +0.3 to +0.6 mM | Significant Increase for GC-rich |
| DMSO 5% + Betaine 1.0 M | -6.5 to -9.5 | +0.8 to +1.25 mM | Highest for Complex Templates |
*ΔTm relative to standard buffer with 1.5 mM Mg2+.
Table 2: Troubleshooting Additive Concentrations
| Problem | Suggested DMSO Adjustment | Suggested Betaine Adjustment | Suggested Mg2+ Adjustment |
|---|---|---|---|
| No Product | Reduce by 2-3% | Reduce to 0.5 M | Increase by 0.5 mM |
| High Background/Smear | Increase by 1% | Reduce by 0.2 M | Decrease by 0.25-0.5 mM |
| Primer-Dimer Formation | Increase by 1-2% | Keep at 1.0 M | Decrease by 0.5 mM |
| Low Yield, Specific Band | Increase by 1-2% | Increase to 1.0 M | Titrate (1.5-3.5 mM) |
Experimental Protocols
Protocol 1: Additive-Enhanced PCR Master Mix Formulation Objective: Prepare a 2X concentrated master mix for high-GC content amplification. Reagents: See "Scientist's Toolkit" below. Steps:
- In a nuclease-free tube, combine the following for a 1 mL 2X master mix:
- 200 μL 10X Polymerase Buffer (provided with enzyme)
- 160 μL 25 mM MgCl2 stock (Final [Mg2+] in 1X mix = 4.0 mM, allowing for additive adjustments)
- 40 μL 50% DMSO stock (Final [DMSO] in 1X mix = 2%)
- 400 μL 5M Betaine stock (Final [Betaine] in 1X mix = 2.0 M)
- 20 μL 10 mM dNTP mix
- 20 μL Polymerase (5 U/μL)
- 160 μL Nuclease-free H2O
- Mix gently by inversion and pulse-spin. Store on ice.
- For a 50 μL reaction: Combine 25 μL 2X master mix, primers, template, and H2O to 50 μL.
- Critical: Calculate the required annealing temperature (Ta) as: Ta = Tm(primer) - 5°C, where Tm is calculated without additive correction. The DMSO/betaine will effectively lower the Ta during cycling.
Protocol 2: Mg2+ Titration in the Presence of Fixed Additives Objective: Determine the optimal Mg2+ concentration when using 5% DMSO and 1 M Betaine. Steps:
- Prepare a base 2X master mix without MgCl2 and with fixed 10% DMSO and 4M Betaine stocks (so that final 1X is 5% and 1M).
- Prepare six 0.2 mL PCR tubes with 24 μL of this master mix.
- Add MgCl2 stock to each tube to create final 1X concentrations of: 1.0, 1.5, 2.0, 2.5, 3.0, and 3.5 mM. Adjust water volume accordingly.
- Add 1 μL template and primers to each tube.
- Run PCR with an annealing temperature 2°C below the calculated Tm.
- Analyze products by agarose gel electrophoresis. The band with highest intensity and minimal background indicates optimal [Mg2+].
Visualizations
Diagram 1: Additive Effects on DNA Denaturation & Annealing
Diagram 2: Optimization Workflow for Additive Master Mix
The Scientist's Toolkit: Research Reagent Solutions
| Item | Function in Optimization | Typical Stock Concentration | Notes |
|---|---|---|---|
| Molecular Biology Grade DMSO | Reduces secondary structure in GC-rich DNA by destabilizing base pairing. | 100% (anhydrous) | Use high purity, aliquot to avoid water absorption. Final conc. usually 3-10%. |
| Betaine (Glycine Betaine) | Homogenizes melting temps of AT and GC base pairs, aiding amplification of heterogeneous regions. | 5M in nuclease-free H2O | Filter sterilize. Warm to dissolve/prevent precipitation before use. |
| Magnesium Chloride (MgCl2) | Essential cofactor for DNA polymerase; concentration critically affects primer annealing, specificity, and yield. | 25 mM (or as provided with enzyme) | Most critical variable to titrate when additives change. |
| PCR Polymerase (High-Fidelity) | Enzyme for DNA synthesis. Some are more tolerant to additives than others. | 5 U/μL | Check manufacturer's guidelines for DMSO/betaine compatibility. |
| 10X Polymerase Buffer | Provides pH, salt, and sometimes Mg2+ baseline for reaction. | Provided with enzyme | May contain (NH4)2SO4, which can interact with betaine. |
| dNTP Mix | Building blocks for DNA synthesis. | 10 mM each | Constant concentration (0.2 mM each final) recommended during additive optimization. |
| GC-Rich Template & Primers | Test system for additive optimization. | Variable | Ideal for demonstrating additive effects. |
Solving Common Amplification Problems: A Troubleshooting Guide for Suboptimal Annealing
Troubleshooting Guides & FAQs
Q1: During my PCR, I see a smear of non-specific bands in addition to my target amplicon on the gel. Could my annealing temperature be too low? A: Yes, this is a common cause. A low annealing temperature reduces stringency, allowing primers to bind imperfectly to non-target sequences with partial complementarity. This leads to the amplification of multiple, unintended products. The optimal annealing temperature is typically 3–5°C below the primer melting temperature (Tm). An excessively low temperature (e.g., >5°C below Tm) significantly increases off-target binding. Begin by calculating your primer Tms precisely and perform a temperature gradient PCR to empirically determine the optimal temperature for your specific master mix and primers.
Q2: My gel shows a prominent primer-dimer band around 50-100 bp. How is this related to annealing temperature? A: Primer-dimers form when primers anneal to each other via complementary 3'-ends, often due to excess primers and low-stringency conditions. A low annealing temperature is a primary facilitator, as it allows these short complementary sequences to bind stably and be extended by the polymerase. Increasing the annealing temperature (often by just 2-4°C) can dramatically reduce or eliminate primer-dimer formation by preventing this cross-binding.
Q3: How do I systematically test if my annealing temperature is the problem? A: Perform a temperature gradient PCR. Set up a single master mix reaction and run it on a thermal cycler with a gradient block, testing a range of annealing temperatures (e.g., from 50°C to 68°C). Analyze all products on a high-percentage agarose gel (2-3%). The correct temperature yields a single, bright band of the expected size, with minimal to no non-specific bands or primer-dimer.
Q4: Besides temperature, what other factors in my master mix could cause these issues? A: While temperature is key, other factors interact with it:
- Excess Magnesium (Mg²⁺): Mg²⁺ is a cofactor for polymerase and stabilizes DNA duplexes. Too much can increase non-specific binding and primer-dimer, effectively mimicking a low-temperature effect.
- Primer Concentration: High primer concentrations promote primer-dimer formation and non-specific binding.
- Cycling Conditions: Too many cycles can amplify low-level artifacts.
- Primer Design: Poorly designed primers with self-complementarity are a root cause.
Experimental Protocols
Protocol 1: Annealing Temperature Gradient Optimization
Objective: To empirically determine the optimal annealing temperature for a primer pair.
- Calculate the theoretical Tm of both primers using your master mix provider's algorithm (often based on salt concentration).
- Prepare a standard 25 µL or 50 µL PCR reaction using your master mix, template, and primers.
- In your thermal cycler software, set the annealing step to a gradient spanning at least 10°C (e.g., from 50°C to 68°C).
- Run the PCR with your standard denaturation and extension steps.
- Analyze 5-10 µL of each reaction on a high-resolution agarose gel (2-3%).
- Identify the temperature that produces the strongest target band with the fewest artifacts.
Protocol 2: Testing for Primer-Dimer & Non-Specific Amplification
Objective: To confirm the source of non-target bands.
- Run a No-Template Control (NTC) alongside your test reactions. Use the same master mix and primers but replace template DNA with nuclease-free water.
- Run a No-Primer Control (optional) to check for contaminant DNA.
- If primer-dimer appears in the NTC, it confirms primers are self-annealing independent of the template. The solution requires optimization of annealing temperature, primer concentration, or primer redesign.
- If non-specific bands appear only with the template, they are amplification artifacts from genomic DNA. Solutions include increasing annealing temperature, adjusting Mg²⁺ concentration, or using a hot-start polymerase.
Data Presentation
Table 1: Effect of Annealing Temperature on PCR Specificity
| Annealing Temp (°C) | Target Band Intensity | Non-Specific Bands | Primer-Dimer Band | Interpretation |
|---|---|---|---|---|
| 50.0 | Weak | Many, strong | Very Strong | Temperature far too low; high non-specificity. |
| 55.0 | Moderate | Several | Strong | Temperature too low; requires optimization. |
| 58.0 | Strong | Few, faint | Moderate | Near optimal; minor adjustments may help. |
| 60.0 | Very Strong | None | Very Faint | Optimal temperature; high specificity. |
| 62.0 | Strong | None | None | Good, but yield may begin to decrease. |
| 65.0 | Weak | None | None | Temperature likely too high; poor primer binding. |
Table 2: Key Master Mix Components Influencing Specificity
| Component | Typical Concentration | Function | Effect if Too High | Effect if Too Low |
|---|---|---|---|---|
| MgCl₂ | 1.5 - 3.0 mM | Polymerase cofactor, stabilizes nucleic acid duplexes. | Increases non-specific binding & primer-dimer. | Reduces polymerase activity, lowers yield. |
| dNTPs | 0.2 mM each | Building blocks for DNA synthesis. | Can increase misincorporation; chelates Mg²⁺. | Reaction fails due to lack of substrates. |
| Primers | 0.1 - 0.5 µM each | Provide sequence specificity for amplification. | Increases primer-dimer & non-specific binding. | Poor efficiency and low yield. |
| Polymerase | 0.5 - 2.5 U/50 µL | Enzymatically synthesizes new DNA strands. | Can amplify artifacts; increases cost. | Insufficient product yield. |
The Scientist's Toolkit: Research Reagent Solutions
| Item | Function in Optimization |
|---|---|
| Hot-Start DNA Polymerase | Remains inactive until initial denaturation step, preventing primer-dimer formation and non-specific extension during reaction setup. |
| Gradient Thermal Cycler | Allows a single experiment to test multiple annealing temperatures simultaneously, crucial for rapid optimization. |
| High-Fidelity PCR Master Mix | Contains polymerases with proofreading activity to reduce misincorporation errors, often optimized for higher specificity. |
| PCR Enhancers/Additives (e.g., DMSO, Betaine) | Can help reduce secondary structure in template/primer, improving specificity and yield for difficult targets. |
| qPCR/SYBR Green Master Mix | Enables real-time monitoring of amplification; primer-dimer formation is indicated by early, non-exponential amplification in NTCs. |
Visualizations
Troubleshooting Non-Specific PCR Results
Temperature Gradient PCR Workflow
Troubleshooting Guide: Annealing Temperature Issues
FAQs
Q1: How do I know if my annealing temperature is too high? A1: Signs include no product, very faint bands, or non-specific bands on a gel. A temperature too high prevents primer binding, while a temperature slightly too low can cause primer-dimer or non-specific amplification.
Q2: What is the first step if I suspect the annealing temperature is incorrect? A2: Perform a temperature gradient PCR. This experiment tests a range of annealing temperatures (typically ± 5°C from the calculated Tm) in a single run to identify the optimal temperature for your specific primer-template combination.
Q3: How do I calculate a starting annealing temperature? A3: Use the formula: Ta = 0.3 x Tm(primer) + 0.7 x Tm(product) – 14.9, where Tm is the melting temperature. Most modern protocols start with the lower Tm of the primer pair minus 3-5°C.
Q4: Can master mix composition affect the optimal annealing temperature? A4: Yes. Components like MgCl2 concentration, salt additives, and polymerase type (e.g., standard vs. hot-start) can influence primer-template binding stability. Always follow the manufacturer's guidelines for your specific master mix.
Q5: Are there other causes of low yield besides annealing temperature? A5: Yes. Common alternatives include:
- Primer degradation or design issues.
- Incorrect template quality, quantity, or denaturation.
- Inhibitors in the reaction.
- Incorrect extension time or temperature.
- Master mix component failure.
Key Experiments & Protocols
Experiment 1: Annealing Temperature Gradient PCR
Objective: Empirically determine the optimal annealing temperature for a primer pair.
Protocol:
- Prepare a standard PCR master mix according to your optimized protocol.
- Aliquot the master mix into a PCR tube strip or plate.
- Set your thermal cycler to a gradient across the block (e.g., from 55°C to 70°C).
- Program the cycler with a denaturation step (95°C for 30 sec), followed by the gradient annealing step (30 sec), and an extension step (72°C for 1 min/kb) for 30-35 cycles.
- Analyze all reactions on the same agarose gel.
Expected Data Table:
| Gradient Temp (°C) | Product Yield | Specificity | Recommended Action |
|---|---|---|---|
| 55.0 | High | Low (multiple bands) | Increase temperature |
| 57.5 | High | Medium (few non-specific bands) | Slight increase may help |
| 60.0 | High | High (single, clear band) | Optimal Temperature |
| 62.5 | Medium | High | Acceptable, but yield may be suboptimal |
| 65.0 | Low/None | High | Temperature too high |
Experiment 2: Two-Step vs. Three-Step PCR
Objective: Evaluate if a simplified two-step protocol (combining annealing/extension) improves yield for primers with higher Tm.
Protocol:
- Three-Step: Denaturation (95°C), Annealing (gradient as in Exp. 1), Extension (68-72°C).
- Two-Step: Denaturation (95°C), Combined Annealing/Extension (60-68°C, typically 5-10°C above primer Tm).
- Run both protocols with the same master mix and template.
- Compare yield and specificity on a gel.
Comparative Data Table:
| PCR Protocol | Annealing/Extension Temp | Cycle Time | Yield (ng/µL) | Specificity | Best For |
|---|---|---|---|---|---|
| Three-Step | Ta = 60°C, Ext = 72°C | Longer | 45.2 | High | Standard primers, complex templates |
| Two-Step | Combined = 65°C | Shorter | 48.1 | High | Primers with Tm > 60°C, simple amplicons |
Visualizations
Title: Troubleshooting PCR Yield Based on Gel Results
Title: Standard Three-Step PCR Thermal Cycling Workflow
The Scientist's Toolkit: Research Reagent Solutions
| Item | Function in Annealing Optimization |
|---|---|
| Hot-Start DNA Polymerase | Prevents non-specific amplification and primer-dimer formation during reaction setup by requiring heat activation, allowing for higher specificity at optimal Ta. |
| MgCl₂ Solution | Critical co-factor for polymerase activity. Concentration affects primer-template binding (Tm) and must be optimized alongside temperature. |
| dNTP Mix | Provides nucleotide substrates. Imbalanced or degraded dNTPs can reduce yield, mimicking temperature-related failure. |
| PCR Buffer (with Additives) | Stabilizes pH and reaction conditions. Some buffers contain enhancers (e.g., DMSO, betaine) that help lower effective Tm for difficult templates. |
| Temperature Gradient Thermal Cycler | Essential hardware for running annealing temperature gradient experiments across a single block. |
| Standard DNA Ladder & Gel Stain | For accurate analysis of PCR product size, yield, and specificity post-amplification. |
| qPCR/SYBR Green Master Mix | For real-time monitoring of amplification efficiency at different temperatures, providing quantitative data beyond gel analysis. |
Optimizing for Touchdown and Step-Down PCR Protocols
Troubleshooting Guide & FAQs
Q1: My touchdown PCR yields non-specific products or a smear on the gel. What is the primary cause and how do I fix it? A: The most common cause is an insufficient starting annealing temperature (Ta) in the touchdown program. The initial cycles are not stringent enough. Fix: Increase the starting Ta by 2-5°C. Ensure the temperature decrement per cycle is no larger than 1°C. Also, verify primer design (length >18 bp, GC content 40-60%) and optimize MgCl₂ concentration.
Q2: During step-down PCR, I get no product. What should I check first? A: First, confirm that the final, lowest annealing temperature in your step-down protocol is at or below the calculated Tm of your primer pair. If the final phase is still too stringent, no extension will occur. Fix: Redesign your step-down blocks so the final block uses an annealing temperature 2-3°C below the calculated Tm.
Q3: How do I determine the optimal number of cycles for each phase of a touchdown protocol? A: The number of cycles in the touchdown phase should allow sufficient product accumulation from the specific annealing events. A general guideline is provided in the table below.
Q4: My protocol optimization is inconsistent across different master mixes. Why? A: Different commercial master mixes contain varying concentrations of MgCl₂, additives (like DMSO or betaine), and buffer compositions. These directly impact the effective annealing temperature and primer stringency. Always re-optimize cycle parameters when switching master mixes.
Data Presentation: Key Optimization Parameters
Table 1: Comparative Parameters for Touchdown vs. Step-Down PCR
| Parameter | Touchdown PCR | Step-Down PCR | Optimization Tip |
|---|---|---|---|
| Annealing Temp Range | Continuous linear decrease (e.g., 70°C→50°C) | Discrete blocks (e.g., 3 cycles at 68°C, 3 at 65°C, 30 at 62°C) | Start 10-15°C above Tm for TD; start 5-10°C above for SD. |
| Typical Decrement | 0.5-1.0°C per cycle | 2-5°C per block | Smaller decrements increase specificity but prolong runtime. |
| Cycles in High-Stringency Phase | 10-20 cycles during decrement | 2-5 cycles per high-T block | More cycles at high Ta improve specificity but risk low yield. |
| Final Phase Cycles | 10-20 cycles at final, lowest Ta | 20-30 cycles at final, lowest Ta | Ensures sufficient amplification of target product. |
| Best Use Case | Primer sets with uncertain Tm or high risk of off-target binding | Routine amplification with well-characterized primers needing slight optimization | TD for novel targets; SD for lab-standard assays. |
Table 2: Effect of Master Mix Additives on Effective Annealing Temperature
| Additive | Typical Concentration | Effect on Ta | Recommended Protocol Adjustment |
|---|---|---|---|
| DMSO | 3-10% v/v | Lowers effective Ta by up to 6°C. | Reduce starting Ta in TD/SD by 3-5°C. |
| Betaine | 1-1.5 M | Equalizes GC/AT stability, can raise effective Ta for GC-rich targets. | For GC-rich (>60%) targets, start TD/SD 2-3°C higher. |
| MgCl₂ (additional) | 0.5-2.0 mM above base mix | Decreases stringency, lowers effective Ta. | Increase starting Ta by 0.5-1°C per 0.5 mM added. |
| Formamide | 1-5% v/v | Destabilizes dsDNA, lowers effective Ta. | Reduce starting Ta by 2-4°C. |
Experimental Protocols
Protocol 1: Standard Touchdown PCR Optimization (for a primer pair with calculated Tm of 55°C)
- Prepare Master Mix: 1X PCR buffer, 200 µM dNTPs, 1.5 mM MgCl₂, 0.5 µM each primer, 1.25 U DNA polymerase, template DNA (10-100 ng), nuclease-free water to 50 µL.
- Initial Denaturation: 95°C for 3 minutes.
- Touchdown Phase: 15 cycles of:
- Denaturation: 95°C for 30 seconds.
- Annealing: Start at 68°C (10°C above Tm) for 30 seconds, decreasing by 0.5°C per cycle.
- Extension: 72°C for 1 minute/kb.
- Final Amplification Phase: 25 cycles of:
- 95°C for 30 seconds.
- 55°C (estimated Tm) for 30 seconds.
- 72°C for 1 minute/kb.
- Final Extension: 72°C for 5 minutes.
- Hold: 4°C.
Protocol 2: Step-Down PCR for Routine Amplification (for a primer pair with optimal Ta ~60°C)
- Prepare Master Mix: As in Protocol 1.
- Initial Denaturation: 95°C for 3 minutes.
- Step-Down Phase 1: 5 cycles at: 95°C for 30s, 65°C for 30s, 72°C for 1 min/kb.
- Step-Down Phase 2: 5 cycles at: 95°C for 30s, 62°C for 30s, 72°C for 1 min/kb.
- Final Amplification Phase: 25 cycles at: 95°C for 30s, 60°C for 30s, 72°C for 1 min/kb.
- Final Extension & Hold: As in Protocol 1.
Visualizations
Touchdown PCR Workflow
Step-Down PCR Block Cycle Design
Factors in PCR Annealing Temperature Optimization
The Scientist's Toolkit: Research Reagent Solutions
Table 3: Essential Reagents for PCR Protocol Optimization
| Item | Function in Optimization | Key Consideration |
|---|---|---|
| High-Fidelity DNA Polymerase | Provides accurate replication with low error rates, essential for cloning post-optimization. | Check buffer compatibility with additives. |
| MgCl₂ Solution (Separate) | Allows precise titration of Mg²⁺ concentration, a critical cofactor that directly affects primer annealing and stringency. | Optimize in 0.5 mM increments from 1.0-4.0 mM. |
| PCR Additives Kit (DMSO, Betaine, Formamide) | Helps amplify difficult templates (GC-rich, secondary structure) by modifying DNA melting behavior. | Test singly and in combination at recommended concentrations. |
| Thermostable dNTP Mix | Provides balanced nucleotides for efficient extension; unstable dNTPs can cause inconsistent results. | Use fresh, high-quality aliquots. |
| Gradient Thermal Cycler | Enables empirical determination of optimal annealing temperature by running multiple Ta simultaneously. | Critical for initial primer testing before TD/SD design. |
| Standardized DNA Template (Control Plasmid) | Provides a consistent, known-concentration template to isolate variables during master mix/protocol testing. | Use at a range of concentrations (1 pg – 100 ng). |
| High-Resolution Gel Agarose | Allows clear visualization of specific vs. non-specific products to assess protocol stringency and yield. | Use 2-4% agarose for products <1 kb. |
Adapting to Different Polymerase Formulations and Buffer Systems
Welcome to the Technical Support Center for polymerase and buffer optimization. This resource is designed to support researchers within the broader thesis context of Optimizing annealing temperature for master mix research, providing targeted troubleshooting for adapting protocols to diverse commercial enzyme systems.
Frequently Asked Questions (FAQs) & Troubleshooting
Q1: My PCR yield dropped significantly when I switched to a new high-fidelity master mix. What should I check first? A: The most common cause is an annealing temperature mismatch. High-fidelity polymerases often have different buffer compositions (e.g., higher pH, different salt concentrations) which alter the effective annealing temperature. Action: Perform a gradient PCR annealing temperature optimization, spanning at least ±5°C from your standard protocol. Refer to Table 1 for typical adjustments.
Q2: I see nonspecific bands when using a hot-start polymerase with my existing protocol. How can I improve specificity? A: Hot-start formulations require complete enzyme activation. Insufficient initial denaturation or a rapid ramp rate to the annealing step can cause "polymerase jump" and primer-dimer artifacts. Action: Ensure the initial activation step matches the manufacturer's recommendation (usually 95-98°C for 30-120 seconds). Implement a two-step or touch-down PCR protocol if issues persist.
Q3: How do I adapt a protocol from a standard Taq polymerase to a GC-rich buffer system? A: GC-rich buffers often contain additives like DMSO, betaine, or glycerol, which lower the effective melting temperature (Tm) of the template. Action: Recalculate primer Tm using the manufacturer's recommended formula (as it may differ from standard calculations). Start by reducing your annealing temperature by 2-4°C and follow the workflow in Diagram 1.
Q4: My qPCR efficiency is suboptimal with a new universal master mix. What steps can I take? A: qPCR efficiency depends on precise buffer-polymerase-primer compatibility. Action: 1) Validate primer specificity with a melt curve analysis. 2) Perform a primer/ probe concentration titration (see Protocol 1). 3) Run a standard curve over 5-6 logs of template dilution to calculate exact efficiency. Target efficiency should be 90-105%.
Data Presentation
Table 1: Common Polymerase Buffer Systems and Annealing Temperature Adjustments
| Polymerase Type | Common Buffer Additives | Typical ∆Ta vs. Standard Taq* | Primary Use Case |
|---|---|---|---|
| Standard Taq | None (simple KCl buffer) | 0°C (Baseline) | Routine cloning, genotyping |
| High-Fidelity | Often includes MgSO₄ | +2 to +4°C | Cloning for sequencing, mutagenesis |
| GC-Rich | DMSO, Betaine, Glycerol | -3 to -6°C | High GC-content templates (>65%) |
| Hot-Start | Antibody or chemical inhibitors | 0 to +2°C | High specificity, multiplex PCR |
| Fast-Cycling | Proprietary enhancers | +1 to +3°C | Rapid diagnostics, high-throughput |
∆Ta: Recommended change in annealing temperature relative to a standard Taq protocol.
Table 2: Troubleshooting Matrix for Common Symptoms
| Symptom | Possible Cause (Buffer/Polymerase Related) | Suggested Correction |
|---|---|---|
| No Product | Mg²⁺ concentration too low, incorrect activation | Titrate MgCl₂/MgSO₄ (1-4 mM), verify thermal cycler block calibration |
| Smearing/Gel Background | Mg²⁺ concentration too high, enzyme overload | Reduce Mg²⁺, reduce polymerase units by 25%, increase annealing temp |
| Primer-Dimers | Buffer favors 3'-extension of mismatches | Use hot-start formulation, increase annealing temp, use touchdown PCR |
| Low Yield in qPCR | Inefficient polymerization/detection chemistry | Optimize primer concentration (Protocol 1), verify probe compatibility |
Experimental Protocols
Protocol 1: Primer Concentration Optimization for qPCR Master Mixes Objective: To determine the optimal primer pair concentration for a new qPCR master mix to ensure >90% amplification efficiency.
- Prepare a SYBR Green master mix according to manufacturer instructions.
- Create a matrix of forward/reverse primer concentrations: 50 nM, 100 nM, 200 nM, 300 nM, and 500 nM.
- Use a fixed amount of cDNA or DNA template (within the linear range).
- Run qPCR with a standardized cycling protocol.
- Analyze the standard curve (Ct vs. log template dilution) for each concentration combination. Select the lowest concentration pair that yields an efficiency between 90-105% and a single peak in melt curve analysis.
Protocol 2: Annealing Temperature Gradient for New Polymerase Formulation Objective: Empirically determine the optimal annealing temperature (Ta) when adapting a protocol to a new polymerase.
- Set up a standard 25µL PCR reaction with your target template and primers.
- On a thermal cycler with a gradient function, set the annealing step to a range spanning at least 8°C (e.g., 55°C to 63°C).
- Keep all other cycling parameters as per the new polymerase's core recommendations.
- Analyze products on an agarose gel. The optimal Ta is the highest temperature that yields a strong, specific band.
Mandatory Visualization
Diagram 1: Workflow for Adapting a Protocol to a New Polymerase
Diagram 2: Key Factors Affecting Annealing in Different Buffers
The Scientist's Toolkit: Research Reagent Solutions
| Item | Function in Adaptation/Optimization |
|---|---|
| Gradient Thermal Cycler | Essential for empirical determination of optimal annealing temperature across a range in a single run. |
| MgCl₂/MgSO₄ Stock Solutions | For titrating magnesium concentration (1-4 mM final) to fine-tive polymerase activity and specificity. |
| PCR Additives (e.g., DMSO, Betaine) | Used to overcome secondary structures in complex templates (GC-rich, amplicon) when adapting a protocol. |
| Standardized DNA Template (Control Plasmid) | A well-characterized amplicon to serve as a positive control when testing new master mixes. |
| High-Sensitivity DNA Binding Dye/ Gel Stain | For accurate visualization of low-yield or smeared products to diagnose buffer-specific issues. |
| Nuclease-Free Water | Critical for consistent reaction assembly; impurities can vary between buffer systems. |
| dNTP Mix | Quality and concentration (typically 200µM each) must be consistent when comparing polymerases. |
Correcting for Plate Uniformity Issues in Thermal Cyclers
Troubleshooting Guides & FAQs
Q1: My endpoint PCR results show inconsistent band intensities across the plate, suggesting a thermal uniformity problem. How can I diagnose this?
A: This is a classic sign of thermal gradient non-uniformity. Perform a calibration experiment using a dsDNA intercalating dye (e.g., SYBR Green I) and a standardized DNA sample with a known, sharp melting temperature (Tm). Run a melt curve analysis program across all wells. Variations in the observed Tm across the plate directly indicate temperature offsets. A deviation >0.5°C between edge and center wells is typically considered problematic for high-precision applications like annealing temperature optimization.
Q2: What experimental protocol can I use to quantify the thermal gradient across my block?
A: Use a temperature verification protocol with calibrated thermistors or a thermal gradient dye assay.
Protocol: Thermal Gradient Dye Assay
- Prepare Master Mix: Create a master mix containing 1X SYBR Green I dye, 50 mM Tris-HCl (pH 8.3), and 75 mM KCl. This solution's fluorescence exhibits a predictable, sharp decrease with increasing temperature.
- Plate Setup: Aliquot 20 µL of the master mix into every well of a 96-well PCR plate. Seal tightly.
- Run Melt Curve: Place the plate in the thermal cycler. Run a program: 1. Hold at 70°C for 2 min. 2. Perform a melt curve from 70°C to 85°C with 0.1°C increments and a 2-second hold per step, while continuously measuring fluorescence.
- Data Analysis: For each well, calculate the temperature at which fluorescence drops to 50% of its maximum (the apparent Tm). Map these values across the plate layout.
Table 1: Example Results from a Thermal Gradient Dye Assay
| Plate Region | Average Apparent Tm (°C) | Standard Deviation (°C) | Delta from Center Well (°C) |
|---|---|---|---|
| Center Wells | 78.2 | 0.1 | 0.0 (reference) |
| Edge Wells | 77.6 | 0.3 | -0.6 |
| Corner Wells | 77.4 | 0.4 | -0.8 |
Q3: How can I correct for block non-uniformity when running my annealing temperature gradient experiments?
A: Implement a spatial correction by mapping the actual temperature of each well. Once you have characterized the block's thermal profile (from Q2), you can apply an offset when setting up your annealing temperature gradient. If, for example, well A1 runs 0.8°C cooler than the center, and your desired low annealing temperature for the gradient is 55°C, program the instrument's block setpoint for that well to be 55.8°C.
Q4: Are there best practices in plate setup to mitigate the effects of non-uniformity?
A: Yes. Utilize a block layout randomization strategy for critical experiments. When setting up replicates for a single annealing condition, distribute them across different plate regions (e.g., center, edge, corner) rather than grouping them. This prevents confounding spatial thermal effects with experimental treatment effects. During data analysis, you can then normalize results based on the characterized thermal map.
Q5: What routine maintenance can prevent thermal uniformity from degrading?
A:
- Regular Calibration: Schedule professional calibration annually or per manufacturer guidelines.
- Block Cleaning: Keep the silver block clean and free of dust, adhesive, or spilled reagents using isopropyl alcohol.
- Secure Sealing: Always use optically clear, adhesive seals appropriate for your thermal cycler to ensure consistent thermal contact.
- Pre-heat the Lid: Always enable the heated lid function and allow it to reach setpoint before the run begins to minimize evaporative cooling and well-to-well condensation differences.
Experimental Protocol: Validating Annealing Temperature Uniformity for Master Mix Optimization
Objective: To empirically determine the optimal annealing temperature (Ta) for a novel PCR master mix, correcting for instrument thermal non-uniformity.
Procedure:
- Thermal Block Mapping: First, execute the Thermal Gradient Dye Assay (described in Q2) to generate a correction map for your specific thermal cycler.
- Gradient PCR Setup:
- Design a primer-template system with a calculated Ta of ~60°C.
- Prepare a single master mix containing all components (buffer, novel enzyme, dNTPs, MgCl2, primers, template).
- Aliquot the master mix across a full plate.
- Program a gradient PCR. Apply spatial corrections from Step 1 to the programmed block temperatures so that the actual experienced temperature in each well corresponds to the intended gradient range (e.g., 55°C to 65°C in 0.5°C increments).
- Analysis: Run products on an agarose gel. For each actual temperature, quantify amplicon yield and specificity. The optimal Ta is defined as the temperature producing the highest yield of the specific product without non-specific bands.
Table 2: Key Research Reagent Solutions
| Reagent/Material | Function in Experiment |
|---|---|
| SYBR Green I Dye | Fluorescent reporter for thermal melt assays; indicates solution temperature via fluorescence quenching. |
| Standardized DNA (e.g., λ DNA) | Provides a consistent, sharp melting transition for block calibration. |
| Validated Primer/Template Set | Control system for annealing temperature gradient experiments. |
| High-Quality Sealant Film | Ensures uniform thermal contact and prevents evaporation and cross-contamination. |
| Calibrated External Thermistor | Gold-standard for independent verification of block temperature (used in manufacturer service). |
Title: Workflow for Correcting Thermal Uniformity in Ta Optimization
Title: Example Thermal Map of a 96-Well Block
Ensuring Robustness: Validation Strategies and Comparative Analysis of Optimization Techniques
Technical Support Center
Troubleshooting Guides & FAQs
Q1: My qPCR amplification curves are inconsistent between replicates when testing annealing temperatures. What could be the cause? A: Inconsistent replicates are often due to pipetting errors or inadequate mixing of the master mix. Ensure the master mix is vortexed thoroughly and spun down before aliquoting. Use calibrated pipettes and tips designed for high-viscosity liquids. Manual pipetting of small reagent volumes (< 2 µL) is a major source of variance; consider using a digital micro-pipette or preparing a larger master mix volume to minimize error.
Q2: I observed nonspecific amplification or primer-dimer formation in my no-template controls (NTCs). How do I address this within the validation framework? A: This indicates a need for higher annealing stringency or master mix optimization.
- Sensitivity Test: Perform a gradient PCR (e.g., 55°C to 65°C) using only the master mix with primers and NTCs. Identify the temperature that eliminates nonspecific products.
- Reagent Solution: Consider switching to a "hot-start" polymerase formulation, which is standard in most modern master mixes, to inhibit polymerase activity at room temperature and reduce primer-dimer artifacts.
- Protocol Adjustment: Ensure your thermal cycler lid is heated to 105°C to prevent sample condensation and evaporation.
Q3: How do I determine if a change in Ct value between annealing temperatures is statistically significant? A: You must incorporate replicate analysis and statistical testing into your validation framework.
- Protocol: For each annealing temperature (e.g., 58°C, 60°C, 62°C), run a minimum of 3-6 technical replicates per sample.
- Analysis: Perform an Analysis of Variance (ANOVA) on the Ct values across the different temperature conditions. A p-value < 0.05 suggests a statistically significant effect of annealing temperature on amplification efficiency.
Q4: My experiment cannot be reproduced by a colleague using the same protocol and reagents. What are the key checklist items to verify? A: Reproducibility failures often stem from undocumented variables. Establish this checklist:
- Equipment Calibration: Verify the calibration of both pipettes and the thermal cycler block. A 1°C gradient bias can significantly impact results.
- Reagent Lot Number: Document the lot numbers for the master mix, primers, and template. Performance can vary between lots.
- Data Analysis Threshold: Ensure identical baseline and threshold settings are applied in the qPCR analysis software for both data sets.
Q5: How sensitive is my assay to small variations in annealing temperature? How do I test this? A: Conduct a sensitivity analysis around your optimal annealing temperature (Ta).
- Protocol: Design an experiment testing a narrow temperature gradient (e.g., Ta - 1°C, Ta, Ta + 1°C).
- Metric: Calculate the Amplification Efficiency (E) for each temperature using a standard dilution curve. The temperature window where E remains between 90-110% (ideal is 100%) defines your assay's robustness.
Q6: What are the critical parameters to document for full reproducibility of my annealing temperature optimization study? A: Adhere to the MIQE guidelines (Minimum Information for Publication of Quantitative Real-Time PCR Experiments). Key parameters include:
- Complete master mix composition (including brand, catalog #, lot #, and final concentrations of all components).
- Thermal cycler manufacturer, model, and software version.
- Exact thermal cycling protocol with ramp rates.
- qPCR plate seal type.
- Full data analysis parameters (software, baseline, threshold method).
Data Presentation
Table 1: Sensitivity of Amplification Efficiency to Annealing Temperature Variation
| Annealing Temperature (°C) | Mean Amplification Efficiency (E) | % CV of Ct (n=6) | Mean Ct Value (Target Gene) | NTC Result |
|---|---|---|---|---|
| 58.0 | 87% | 2.8% | 24.1 | Positive |
| 59.5 | 98% | 1.5% | 23.7 | Negative |
| 60.0 | 101% | 1.2% | 23.5 | Negative |
| 60.5 | 99% | 1.3% | 23.6 | Negative |
| 62.0 | 92% | 2.1% | 24.0 | Negative |
CV: Coefficient of Variation; NTC: No-Template Control
Table 2: Reproducibility Assessment Between Two Experimental Runs
| Parameter | Run 1 (User A) | Run 2 (User B) | % Difference |
|---|---|---|---|
| Optimal Ta (from Gradient) | 60.2°C | 60.0°C | 0.33% |
| Efficiency at Optimal Ta | 100.5% | 99.8% | 0.70% |
| Mean Ct (10 ng/µL sample) | 23.4 | 23.6 | 0.85% |
Experimental Protocols
Protocol 1: Annealing Temperature Gradient for Master Mix Validation
- Prepare a single, large-volume master mix containing buffer, dNTPs, hot-start polymerase, primers, and nuclease-free water according to the manufacturer’s instructions.
- Aliquot the master mix into individual PCR tubes or a plate.
- Add an equal amount of template DNA to each reaction. Include a minimum of three No-Template Controls (NTCs).
- Program the thermal cycler with a gradient function across the block (e.g., from 55°C to 65°C) during the annealing step of the cycling protocol.
- Run the qPCR. Analyze the results for amplification efficiency (via standard curve), specificity (melt curve analysis), and consistency of Ct values across replicates.
Protocol 2: Inter-Run Reproducibility Testing
- Reagent Alignment: Two users (A & B) use aliquots from the same batch of master mix, primers, and template stock.
- Independent Setup: Each user independently prepares their reactions following the same written protocol at different workstations.
- Equipment: Reactions are run on the same model of thermal cycler, but on two different instruments.
- Blinded Analysis: A third party analyzes the resulting data using a pre-defined, standardized analysis protocol.
- Comparison: Key output parameters (Optimal Ta, Efficiency, Ct values) are compared statistically (e.g., using a t-test).
Mandatory Visualization
Diagram 1: Validation Framework Workflow for qPCR Annealing Optimization
Diagram 2: Factors Influencing qPCR Reproducibility
The Scientist's Toolkit: Research Reagent Solutions
Table 3: Essential Materials for Annealing Temperature Optimization
| Item | Function in Validation | Key Consideration |
|---|---|---|
| Hot-Start qPCR Master Mix | Provides buffer, enzymes, dNTPs. Hot-start mechanism reduces primer-dimer formation, critical for sensitivity tests. | Choose a mix with proven robustness and consistent lot-to-lot performance. |
| Nuclease-Free Water | Reconstitutes and dilutes primers and samples. Prevents RNase/DNase contamination that can degrade templates. | Use certified nuclease-free water, not DEPC-treated. |
| Optical qPCR Plates & Seals | Holds reactions and allows for fluorescence detection during cycling. | Use seals designed for high-temperature cycling to prevent evaporation and well-to-well contamination. |
| Calibrated Micro-pipettes | Ensures accurate and precise liquid handling for master mix assembly. | Regular calibration (every 3-6 months) is mandatory for reproducibility. |
| Digital/Electronic Pipette | Highly recommended for dispensing the master mix itself. Dramatically reduces inter-operator variability. | Essential for high-throughput or critical reproducibility studies. |
| Standardized DNA Template | A stable, high-quality DNA sample used as a positive control and for generating standard curves. | Aliquoted and stored at -20°C or -80°C to prevent freeze-thaw degradation. |
| Primer Stocks (100 µM, lyophilized) | Specific oligonucleotides that define the amplified target. | Resuspend in nuclease-free water, make small working aliquots to avoid contamination. |
Technical Support Center
Troubleshooting Guides & FAQs
Q1: In Gradient PCR, I get strong bands at one end of the thermal block but no amplification in other wells. What is the likely cause and how do I fix it? A: This indicates the true optimal annealing temperature (Ta) lies outside your tested gradient range. The gradient may be miscalibrated or too narrow. Fix: 1) Verify thermal block calibration with an external probe. 2) Widen the gradient range (e.g., from 55°C–70°C to 50°C–75°C). 3) Ensure the PCR master mix is thoroughly mixed before aliquoting into the gradient block to eliminate variation. 4) Re-center your gradient around the predicted primer Tm using a reliable calculation method (e.g., NN method).
Q2: When setting up a Touchdown PCR protocol, how do I determine the starting annealing temperature and the number of cycles per step? A: The starting Ta should be 5–10°C above the calculated Tm of your primers. A typical protocol decreases the Ta by 1°C every 1–2 cycles until it reaches the "touchdown" Ta, which is 2–5°C below the final calculated Tm. For a robust assay, use 2 cycles per step. For example, for primers with a Tm of 60°C: Start at 70°C for 2 cycles, then 69°C for 2 cycles, continuing down to 58°C. Then, run 20–25 cycles at the final 58°C.
Q3: My Universal PCR Master Mix, designed to work at a standard 60°C annealing temperature, yields non-specific products. How can I optimize without changing the master mix? A: You can modify the cycling conditions. 1) Implement a 2-step PCR protocol if your primers allow (combine annealing/extension at 68–72°C). 2) Add a hot start step by holding the reaction at 95°C for 5–10 minutes before cycling to increase specificity. 3) Adjust MgCl₂ concentration (if your master mix allows supplementation)—increasing it can increase specificity in some systems. 4) Reduce primer concentration to 0.1–0.3 µM each.
Q4: Touchdown PCR is still producing primer-dimers. What should I check? A: Primer-dimers often form at lower temperatures. 1) Increase your final touchdown Ta by 2–3°C. 2) Shorten the extension time to prevent spurious early-cycle products from amplifying. 3) Review primer design for complementarity, especially at the 3' ends. 4) Ensure reagent and template quality; degraded template can exacerbate primer-dimer formation.
Q5: When comparing methods, my Gradient PCR results show optimal Ta differs from the calculated Tm. Which should I trust for subsequent experiments? A: Always trust the empirical result from the gradient. Primer Tm calculations are predictions based on salt and primer concentration. The optimal Ta identified by the gradient experiment is the correct temperature for your specific reaction conditions and should be used for standard PCR or as the final "touchdown" temperature in a TD-PCR protocol.
Quantitative Data Comparison
Table 1: Key Parameter Comparison of PCR Annealing Optimization Methods
| Parameter | Gradient PCR | Touchdown PCR (TD-PCR) | Universal Temperature PCR |
|---|---|---|---|
| Primary Purpose | Empirical determination of optimal Ta. | Increase specificity; reduce optimization time. | High-throughput consistency; ease of use. |
| Typical Annealing Temp Range | Wide (e.g., 50–70°C) across a single block. | High-to-low (e.g., 70°C → 58°C) over cycles. | Fixed (often 60°C or 58–62°C). |
| Cycle Structure | Constant Ta for all cycles. | Incrementally decreasing Ta per step. | Constant Ta for all cycles. |
| Specificity | High (when optimal Ta is identified). | Very High (favors specific early annealing). | Moderate to Low (primer-design dependent). |
| Success Rate with Sub-Optimal Primers | Low | High | Very Low |
| Time to Optimization | Moderate (1-2 runs) | Fast (minimal pre-optimization needed) | Instant (no optimization) |
| Best For | Primer validation; exact Ta determination. | Novel targets; degenerate primers; multiplex. | Routine assays with validated primers. |
Table 2: Experimental Outcomes from a Comparative Study
| Method | Optimal Ta Identified | Specificity Score (1-5) | Yield (ng/µL) | Time to Result (hrs) |
|---|---|---|---|---|
| Gradient PCR | 64.5°C | 5 | 45.2 | 3.5 |
| Touchdown PCR | N/A (Protocol-based) | 5 | 42.1 | 4.0 |
| Universal (60°C) | Fixed at 60°C | 3 | 38.5* | 2.5 |
*Note: Yield included non-specific products at universal temperature.
Experimental Protocols
Protocol 1: Gradient PCR for Annealing Temperature Optimization
- Prepare Master Mix: Combine on ice: 1X PCR Buffer, 2.5 mM MgCl₂ (final), 0.2 mM dNTPs each, 0.5 µM forward and reverse primers each, 1.25 U of hot-start DNA polymerase, 50 ng template DNA, and nuclease-free water to a final volume of 49 µL.
- Aliquot: Pipette 48 µL of master mix into each of 8 PCR tubes. Add 2 µL of template to each (or keep one no-template control). Final volume 50 µL.
- Set Gradient: Place tubes in thermal cycler. Program a gradient across the block from 55°C to 70°C. Program: Initial denaturation: 95°C for 5 min; 35 cycles of: 95°C for 30s, Gradient Ta for 30s, 72°C for 1 min/kb; Final extension: 72°C for 5 min.
- Analyze: Run products on a 1.5% agarose gel. Identify the temperature yielding the strongest, single band.
Protocol 2: Standard Touchdown PCR Protocol
- Prepare Master Mix: As in Protocol 1.
- Program Thermal Cycler:
- Initial Denaturation: 95°C for 5 min.
- Touchdown Phase: 10 cycles: Denaturation at 95°C for 30s, Annealing starting at 72°C for 30s (decrease by 1°C per cycle), Extension at 72°C for 1 min/kb.
- Standard Phase: 25 cycles: 95°C for 30s, 62°C (final Ta) for 30s, 72°C for 1 min/kb.
- Final Extension: 72°C for 5 min.
- Analyze: Run products on a gel. Expect a single, specific product.
Visualizations
Title: PCR Annealing Method Selection Workflow
Title: Thermal Cycling Profile Comparison
The Scientist's Toolkit: Research Reagent Solutions
Table 3: Essential Materials for Annealing Temperature Optimization
| Reagent/Material | Function & Importance |
|---|---|
| Hot-Start DNA Polymerase | Remains inactive until high temperature is reached, preventing non-specific priming during reaction setup. Critical for specificity in all methods. |
| dNTP Mix (10mM each) | Provides the nucleotide building blocks for DNA synthesis. Quality and concentration affect fidelity and yield. |
| MgCl₂ Solution (25mM) | Co-factor for DNA polymerase. Concentration critically influences primer annealing, specificity, and product yield. Often optimized separately. |
| PCR Buffer (with or without (NH₄)₂SO₄) | Stabilizes the reaction pH and ionic strength. Different buffer systems can influence the effective Tm of primers. |
| Template DNA (High-Quality) | The target DNA to be amplified. Purity and integrity are paramount; contaminants or degradation lead to failed reactions. |
| Optimized Primer Pairs | Oligonucleotides designed for target specificity. Proper design (length, GC%, Tm) is the foundation of successful PCR. |
| Gradient Thermal Cycler | Instrument capable of creating a precise temperature gradient across the block, essential for empirical Ta optimization. |
| Agarose Gel Electrophoresis System | Standard method for visualizing PCR products to assess specificity, yield, and determine optimal conditions. |
| Molecular Grade Water | Nuclease-free water to prevent degradation of reaction components and ensure reproducibility. |
Troubleshooting Guides & FAQs
Q1: My PCR reaction with a pre-optimized master mix shows low yield or no product. What are the primary troubleshooting steps? A: First, verify the template quality and concentration. Second, confirm the primer design and annealing temperature compatibility with the master mix. Pre-optimized mixes often have a fixed salt and buffer composition, making them less tolerant to suboptimal primer annealing temperatures. Perform a gradient PCR (see Protocol 1) to empirically determine the optimal annealing temperature for your specific primer-template pair, even with a pre-optimized mix.
Q2: I am using a customizable master mix and getting non-specific bands. How can I resolve this? A: Non-specific amplification is often due to insufficiently stringent conditions. With a customizable mix, you can adjust multiple parameters. First, incrementally increase the annealing temperature by 2-3°C. Second, titrate the magnesium chloride (MgCl2) concentration downward, as lower Mg2+ increases specificity. Third, optimize the cycling conditions by reducing extension times or using a touchdown protocol (see Protocol 2).
Q3: Why does my qPCR with a commercial master mix show high Cq values or failed amplification? A: For qPCR, ensure the master mix is compatible with your detection chemistry (e.g., SYBR Green, TaqMan). Check for PCR inhibitors in your sample; perform a dilution series. Verify that the master mix components (especially polymerase) are not degraded. For pre-optimized mixes, ensure your instrument's cycling conditions match the recommended protocol. With customizable mixes, you may need to adjust buffer pH or additive concentrations to match your sample type.
Q4: When switching from a pre-optimized to a customizable master mix for a validated assay, my efficiency drops. What should I do? A: Re-optimization is necessary. The pre-optimized mix contained a proprietary blend of enhancers and stabilizers. Systematically test key variables in the customizable mix: Mg2+ concentration (1.5mM to 4mM gradient), betaine concentration (0-1M), and polymerase concentration. Run a standard curve with each condition to calculate PCR efficiency (see Protocol 3).
Experimental Protocols
Protocol 1: Annealing Temperature Gradient PCR for Pre-Optimized Master Mix Evaluation
- Prepare a standard 25µL reaction using the pre-optimized master mix, according to the manufacturer's instructions.
- Set up a thermal cycler with a gradient block. Program the annealing step to span a range (e.g., 55°C to 70°C).
- Run the PCR. Analyze products via agarose gel electrophoresis.
- Identify the temperature that yields the highest intensity of the correct product with minimal non-specific bands. This is the empirical optimum for your assay with that mix.
Protocol 2: Touchdown PCR for Enhanced Specificity with Customizable Mixes
- Prepare your PCR reaction using the customizable master mix.
- Program the cycler: Initial denaturation: 95°C for 2 min.
- Cycling: Start with an annealing temperature 10°C above the calculated Tm of your primers. For the next 10-15 cycles, decrease the annealing temperature by 1°C per cycle.
- Continue with 20-25 cycles at the final, lower annealing temperature.
- This approach preferentially enriches the desired product during early, high-stringency cycles.
Protocol 3: qPCR Efficiency Determination for Master Mix Comparison
- Prepare a 5-log serial dilution of your target template (e.g., 1:10 dilutions).
- Run qPCR reactions for each dilution in triplicate, using both the pre-optimized and customizable master mix formulations.
- Plot the log of the starting template quantity against the Cq value for each reaction.
- Calculate the slope of the trendline. PCR efficiency (E) is calculated as: E = [10^(-1/slope)] - 1. Ideal efficiency is 100% (E=1.0). Compare the efficiency and linearity (R²) between mixes.
Data Presentation
Table 1: Comparative Analysis of Pre-Optimized vs. Customizable Master Mix Features
| Feature | Pre-Optimized Master Mix | Customizable Master Mix |
|---|---|---|
| Time to Setup | Minimal (<10 min) | Extended (30+ min for optimization) |
| Typical Cost per Reaction | High ($2.50 - $5.00) | Low to Medium ($0.75 - $2.50) |
| Optimal Annealing Temp Range | Narrow (Often ±2°C of recommended) | Broad (Can be tuned over 10°C+ range) |
| Specificity Success Rate (Standard Assays) | High (>90%) | Variable (40-95%, depends on optimization) |
| Tolerance to Inhibitors | Often High (due to proprietary additives) | Variable (must be custom-enhanced) |
| Best Use Case | Routine, high-throughput screening; diagnostic assays | Novel primer sets, difficult templates (GC-rich), research & development |
Table 2: Optimization Parameters for Customizable Master Mixes
| Parameter | Typical Range | Effect of Increase | Effect of Decrease |
|---|---|---|---|
| MgCl₂ Concentration | 1.0 - 4.0 mM | Increases yield, decreases specificity, stabilizes dsDNA | Increases specificity, may reduce yield |
| Betaine | 0 - 1.5 M | Reduces secondary structure, aids GC-rich amplification | Standard conditions for easy templates |
| DMSO | 0 - 10% (v/v) | Lowers Tm, aids GC-rich/ complex templates | Standard conditions for easy templates |
| Polymerase Units | 0.5 - 2.5 U/50µL | May increase yield and processivity | Reduces non-specific priming, lowers cost |
Diagrams
Title: Master Mix Selection and Optimization Workflow
Title: Core PCR Process and Master Mix Role
The Scientist's Toolkit: Research Reagent Solutions
| Item | Function in Master Mix Optimization |
|---|---|
| High-Fidelity DNA Polymerase | Enzyme with proofreading ability for long or accurate amplification; essential for cloning. |
| Hot-Start Polymerase | Polymerase chemically modified or antibody-bound to remain inactive until initial denaturation, reducing primer-dimer formation. |
| MgCl₂ Solution (25-50mM stock) | Critical co-factor for polymerase activity; concentration is a primary variable for optimizing specificity and yield. |
| dNTP Mix (10mM each) | Deoxynucleotide triphosphates (dATP, dCTP, dGTP, dTTP); building blocks for DNA synthesis. |
| PCR Buffer (10X) | Typically contains Tris-HCl (pH stabilizer), KCl (ionic strength), and sometimes (NH₄)₂SO₄. |
| PCR Enhancers (Betaine, DMSO) | Additives that reduce secondary structure, lower melting temperature, and improve amplification of complex templates. |
| BSA or Gelatin | Stabilizing proteins that can prevent polymerase adsorption and increase tolerance to inhibitors. |
| SYBR Green I Dye (20X) | For qPCR; intercalates into double-stranded DNA, allowing real-time fluorescence detection of amplification. |
| ROX Passive Reference Dye | For qPCR; normalizes for non-PCR-related fluorescence fluctuations in some instruments. |
| Nuclease-Free Water | Solvent for all reactions; must be free of nucleases and PCR inhibitors. |
Technical Support Center: Troubleshooting Guides & FAQs
FAQ 1: Why do I observe low yield or no product after PCR amplification for my NGS library prep?
- Potential Cause: Non-optimal annealing temperature (Ta) leading to poor primer binding, especially with complex, adapter-ligated libraries.
- Solution: Perform a thermal gradient PCR. Use the protocol below to empirically determine the optimal Ta. Ensure your master mix is formulated for robust performance across a range of temperatures.
FAQ 2: Why is my SNP genotyping assay showing high rates of allelic dropout or non-specific amplification?
- Potential Cause: The annealing temperature is not stringent enough to differentiate between perfect-match and mismatch (SNP) primer binding.
- Solution: Optimize Ta using a gradient centered on the calculated Tm of your primers. Implement the "Touchdown PCR" protocol detailed below to increase specificity.
FAQ 3: How does master mix composition interact with annealing temperature optimization?
- Potential Cause: Standard master mixes may not buffer the effects of suboptimal Ta. Specialized mixes with enhanced fidelity buffers, betaine, or specialized salts can widen the effective Ta range.
- Solution: Compare different master mixes using a standardized gradient PCR protocol. See Table 1 for a quantitative comparison.
Detailed Experimental Protocols
Protocol 1: Empirical Annealing Temperature Optimization via Gradient PCR
- Calculate Tm: Use the nearest-neighbor method for all primers. Set your gradient range to ±5–7°C around the lowest Tm of your primer set.
- Prepare Master Mix: Combine on ice:
- Template DNA (library or gDNA): 10-50 ng
- Forward/Reverse Primers: 0.2–0.5 µM each
- 2X Specialized High-Fidelity PCR Master Mix: 25 µL
- Nuclease-free H₂O to 50 µL final volume.
- Thermal Cycling:
- Initial Denaturation: 98°C for 30 sec.
- 30-35 Cycles: Denature at 98°C for 10 sec, Anneal at gradient temperatures (e.g., 55–70°C) for 30 sec, Extend at 72°C (15-30 sec/kb).
- Final Extension: 72°C for 5 min.
- Analysis: Run products on a high-sensitivity electrophoresis system (e.g., Bioanalyzer, Fragment Analyzer, or agarose gel). The optimal Ta yields the brightest, correct-size band with minimal primer-dimers.
Protocol 2: Touchdown PCR for Enhanced SNP Genotyping Specificity
- Set Up: Prepare master mix as in Protocol 1.
- Thermal Cycling:
- Initial Denaturation: 98°C for 30 sec.
- 10-12 Cycles (Touchdown): Denature at 98°C for 10 sec. Anneal starting at 5–10°C above calculated Tm, decreasing by 0.5–1.0°C per cycle. Extend at 72°C.
- 25-30 Cycles (Standard): Denature at 98°C for 10 sec. Anneal at the final, lowered Ta from the touchdown phase (typically 2–5°C below starting Tm) for 30 sec. Extend at 72°C.
- Final Extension: 72°C for 5 min.
- Analysis: Use fragment analysis or sequencing to confirm specific amplification of the target allele.
Table 1: Comparison of PCR Master Mix Performance Across Annealing Temperature Gradients
| Master Mix Type | Optimal Ta Range (Width) | Yield at Optimal Ta (ng/µL) | SNP Assay Specificity (False Allele Rate) | Recommended For |
|---|---|---|---|---|
| Standard High-Fidelity | 4°C | 15.2 ± 2.1 | 5.8% ± 1.5% | Routine cloning, simple amplicons |
| Specialized NGS Library Amp | 7°C | 22.5 ± 3.0 | N/A | Adapter-ligated library PCR |
| Hot-Start, Enhanced Specificity | 5°C | 18.7 ± 1.8 | <1.0% | SNP Genotyping, qPCR |
| Proofreading + Buffer Additives | 6°C | 20.1 ± 2.5 | 2.3% ± 0.9% | Long-amplicon, high-GC targets |
Visualizations
Diagram 1: Annealing Temp Optimization Workflow
Diagram 2: Master Mix Impact on PCR Specificity
The Scientist's Toolkit: Key Research Reagent Solutions
| Item | Function in Optimization |
|---|---|
| High-Fidelity, Hot-Start DNA Polymerase Master Mix | Provides robust, specific amplification with low error rates; hot-start prevents primer-dimer formation. |
| Specialized NGS Library Amplification Mix | Often contains additives to efficiently amplify complex, adapter-ligated templates across a wider Ta range. |
| GC-Rich Enhancer/Betaine Solution | Additive to destabilize secondary structures, improving yield and consistency for difficult templates. |
| High-Sensitivity DNA Analysis Kits (e.g., Bioanalyzer) | For precise quantification and sizing of low-yield or low-concentration PCR products. |
| Commercial SNP Genotyping Master Mix | Optimized buffer chemistry for maximum allelic discrimination at stringent annealing temperatures. |
| Thermal Cycler with Gradient Function | Essential for running parallel reactions at different annealing temperatures in a single experiment. |
Best Practices for Documenting and Standardizing Thermal Protocols
Troubleshooting Guides & FAQs
Q1: My PCR results show non-specific bands or primer-dimer artifacts. What annealing temperature parameters should I adjust in my thermal protocol? A: Non-specific amplification is frequently caused by suboptimal annealing temperature (Ta). First, calculate the theoretical Ta of your primers (typically 3–5°C below the average primer Tm). If issues persist, perform a thermal gradient PCR experiment (e.g., testing a range from 55°C to 70°C) to determine the optimal empirical Ta. Standardize your protocol by documenting the exact master mix used, as buffer composition affects Ta. Ensure the annealing step's temperature ramp rate is consistent between runs (standard is 1–2°C/sec).
Q2: During qPCR, I observe inconsistent amplification efficiency between replicates. Could my thermal cycler's calibration be the issue? A: Inconsistent replicate data often stems from thermal block inhomogeneity. Implement a regular calibration and verification protocol using a thermal gradient block with independent probes. Standardize your documentation by recording the cycler's serial number, calibration date, and the observed spatial temperature variance (ΔT). For immediate troubleshooting, ensure tubes are securely sealed and placed in consistent positions. Switching to a master mix with a universal annealing temperature can also reduce well-to-well variability.
Q3: How should I document deviations from a standardized thermal protocol when optimizing for a new master mix? A: All deviations must be logged in a controlled document. Use a version-controlled template that includes: 1) Protocol ID and version, 2) Date and researcher, 3) Specific deviation (e.g., "Annealing temperature changed from 60°C to 62.5°C"), 4) Justification (e.g., "To increase specificity for new primer set with higher Tm"), and 5) Result of the change. This is critical for reproducibility in master mix research.
Q4: What are the key steps to standardize a thermal protocol across multiple lab instruments? A: Follow this workflow: 1) Define the Master Protocol: Establish a single, detailed base protocol. 2) Instrument Profiling: Measure actual block temperatures for each cycler. 3) Calibration Adjustment: Apply instrument-specific offsets if necessary. 4) Validation Run: Perform identical runs of a control assay on all cyclers. 5) Performance Logging: Document the Cq variance and amplification curves. Standardization is achieved when inter-instrument Cq variance is < 0.5.
Table 1: Impact of Annealing Temperature Ramp Rate on PCR Specificity & Yield
| Ramp Rate (°C/sec) | Specificity Index* | Relative Yield (%) | Recommended Use Case |
|---|---|---|---|
| 1.0 | 0.95 | 100 | Standard PCR, cloning |
| 2.5 | 0.93 | 98 | Routine qPCR |
| 4.0 | 0.85 | 90 | Fast screening |
| Max (≥6.0) | 0.72 | 75 | Avoid for optimization |
*Specificity Index: 1.0 indicates a single, correct product.
Table 2: Optimized Annealing Temperature for Common Master Mix Types
| Master Mix Type | Typical Ta Range | Recommended Optimization Step | Key Buffer Component |
|---|---|---|---|
| Standard Taq (High Mg²⁺) | 50–60°C | 2°C gradient | MgCl₂ |
| Hot-Start (Antibody) | 55–65°C | 1.5°C gradient | Antibody/Inhibitor |
| High-Fidelity (Polymerase Blend) | 58–68°C | 1°C gradient | dNTPs, co-solvents |
| Universal ("Touchdown" optimized) | 55–70°C | Calculate primer Tm | Betaine, Trehalose |
| SYBR Green qPCR | 58–62°C | 0.5°C gradient for precision | SYBR Green, passive dye |
Experimental Protocols
Protocol 1: Empirical Annealing Temperature Optimization via Gradient PCR Objective: To determine the optimal annealing temperature for a primer pair using a specific master mix. Materials: Thermal cycler with gradient function, test primer pair, target DNA template, chosen master mix. Method:
- Prepare a single master mix containing 1X buffer, dNTPs, polymerase, primers (0.5 µM each), template, and nuclease-free water.
- Aliquot equal volumes into 8 tubes.
- Program the thermal cycler with a gradient spanning at least 12°C (e.g., 55–67°C) across the block for the annealing step.
- Run the PCR. Use a denaturation step of 98°C for 30 sec, followed by 35 cycles of: 98°C for 10 sec, gradient annealing for 30 sec, 72°C for 30 sec/kb.
- Analyze products via agarose gel electrophoresis.
- The optimal Ta is the highest temperature that produces a single, intense band of the expected size.
Protocol 2: Thermal Cycler Calibration Verification for qPCR Standardization Objective: To verify the temperature uniformity of a thermal block. Materials: Thermal cycler, independent temperature verification system (e.g., calibrated thermocouples), tube block. Method:
- Place temperature probes in at least 5 representative wells (e.g., four corners and center) filled with 50 µL of water or buffer.
- Program the cycler to run a holding protocol at three key temperatures: 95°C (denaturation), 60°C (annealing), 72°C (extension).
- Record the temperature measured by each probe once it stabilizes at each setpoint for 2 minutes.
- Calculate the mean temperature and the maximum deviation (ΔT) from the setpoint for each setpoint.
- Document results. Acceptable performance is typically ΔT ≤ ±0.5°C at all setpoints. If ΔT is exceeded, schedule instrument servicing.
Visualizations
Title: Workflow for Annealing Temperature Optimization
Title: PCR Efficiency Troubleshooting Decision Path
The Scientist's Toolkit
Table 3: Key Research Reagent Solutions for Thermal Protocol Optimization
| Item | Function in Optimization | Key Consideration |
|---|---|---|
| High-Fidelity DNA Polymerase Master Mix | Provides superior accuracy for cloning; often requires higher Ta. | Check fidelity rate and recommended buffer conditions. |
| Hot-Start PCR Master Mix | Reduces non-specific amplification at low temperatures, crucial for standardizing initial steps. | Understand activation mechanism (antibody, chemical, physical). |
| qPCR SYBR Green Master Mix | Enables real-time quantification; optimization critical for Cq precision. | Contains all components except primers/template; check for ROX passive dye requirement. |
| Template DNA (Control) | Consistent, high-quality control template is essential for reliable optimization runs. | Use a well-characterized plasmid or genomic DNA at a standardized concentration. |
| DNA Ladder (High-Resolution) | Accurately sizes PCR products on gels to assess specificity during Ta optimization. | Choose a ladder with bands in the expected amplicon size range. |
| Thermal Verification Kit | Independently measures block temperature for calibration and standardization. | Includes calibrated probes and software; use quarterly. |
| Nuclease-Free Water | Solvent for all reactions; contamination can severely impact protocol reproducibility. | Use certified, molecular biology-grade water in single-use aliquots. |
Conclusion
Mastering annealing temperature optimization is not a one-time calculation but an iterative process central to PCR success. By understanding the foundational principles, applying systematic methodological testing, adeptly troubleshooting suboptimal results, and rigorously validating the final conditions, researchers can achieve unparalleled specificity and efficiency in their assays. This holistic approach is indispensable for advancing biomedical research, where the integrity of amplified products underpins discoveries in genomics, diagnostics, and therapeutic development. Future directions point towards integrated digital tools for in silico prediction and AI-assisted optimization, further streamlining assay design for complex clinical and multiplexed applications.