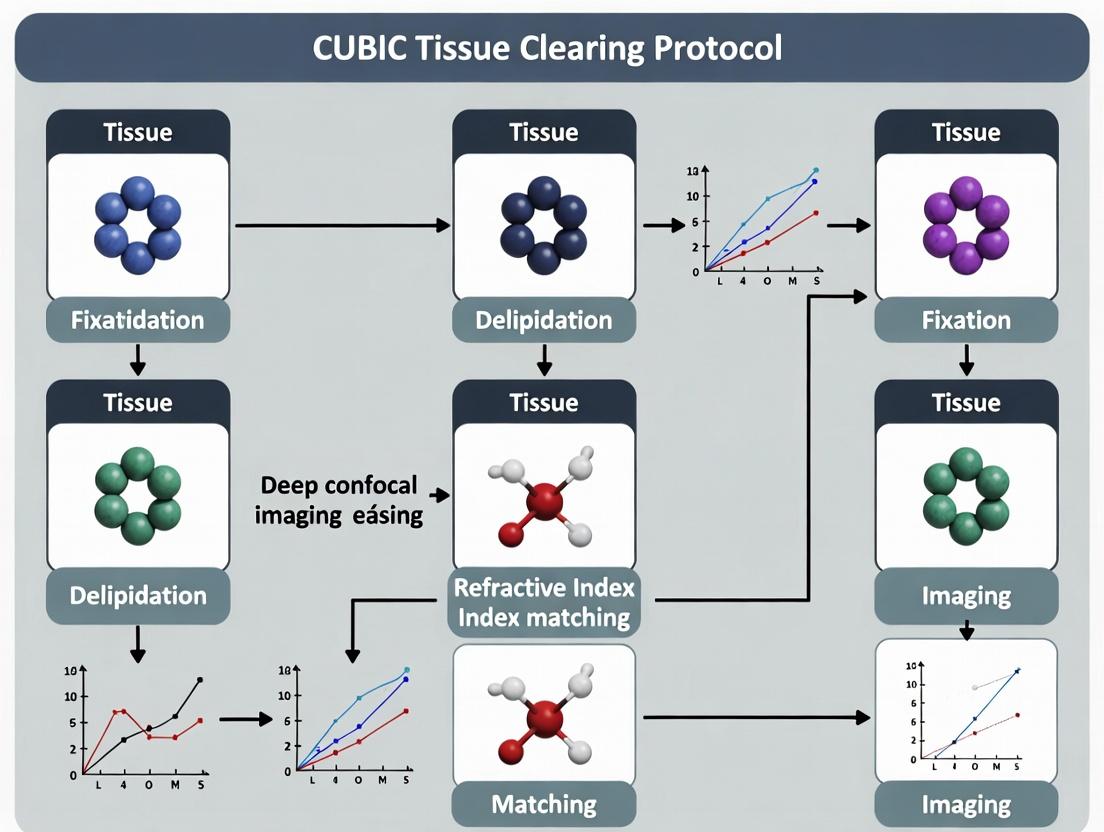
Mastering the CUBIC Protocol: A Comprehensive Guide for Deep-Tissue Clearing and 3D Confocal Imaging
This guide provides a detailed, actionable framework for implementing the CUBIC (Clear, Unobstructed Brain/Body Imaging Cocktails and Computational analysis) tissue clearing protocol for deep confocal imaging.
Mastering the CUBIC Protocol: A Comprehensive Guide for Deep-Tissue Clearing and 3D Confocal Imaging
Abstract
This guide provides a detailed, actionable framework for implementing the CUBIC (Clear, Unobstructed Brain/Body Imaging Cocktails and Computational analysis) tissue clearing protocol for deep confocal imaging. Tailored for researchers, scientists, and drug development professionals, it covers the fundamental principles of hydrogel-based clearing, a step-by-step methodological workflow from sample preparation to 3D reconstruction, advanced troubleshooting and optimization strategies for challenging tissues, and a critical validation and comparison with alternative clearing techniques. The article aims to empower users to achieve consistent, high-quality transparency and imaging depth for complex 3D biological analyses.
Understanding CUBIC Clearing: Principles, Advantages, and Core Components for 3D Biology
The pursuit of high-resolution volumetric imaging of intact biological specimens is central to modern neuroscience, developmental biology, and pathology. Traditional histological sectioning disrupts long-range 3D architecture, creating a critical need for tissue clearing—the process of rendering opaque tissues transparent. This application note frames tissue clearing within the context of the CUBIC (Clear, Unobstructed Brain/Body Imaging Cocktails and Computational analysis) protocol, detailing its principles, quantitative performance, and protocols for enabling deep confocal imaging in research and drug development.
The Depth Challenge in Microscopy
Biological tissues scatter and absorb light due to heterogeneous refractive indices (from lipids, proteins, water) and pigments (like heme and melanin). This limits imaging depth in confocal and two-photon microscopy. Tissue clearing mitigates this by homogenizing refractive indices and removing light-absorbing components, enabling whole-organ imaging.
Table 1: Impact of Light Scattering on Imaging Depth
| Tissue Type | Approximate Unclearred Imaging Depth (Confocal) | Major Scattering/Absorbing Components |
|---|---|---|
| Mouse Brain | 50-100 µm | Myelin lipids, cellular membranes |
| Mouse Liver | 20-50 µm | Hemoglobin, dense connective tissue |
| Mouse Lung | 30-70 µm | Blood, alveoli air-tissue interfaces |
| Tumor Xenograft | 40-80 µm | Dense cell packing, necrotic regions |
CUBIC Protocol: Principles and Workflow
CUBIC is a hydrophilic, reagent-based clearing method. It uses aminoalcohols and urea to delipidate and decolorize tissue, while matching the refractive index (RI) to ~1.48.
Core Mechanism:
- Delipidation & Decolorization: Reagents like Triton X-100 and aminoalcohols (e.g., N-butyldiethanolamine) permeabilize membranes, remove lipids, and bleach heme.
- Refractive Index Homogenization: High concentrations of urea and sucrose replace water, minimizing light scattering by creating a uniform optical medium.
Detailed CUBIC Protocol for Murine Brain
Materials: CUBIC-1, CUBIC-2, PBS, 4% PFA, Shaker, Confocal/Light Sheet Microscope.
Protocol:
- Fixation & Permeabilization:
- Perfuse and dissect tissue. Fix in 4% PFA for 6-24h at 4°C.
- Wash in PBS (3 x 1h).
- For immunolabeling: Perform staining steps (primary/secondary antibodies) before clearing, with extended incubation times (days to weeks).
Clearing Stage 1 (CUBIC-1):
- Incubate sample in CUBIC-1 reagent (25 wt% urea, 25 wt% N-butyldiethanolamine, 15 wt% Triton X-100 in water) at 37°C with gentle shaking.
- Time varies: 3-7 days for a mouse brain, with solution refreshment every 2-3 days.
- Function: Active delipidation and decolorization.
Washing:
- Rinse in PBS for 24-48h at 37°C to remove reagent.
Clearing Stage 2 (CUBIC-2):
- Incubate in CUBIC-2 reagent (50 wt% sucrose, 25 wt% urea, 10 wt% 2,2',2''-nitrilotriethanol, 0.1% v/v Triton X-100 in water) at room temperature until transparent (2-5 days for mouse brain).
- Function: Refractive index matching and final bleaching.
Imaging:
- Mount sample in CUBIC-2 for imaging via confocal (with long working distance objective) or light-sheet microscopy.
Table 2: Quantitative Performance of CUBIC vs. Other Methods
| Clearing Method | Principle | Clearing Time (Mouse Brain) | Refractive Index | Tissue Expansion/Shrinkage | Compatibility (Immunofluorescence) |
|---|---|---|---|---|---|
| CUBIC | Hydrophilic | 7-14 days | ~1.48 | Slight expansion (~10%) | Excellent |
| CLARITY | Hydrophilic (Hydrogel) | 7-14 days + electrophoresis | ~1.45 | Minimal | Excellent |
| iDISCO | Organic Solvent | 5-7 days | ~1.56 | Significant shrinkage (~40%) | Good (with permeabilization) |
| SeeDB2 | Aqueous (Fructose) | 2-3 days | ~1.52 | Minimal | Moderate |
The Scientist's Toolkit: Research Reagent Solutions
Table 3: Essential Materials for CUBIC Tissue Clearing
| Item | Function/Description | Example Product/Catalog # |
|---|---|---|
| CUBIC-1 Reagent | Primary clearing agent for delipidation and decolorization. | TCI Chemicals (Urea, N-butyldiethanolamine) + Triton X-100 |
| CUBIC-2 Reagent | Secondary reagent for refractive index matching. | Sucrose, Urea, Triethanolamine, Triton X-100 |
| Paraformaldehyde (PFA) | Fixative for preserving tissue structure and antigenicity. | 4% PFA Solution, Thermo Fisher Scientific |
| Triton X-100 | Non-ionic detergent for permeabilizing cell membranes. | MilliporeSigma #X100 |
| Passive Shaking Incubator | Provides constant, gentle agitation for reagent penetration. | ThermoFisher MaxQ 4450 |
| Long WD Objective Lens | Microscope objective for imaging deep within cleared samples. | Nikon CFI75 LWD 16x/0.8 NA, Olympus XLPLN25XWMP2 |
| Refractive Index Matching Fluid | Immersion fluid matching sample RI (CUBIC-2 can be used). | Cargille Type DF (RI=1.47-1.54) |
Experimental Workflow and Pathway Diagram
Diagram 1: CUBIC Tissue Clearing Workflow (97 chars)
Diagram 2: Light Interaction in Native vs Cleared Tissue (99 chars)
Application Notes for Drug Development
- Tumor Microenvironment Analysis: CUBIC enables 3D assessment of drug penetration, vascular architecture, and immune cell distribution in intact tumor biopsies or xenografts.
- Neurotoxicity Screening: Volumetric imaging of cleared whole brains from animal models allows comprehensive mapping of neuronal loss or glial activation.
- Quantitative 3D Phenotyping: Move beyond 2D histology scores to volumetric quantitation of biomarkers (e.g., beta-amyloid load in Alzheimer's models).
- Protocol Note: For large or dense human tissue biopsies, clearing times must be extended (weeks), and reagents may require perfusion-assisted delivery. Always validate antibody penetration in pilot studies.
CUBIC tissue clearing directly addresses the fundamental challenge of depth in microscopy. By providing a robust protocol for creating optically transparent tissues, it unlocks the potential for holistic, high-resolution 3D analysis, becoming an indispensable tool for advancing systems biology and translational drug discovery research.
Application Notes
CUBIC (Clear, Unobstructed Brain/Body Imaging Cocktails and Computational analysis) is a transformative tissue-clearing methodology that enables whole-organ and whole-body imaging. Its philosophy hinges on two distinct yet synergistic phases: a hydrogel-based delipidation and subsequent refractive index (RI) matching. This approach renders large biological specimens transparent and compatible with deep confocal microscopy.
Phase 1: Hydrogel-Based Delipidation The initial stage employs a hydrogel-polymer network to physically stabilize endogenous proteins and nucleic acids while aggressively removing lipids, the primary source of light scattering. The reagent (CUBIC-L) typically contains urea, Quadrol, and Triton X-100. Urea and Quadrol disrupt hydrophobic interactions and hydrogen bonds, while Triton X-100 solubilizes lipids. The hydrogel matrix prevents structural collapse during this harsh delipidation, preserving epitopes for immunostaining.
Phase 2: Refractive Index Matching Following delipidation, the tissue is permeated with a high-RI aqueous solution (CUBIC-R+). This solution contains sucrose, urea, and triethanolamine, raising the RI to ~1.48, closely matching that of the remaining tissue components (primarily proteins). This minimization of RI heterogeneity drastically reduces light scattering, achieving transparency.
Key Advantages for Deep Confocal Imaging:
- Superior Depth Penetration: Enables imaging of structures millimeters to centimeters deep.
- Macro-to-Nano Scale Imaging: Compatible with wide-field microscopy down to super-resolution.
- Multiplexed Immunostaining: Hydrogel stabilization allows for multiple rounds of antibody labeling.
- Quantitative Capability: Suitable for single-cell profiling and quantitative analysis throughout large volumes.
Protocols
Protocol 1: CUBIC Clearing for Mouse Brain (Adult)
Materials:
- CUBIC-L reagent: 25 wt% urea, 25 wt% Quadrol, 15 wt% Triton X-100 in D.W.
- CUBIC-R+ reagent: 50 wt% sucrose, 25 wt% urea, 10 wt% triethanolamine in D.W.
- PBS, 4% PFA, 20% sucrose/PBS.
- Shaking incubator.
Method:
- Fixation & Cryoprotection: Perfuse and fix tissue with 4% PFA. Immerse in 20% sucrose/PBS at 4°C until sunk.
- Delipidation: Immerse sample in CUBIC-L at 37°C with gentle shaking. Replace solution every 2-3 days.
- Incubation Time: 3-7 days for a mouse brain.
- Washing: Rinse sample in PBS for 1-2 hours at room temperature to remove residual CUBIC-L.
- Refractive Index Matching: Immerse sample in CUBIC-R+ at room temperature with gentle shaking.
- Incubation Time: 1-3 days until the tissue becomes optically clear.
- Imaging: Mount the cleared sample in fresh CUBIC-R+ and image using a confocal microscope equipped with long-working-distance objectives.
Protocol 2: Passive Immunostaining for CUBIC-Cleared Tissues
Materials:
- Blocking buffer: 5% DMSO, 3% Triton X-100, 10% normal goat serum in PBS.
- Primary & secondary antibodies diluted in PBS containing 3% Triton X-100, 5% DMSO, and 1% normal goat serum.
- CUBIC-R+.
Method:
- After CUBIC-L delipidation and PBS wash, incubate sample in blocking buffer for 1-2 days at 37°C.
- Incubate with primary antibody for 5-14 days at 37°C with gentle shaking.
- Wash with PBS containing 3% Triton X-100 (3 x 1 day each) at 37°C.
- Incubate with fluorescent secondary antibody for 5-14 days at 37°C, protected from light.
- Wash again as in step 3.
- Proceed to RI matching with CUBIC-R+ (Protocol 1, Step 4) before imaging.
Data Presentation
Table 1: CUBIC Reagent Composition and Function
| Reagent | Key Components | Primary Function | Target RI | Typical Incubation Time (Mouse Brain) |
|---|---|---|---|---|
| CUBIC-L | Urea, Quadrol, Triton X-100 | Hydrogel formation & delipidation | ~1.45 | 5-7 days |
| CUBIC-R+ | Sucrose, Urea, Triethanolamine | Refractive index homogenization | ~1.48 | 2-3 days |
Table 2: Comparative Clearing Performance Metrics
| Parameter | CUBIC (Brain) | CLARITY (Brain) | Organic Solvent (BABB) |
|---|---|---|---|
| Clearing Time | 1-2 weeks | 1-2 weeks (electrophoresis) | 2-3 days |
| Tissue Integrity | Excellent (Hydrogel) | Excellent (Hydrogel) | Good (Shrinkage) |
| Immunostaining | Excellent (Multi-round) | Excellent | Poor |
| RI Matching | Aqueous (RI~1.48) | Aqueous (RI~1.45) | Organic (RI~1.55) |
| Imaging Depth | >5 mm | >5 mm | ~1 mm |
Visualizations
CUBIC Experimental Workflow (99 chars)
CUBIC Core Mechanism (66 chars)
The Scientist's Toolkit: Research Reagent Solutions
Table 3: Essential Materials for CUBIC Protocols
| Item | Function & Rationale |
|---|---|
| Quadrol (N,N,N',N'-Tetrakis(2-hydroxypropyl)ethylenediamine) | A polyamine critical in CUBIC-L. Acts as a hydrogel monomer and a potent lipid-solubilizing agent, enabling efficient delipidation without protein loss. |
| CUBIC-L Reagent | The primary delipidation cocktail. Hydrogel polymers stabilize the proteome while urea, Quadrol, and Triton X-100 collaboratively extract lipids. |
| CUBIC-R+ Reagent | The refractive index matching solution. Sucrose and triethanolamine raise the RI to ~1.48, matching the cleared tissue to enable transparency. |
| Triton X-100 (or alternatives like N,N-Dimethylacetamide) | Non-ionic detergent that solubilizes membrane lipids and facilitates reagent penetration throughout the tissue sample. |
| Long-Working-Distance Immersion Objectives (e.g., 20x, 25x) | Essential for deep imaging of cleared samples. Allow focus into millimeter depths within the cleared tissue mount. |
| Gentle Agitation System | Orbital shaker or rocker placed in a temperature-controlled incubator (37°C). Ensures even reagent penetration and staining throughout multi-day incubations. |
Application Notes
Within the CUBIC (Clear, Unobstructed Brain/Body Imaging Cocktails and Computational analysis) tissue clearing protocol, achieving optical transparency while preserving endogenous fluorescence is a delicate balance. This balance is critically mediated by three core reagent classes: aminoalcohols, urea, and Triton X-100. Their synergistic action enables the deep confocal imaging essential for modern neuroscience and drug development research.
Aminoalcohols (e.g., N-butyldiethanolamine, N,N,N',N'-Tetrakis(2-hydroxypropyl)ethylenediamine): These reagents function as hydrophilic index-matching agents and lipid saponification catalysts. Their primary role is to homogenize the refractive index (RI) of the tissue by replacing lipids with aqueous solutions. Aminoalcohols raise the RI of the aqueous medium to approximately 1.48-1.49, closely matching that of proteins. Concurrently, their alkaline nature (pH ~10-11) facilitates the hydrolysis of ester bonds in phospholipids, breaking down membranous structures that cause light scattering.
Urea: A chaotropic agent and a key denaturant and hydration promoter. At high concentrations (e.g., 4-8M), urea disrupts hydrogen bonding within and between biomolecules. This action unfolds proteins, reduces light scattering from protein aggregates, and critically, hyper-hydrates the tissue. This swelling is a deliberate and controlled step in CUBIC, separating scattering elements to increase transparency before subsequent RI matching.
Triton X-100: A non-ionic detergent responsible for delipidation and membrane permeabilization. It solubilizes lipid bilayers by disrupting lipid-lipid and lipid-protein interactions. This process is fundamental for removing opaque light-scattering lipids and for allowing the penetration of other clearing reagents, antibodies, and dyes deep into the tissue matrix.
The sequential and combinatorial application of these reagents in CUBIC protocols (CUBIC-L for delipidation/clearing and CUBIC-R+ for RI matching) facilitates the creation of a macro-scale, optically homogeneous specimen suitable for high-resolution 3D imaging.
Quantitative Data Summary: Core Reagent Properties in CUBIC Protocols
| Reagent Class | Example in CUBIC | Typical Concentration | Primary Function | Key Effect on Tissue | Refractive Index Contribution |
|---|---|---|---|---|---|
| Aminoalcohol | Quadrol (CUBIC-R+) | 10-25% w/w | RI matching, Lipid saponification | Lipid removal, RI elevation to ~1.48-1.49 | High (RI ~1.48 at 25%) |
| Urea | Urea (CUBIC-L & R+) | 4-8 M | Chaotropic agent, Hydration | Protein denaturation, Tissue swelling | Moderate (8M Urea soln. RI ~1.43) |
| Detergent | Triton X-100 (CUBIC-L) | 0.1-1% v/v | Delipidation, Permeabilization | Lipid removal, Membrane disruption | Low (negligible direct effect) |
Experimental Protocols
Protocol 1: Standard CUBIC Clearing for Mouse Brain (CUBIC-L followed by CUBIC-R+)
This protocol is adapted for a perfused, fixed adult mouse brain.
I. Materials & Reagents (The Scientist's Toolkit)
| Item | Function in Protocol |
|---|---|
| CUBIC-L Solution: 25 wt% Urea, 25 wt% N-butyldiethanolamine, 0.1% v/v Triton X-100 in Milli-Q water. | Primary clearing agent. Urea swells/denatures, aminoalcohol saponifies, Triton solubilizes lipids. |
| CUBIC-R+ Solution: 25 wt% Urea, 50 wt% Sucrose, 25 wt% Quadrol, 0.1% v/v Triton X-100 in Milli-Q water. | Refractive index matching solution (~RI 1.52). Urea and Quadrol maintain hydration and high RI. |
| Phosphate-Buffered Saline (PBS) | Washing and storage buffer for fixed tissue. |
| 4% Paraformaldehyde (PFA) in PBS | Tissue fixative. |
| Confocal Imaging Dish with Coverslip Bottom | Holder for cleared tissue during imaging. |
| Orbital Shaker | For gentle agitation during incubation steps. |
II. Procedure
- Tissue Preparation: Perfuse mouse transcardially with PBS followed by 4% PFA. Dissect brain and post-fix in 4% PFA for 24h at 4°C.
- Washing: Rinse brain in PBS (3 x 1h) at room temperature (RT) with gentle shaking.
- CUBIC-L Clearing: a. Immerse the brain in 10-20x volume of CUBIC-L solution. b. Incubate at 37°C with gentle shaking. Monitor daily. The tissue will swell 1.5-2x in size and become translucent within 5-7 days. Refresh solution after 3 days. c. Wash the cleared tissue in PBS (3 x 1h) at RT to remove CUBIC-L. Tissue will de-swell.
- CUBIC-R+ Refractive Index Matching: a. Transfer the washed tissue to CUBIC-R+ solution. b. Incubate at RT with gentle shaking until the tissue is fully transparent and sinks (typically 2-3 days). Refresh solution if needed.
- Mounting & Imaging: Place the cleared brain in a fresh CUBIC-R+ solution in an imaging dish. Perform deep confocal imaging using a long-working-distance objective. The tissue is now ready for 3D reconstruction.
Protocol 2: Optimization Test for Lipid Removal Efficiency
This protocol compares the efficacy of different detergent/aminoalcohol combinations.
- Sample Preparation: Prepare identical 500µm thick coronal sections from a fixed mouse brain.
- Treatment Groups: Assign sections to one of four treatment solutions (all containing 4M Urea as a base):
- Group A: + 0.5% Triton X-100
- Group B: + 10% N-butyldiethanolamine
- Group C: + 0.5% Triton X-100 + 10% N-butyldiethanolamine
- Group D: (Control) No additive.
- Incubation: Treat all sections in 2mL of their respective solutions at 37°C for 48h with shaking.
- Assessment: Measure transparency via light transmission at 650nm using a spectrophotometer with an integrating sphere. Quantify residual lipids via a fluorescent lipid dye (e.g., LipidTOX) stain and subsequent mean fluorescence intensity measurement from confocal z-stacks.
- Analysis: Compare transparency and residual lipid signal across groups. Expect Group C (combinatorial) to show highest transparency and lowest lipid signal.
Visualization Diagrams
Title: CUBIC Core Reagent Mechanism of Action
Title: Standard CUBIC Protocol Workflow
Application Notes
The CUBIC (Clear, Unobstructed Brain/Body Imaging Cocktails and Computational analysis) protocol enables three-dimensional, system-level analysis of biological tissues by rendering them optically transparent. Its core principle involves the removal of lipids and pigments, coupled with refractive index matching, to allow deep confocal or light-sheet microscopy imaging without physical sectioning. This application note details its pivotal uses in neuroscience and oncology, framed within a thesis on advancing deep-tissue imaging methodologies.
Whole-Brain Neural Circuit Mapping
CUBIC clearing permits intact imaging of rodent brains to map neuronal projections, cell distributions, and connectivity. Quantitative analysis of cleared brains has revealed global neural networks involved in learning and memory. The protocol is scalable, allowing whole-organ phenotyping in genetic or disease models.
Tumor Microenvironment (TME) Deconvolution
In oncology, CUBIC facilitates 3D visualization of the entire tumor mass and its microenvironment. Researchers can analyze spatial relationships between cancer cells, immune infiltrates (e.g., T-cells, macrophages), vasculature, and stromal components in unprecedented detail, enabling studies on metastasis, immune evasion, and drug penetration.
Table 1: Quantitative Data from Representative CUBIC Studies
| Application | Sample Type | Clearing Time | Max Imaging Depth | Key Measurable Metrics | Reference (Example) |
|---|---|---|---|---|---|
| Whole-Brain Mapping | Adult Mouse Brain | 7-14 days | Entire hemisphere | Neuron count, Axon projection length, Regional volume | Susaki et al., Cell, 2014 |
| Tumor Analysis | 4T1 Mouse Mammary Tumor | 5-7 days | >5 mm | Immune cell density, Vascular network length, Tumor cell cluster size | Tainaka et al., Cell, 2018 |
| Organ-Wide Profiling | Mouse Lung & Liver | 10-14 days | Entire organ | Cell population counts, Spatial coordinates of rare cells | Kubota et al., Cell Reports, 2017 |
Experimental Protocols
Protocol 1: CUBIC-Based Whole-Brain Clearing and Immunolabeling for Confocal Imaging
This protocol is for mapping fluorescent protein-expressing neurons or immunolabeled targets in a whole mouse brain.
Materials: See "The Scientist's Toolkit" below. Workflow:
- Perfusion & Fixation: Transcardially perfuse mouse with PBS followed by 4% PFA. Dissect brain and post-fix in 4% PFA at 4°C for 24 hours.
- Delipidation & Decolorization: Immerse brain in CUBIC-L solution (Reagent A) at 37°C with gentle shaking. Refresh solution every 2-3 days. Monitor until tissue becomes transparent (typically 5-7 days).
- Refractive Index Matching: Transfer brain to CUBIC-R solution (Reagent B) at room temperature until fully refractive-index matched and clear (1-2 days).
- Immunolabeling (Optional): For labeling non-fluorescent targets, after Step 2, wash in PBS for 24 hours. Incubate in primary antibody diluted in PBS with 0.3% Triton X-100 for 7-14 days at 37°C. Wash for 2 days, then incubate in secondary antibody for 7-14 days.
- Imaging: Mount cleared brain in CUBIC-R and image using a long-working-distance objective on a confocal or light-sheet microscope. Acquire tiles and z-stacks.
Protocol 2: 3D Tumor Microenvironment Analysis
This protocol is for analyzing the spatial architecture of a subcutaneous tumor and its microenvironment.
Workflow:
- Tumor Harvest & Fixation: Excise subcutaneous tumor, immerse in 4% PFA at 4°C for 48 hours with gentle agitation.
- Passive Clearing: Cut tumor into 2-3 mm thick slabs. Place in CUBIC-L at 37°C until clear (3-5 days for slabs, refreshing solution daily).
- Multiplex Immunostaining: Perform iterative immunostaining as in Protocol 1, Step 4, or use a pre-conjugated antibody panel for direct labeling.
- Final Clearing & Storage: Transfer to CUBIC-R for 1-2 days. Store in CUBIC-R at 4°C protected from light.
- Imaging & Analysis: Image entire slab. Use 3D analysis software to segment cells, calculate distances between cell populations, and quantify vascular networks.
Diagrams
Workflow for Whole-Brain Mapping with CUBIC
Workflow for 3D Tumor Microenvironment Analysis
Mechanism of CUBIC Tissue Clearing
The Scientist's Toolkit
Table 2: Essential Research Reagent Solutions for CUBIC Protocols
| Reagent/Material | Function in Protocol | Key Considerations |
|---|---|---|
| CUBIC-L Solution | Primary delipidating and decolorizing agent. Contains urea, Triton X-100, and triethanolamine to remove lipids and bleach heme. | Critical for penetration; requires incubation at 37°C; refreshed periodically. |
| CUBIC-R Solution | Refractive index matching medium. Contains sucrose, urea, and triethanolamine to render tissue transparent for imaging. | Final storage and imaging solution; high viscosity; hygroscopic. |
| Paraformaldehyde (4% PFA) | Fixative for preserving tissue morphology and fluorescent signals. | Quality and pH (7.4) are critical; perfusion is recommended for large organs. |
| Long-Working-Distance Objective (e.g., 20X, NA 0.8) | Microscope lens designed to focus deep within cleared samples with minimal spherical aberration. | Essential for deep confocal imaging; water-immersion objectives are often used. |
| Light-Sheet Microscope | Instrument that illuminates only a thin plane of the sample, enabling fast, high-contrast, low-photobleach 3D imaging. | Ideal for large cleared samples; provides rapid data acquisition. |
| Passive Shaker (37°C) | Provides gentle, consistent agitation during long clearing and staining steps to ensure even reagent penetration. | Prevents formation of concentration gradients within the sample. |
| 3D Image Analysis Software (e.g., Imaris, Arivis) | Platform for visualizing, segmenting, and quantifying cells and structures in large 3D image datasets. | Requires significant computational resources (GPU, RAM) for terabyte-sized datasets. |
Within the broader thesis on the CUBIC (Clear, Unobstructed Brain/Body Imaging Cocktails and Computational analysis) tissue clearing protocol, successful deep confocal imaging research is fundamentally dependent on three critical prerequisites: compatible sample types, appropriate fixation methods, and strategic genetic labeling. This document provides detailed application notes and protocols to guide researchers in preparing mouse, rat, and human samples for CUBIC-based 3D imaging, ensuring optimal preservation of morphology and fluorescence.
Table 1: Compatibility of Sample Types with CUBIC Protocols
| Sample Type | Recommended CUBIC Protocol | Typical Sample Size Limit | Key Considerations for Clearing Efficiency |
|---|---|---|---|
| Mouse | CUBIC-Histo, CUBIC-R | Whole brain, organs <1.5cm³ | Homogeneous clearing; ideal for transgenic models. |
| Rat | CUBIC-R+, Prolonged CUBIC-Histo | Whole neonatal brain, adult brain slices (<5mm) | Longer incubation times required; perfusion fixation critical. |
| Human | CUBIC-Histo (modified) | Biopsy samples, tissue blocks (<5mm³) | High lipid and collagen content demands extended clearing. |
Table 2: Fixation Methods and Impact on Labeling & Clearing
| Fixation Method | Concentration & Time | Compatibility with GFP/YFP | Compatibility with mCherry/RFP | Impact on CUBIC Clearing Speed | Autofluorescence Level |
|---|---|---|---|---|---|
| Paraformaldehyde (PFA) | 4%, 4-24h (perfusion preferred) | High (pH dependent) | High | Standard (benchmark) | Moderate |
| Formalin (NBF) | 10%, <48h | Moderate (may quench) | High | Slower (crosslinking) | High (requires quenching) |
| Methanol | 100%, -20°C, 1h | Low (denatures) | Moderate | Faster (dehydrates) | Low |
| Glyoxal | 2%, 24h | Moderate | High | Similar to PFA | Low |
Table 3: Genetic Labeling Tool Compatibility with CUBIC Clearing
| Labeling Method | Model System | Key Compatible Fluorophores | Stability in CUBIC-R (Refractive Index Matching Solution) | Recommended Mounting Medium |
|---|---|---|---|---|
| Transgenic (Cre-lox) | Mouse, Rat | GFP, YFP, tdTomato, mCherry | High (weeks) | CUBIC-Mount or 80% glycerol |
| Viral Vector (AAV) | Mouse, Rat, Human explants | eGFP, mNeonGreen, JF dyes | High (weeks) | Proprietary high-RI media |
| Immunohistochemistry | All | Alexa Fluor 488, 555, 647, Dylight dyes | Moderate (days); minimize light exposure | Anti-fade mounting media |
| Nanobody Labeling | Mouse, Human | GFP-booster, RFP-booster | High (weeks) | CUBIC-Mount |
Experimental Protocols
Protocol 3.1: Perfusion Fixation for Mouse and Rat Models for Optimal CUBIC Clearing
Objective: To achieve uniform fixation with minimal autofluorescence and optimal preservation of endogenous fluorescence. Materials: Perfusion pump, surgical tools, 1x PBS (ice-cold), 4% PFA in 0.1M PBS (pH 7.4, pre-chilled). Procedure:
- Anesthetize the rodent deeply (e.g., pentobarbital, 100 mg/kg i.p.).
- Thoracotomy: Pin the animal supine, cut the rib cage laterally, and expose the heart.
- Perfusion: Insert a butterfly needle into the left ventricle. Immediately make an incision in the right atrium. a. Start perfusion with ice-cold 1x PBS at a rate of 10-15 mL/min for 2-3 minutes until the liver and lungs blanch and the effluent from the atrium runs clear. b. Switch to ice-cold 4% PFA. Perfuse at the same rate for 7-10 minutes (mouse: ~20 mL total; rat: ~100 mL). Observe stiffening of the body.
- Dissection: Quickly extract the target organs (e.g., brain) and post-fix in the same 4% PFA solution for 4-6 hours at 4°C on a shaker. Do not over-fix.
- Wash: Transfer tissue to 1x PBS. Wash 3x for 30 minutes each at 4°C to remove all PFA. Tissue can be stored in PBS with 0.05% sodium azide at 4°C for up to a week before clearing.
Protocol 3.2: Pre-clearing Immunohistochemistry for Human Tissue Sections
Objective: To label specific antigens in thick human tissue slices (up to 500 µm) prior to CUBIC clearing. Materials: Vibratome, blocking buffer (5% normal donkey serum, 1% BSA, 0.5% Triton X-100 in PBS), primary/secondary antibodies, PBS-T (0.1% Triton X-100). Procedure:
- Sectioning: Cut fixed human tissue samples into 300-500 µm thick sections using a vibratome in ice-cold PBS.
- Permeabilization & Blocking: Incubate sections in PBS-T for 24 hours at 4°C on a gentle shaker. Replace with blocking buffer for 24 hours at 4°C.
- Primary Antibody Incubation: Incubate in primary antibody diluted in blocking buffer for 72-96 hours at 4°C with gentle shaking.
- Washing: Wash with PBS-T 4-6 times over 24 hours at 4°C.
- Secondary Antibody Incubation: Incubate in fluorophore-conjugated secondary antibody (e.g., Alexa Fluor 647) diluted in blocking buffer for 48-72 hours at 4°C in the dark.
- Final Wash: Wash with PBS-T 4-6 times over 24 hours at 4°C. Proceed to CUBIC-Histo clearing protocol.
Protocol 3.3: CUBIC-Histo Protocol for Fixed Mouse Brain and Human Biopsies
Objective: To render fixed tissue transparent and refractive index matched for deep confocal imaging. Reagents: CUBIC-L (Reagent 1: 10 wt% N-butyldiethanolamine, 10 wt% Triton X-100 in water), CUBIC-R+ (Reagent 2: 45 wt% antipyrine, 30 wt% nicotinamide, 0.5% wt%/vol Triton X-100 in water). Procedure:
- Delipidation & Decolorization: a. Immerse fixed and washed sample in CUBIC-L at 37°C with gentle shaking. Use a 5:1 volume ratio of reagent to tissue. b. Incubation Time: - Mouse brain: 3-7 days. Replace with fresh CUBIC-L after day 3. - Human biopsy (5mm³): 7-14 days. Replace solution every 3-4 days. c. Tissue will expand 1.5-2x in size.
- Washing: Rinse tissue in PBS for 4-6 hours at 37°C to remove CUBIC-L. This step is critical for reducing background.
- Refractive Index Matching: a. Transfer tissue to CUBIC-R+ at room temperature. b. Incubation Time: Mouse brain: 1-2 days; Human biopsy: 3-4 days. Tissue will shrink to near-original size and become transparent.
- Imaging: Mount the cleared tissue in fresh CUBIC-R+ in an appropriate imaging chamber. Image using a confocal microscope equipped with long-working-distance objectives.
Diagrams
Title: CUBIC Tissue Clearing Workflow
Title: Fixation Impact on Fluorophore Stability
The Scientist's Toolkit: Key Research Reagent Solutions
Table 4: Essential Materials for CUBIC-based Studies
| Item | Function in CUBIC Protocol | Key Considerations |
|---|---|---|
| CUBIC-L (Reagent 1) | Primary delipidation and decolorization agent. Removes heme and lipids for initial clearing. | Causes tissue expansion. Contains strong detergents; handle with gloves. |
| CUBIC-R+ (Reagent 2) | Refractive index matching solution. Contains antipyrine and nicotinamide to achieve RI ~1.52. | Tissue shrinks back. Hygroscopic; store desiccated. |
| Dimethylsulfoxide (DMSO) | Optional additive to CUBIC-L (5-10%) for enhanced antibody penetration in pre-stained samples. | Can quench some fluorophores; test compatibility. |
| Passive Clarity Technique (PACT) Dehydration Solutions | Alternative pre-clearing steps for challenging tissues (e.g., human, bone). Hydrogel embedding can protect epitopes. | Can be combined with CUBIC-R+ for final R.I. matching. |
| High RI Mounting Media (e.g., CUBIC-Mount, 80% Glycerol/Thiodiethanol) | Preserves transparency during imaging on microscope stage. Prevents sample drying and RI mismatch. | Match RI to CUBIC-R+ (RI ~1.52). Use no. 1.5 coverslips. |
| Sodium Azide (0.05%) | Preservative for storing fixed tissues and antibody solutions to prevent microbial growth. | TOXIC. Do not mix with acids or dispose down sink. |
| Long-Working-Distance Objectives (e.g., 20x/0.8, 25x/1.0) | Critical for deep imaging within cleared tissue (multi-mm working distances). | Use dipping cone or correction collar for RI 1.52. |
| Shaking Incubator (37°C) | Provides constant agitation and temperature control for efficient CUBIC-L and CUBIC-R+ incubation. | Gentle orbital shaking is optimal to avoid tissue damage. |
Step-by-Step CUBIC Protocol: From Sample to Stunning 3D Confocal Data
Application Notes
The initial phase of the CUBIC-R (Clear, Unobstructed Brain/Body Imaging Cocktails and Computational analysis - Reduction) protocol is critical for subsequent tissue clearing and deep imaging. This stage prepares the tissue by stabilizing endogenous biomolecules, particularly proteins and nucleic acids, through hydrogel-tissue hybridization. The hydrogel mesh, formed in situ, anchors these targets, allowing for subsequent harsh lipid extraction with minimal structural distortion or loss of fluorescence. This process is essential for research in neuroanatomy, developmental biology, and pathology, enabling whole-organ 3D phenotyping for drug target validation and mechanistic studies.
Protocol: Sample Preparation and Hydrogel Monomer Infusion
Objective: To perfuse and fixate tissue samples, followed by complete infusion with hydrogel monomer solution for polymerization.
I. Materials & Reagent Solutions
| Research Reagent Solution | Function in Protocol |
|---|---|
| Phosphate-Buffered Saline (PBS), 1x | Isotonic washing and perfusion buffer to maintain physiological pH and osmolarity. |
| Paraformaldehyde (PFA), 4% in PBS | Primary fixative for cross-linking and stabilizing tissue proteins and structures. |
| CUBIC-R Monomer Solution | Contains acrylamide (AA) and N,N'-methylenebisacrylamide (BIS) in PBS. Forms the polyacrylamide hydrogel matrix upon initiation. |
| Thermo-initiator: VA-044 | Azo-initiator that decomposes at ~45°C to generate free radicals for uniform, thermal hydrogel polymerization. |
| Sodium Acrylate | Optional anionic monomer included to increase hydrogel swelling and enhance clearing efficiency in some protocols. |
| Protase Inhibitors (e.g., PMSF) | Added to monomer solution to prevent protein degradation during the infusion and polymerization process. |
II. Detailed Methodology
A. Perfusion and Fixation
- Transcardial Perfusion (for rodents):
- Anesthetize the animal deeply following approved IACUC protocols.
- Perfuse intracardially with ~20-50 mL of ice-cold 1x PBS to flush blood from the circulatory system.
- Immediately follow with perfusion of ~20-50 mL of ice-cold 4% PFA.
- Excise the target organ (e.g., brain, liver) and post-fix by immersion in 4% PFA at 4°C.
- Fixation Duration: Optimize for tissue type. For adult mouse brains, post-fix for 24-48 hours at 4°C with gentle shaking.
- Fixation for Other Tissues (e.g., human biopsies, organoids):
- Directly immerse tissue in 4% PFA at 4°C.
- Ensure sample dimensions do not exceed 5-10 mm in one axis for effective reagent diffusion.
- Fixation time should be empirically determined (e.g., 12-48 hours).
B. Monomer Solution Preparation & Infusion
- Prepare CUBIC-R Monomer Solution (100 mL):
- In 80 mL of PBS, dissolve:
- Acrylamide (AA): 8.0 g (final 8% w/w)
- N,N'-methylenebisacrylamide (BIS): 0.15 g (final 0.15% w/w)
- Optional: Sodium Acrylate: 7.0 g (final 7% w/w)
- Adjust pH to 7.0-7.5. Bring final volume to 100 mL with PBS. Filter sterilize (0.22 µm).
- Critical: Just before use, add the thermo-initiator VA-044 to a final concentration of 0.25% (w/v). (e.g., 0.25 g per 100 mL). Dissolve completely.
- In 80 mL of PBS, dissolve:
Wash and Infuse:
- After fixation, wash the sample in 1x PBS at 4°C with shaking. Change PBS 3-5 times over 24 hours to remove residual PFA.
- Transfer the sample to a 5-10x volume of the prepared CUBIC-R monomer solution (containing VA-044).
- Incubate at 4°C with gentle shaking for 3-7 days to allow complete diffusion of monomers into the tissue.
Polymerization:
- After full infusion, degas the container briefly with nitrogen or argon gas to reduce inhibition by oxygen.
- Seal the container and incubate in a water bath at 45°C for 3-6 hours to initiate polymerization. The solution will become viscous and form a firm hydrogel.
C. Post-Polymerization Trimming
- Once polymerized, carefully remove the tissue-hydrogel composite.
- Using a vibratome or sharp blade, trim away excess hydrogel and section the sample if necessary for downstream processing (e.g., for large organs).
- The sample is now ready for Phase 2: Lipid Extraction and Delipidation.
III. Quantitative Data Summary
Table 1: Key Parameters for CUBIC-R Phase 1 Protocol
| Parameter | Typical Value / Range | Notes & Optimization |
|---|---|---|
| PFA Fixation | 24-48 hours (4°C) | Longer times improve anchoring but may quench fluorescence; optimize for antigen/FP. |
| Sample Size Limit | < 10 mm thick | For effective monomer diffusion without passive clearing aids. |
| Acrylamide Concentration | 4-10% (w/w) | 8% is standard. Higher % increases anchoring strength but may reduce monomer diffusion. |
| BIS Crosslinker | 0.1-0.25% (w/w) | 0.15% is standard. Determines hydrogel pore size. |
| VA-044 Initiator | 0.25% (w/v) | Concentration critical for complete, uniform polymerization. |
| Monomer Infusion Time | 3-7 days (4°C) | Time is tissue-size dependent. Use weight measurement to confirm full infusion. |
| Polymerization | 45°C for 3-6 hours | Lower temperatures (37°C) can be used for longer periods (24h) if tissue is sensitive. |
IV. Protocol Workflow Diagram
CUBIC-R Phase 1 Workflow
V. Hydrogel-Tissue Hybridization Mechanism
Mechanism of Hydrogel-Tissue Hybridization
Phase 2 of the CUBIC (Clear, Unobstructed Brain/Body Imaging Cocktails and Computational analysis) protocol is critical for achieving optical transparency in thick tissue samples. Following initial refractive index matching in Phase 1 (CUBIC-R), Phase 2 employs CUBIC-L solution to remove lipids and heme pigments, which are primary sources of light scattering and absorption. This step is indispensable for deep, high-resolution confocal imaging in research focused on neuroanatomy, cancer biology, and developmental studies.
Key Principles & Mechanism of Action
CUBIC-L is an alkaline, aqueous reagent containing aminoalcohols (e.g., Quadrol) and detergents (e.g., Triton X-100, N-Octyl-β-D-glucoside). Its dual function involves:
- Delipidation: The detergent components solubilize and remove phospholipid bilayers from cellular membranes.
- Decolorization: The alkaline environment (pH ~8-9) denatures and elutes heme groups from hemoglobin and cytochromes, significantly reducing sample autofluorescence.
This combined action drastically reduces the scattering coefficient (μs) and absorption coefficient (μa) of the tissue, enabling photon penetration for imaging depths exceeding several millimeters.
Table 1: Key Properties & Performance Metrics of CUBIC-L Treatment
| Parameter | Typical Value / Result | Measurement Notes / Conditions |
|---|---|---|
| Solution pH | 8.5 - 9.0 | Critical for heme group denaturation. |
| Primary Active Components | Quadrol (20-25% w/w), Triton X-100 (5-10% w/w), Urea | Aminoalcohol (Quadrol) is essential for lipid removal. |
| Optimal Incubation Temperature | 37°C | Accelerates diffusion and reaction kinetics. |
| Typical Incubation Duration | 7 - 14 days | Depends on tissue type and size (e.g., mouse brain: ~7 days; whole adult mouse body: ≥14 days). |
| Recommended Solution Volume | 5-10x tissue volume | Ensures sufficient reagent capacity. |
| Key Outcome: Reduction in Absorbance (520-580 nm) | 70 - 90% | Measured by spectrophotometry of eluted solution; correlates with heme removal. |
| Clearing Rate (Thickness) | ~0.5 - 1.0 mm/day | Approximate linear clearing front progression in dense organs. |
| Post-treatment RI | ~1.38 - 1.40 | Must be followed by RI matching (return to CUBIC-R or mounting media) for imaging. |
Table 2: Impact of CUBIC-L on Imaging Quality
| Imaging Metric | Before CUBIC-L | After CUBIC-L (with RI matching) | Improvement Factor |
|---|---|---|---|
| Effective Imaging Depth (Confocal) | < 100 µm | > 3 mm | > 30x |
| Signal-to-Background Ratio | Low (High autofluorescence) | High | 5 - 10x increase |
| Axial Resolution at 1 mm depth | Severely degraded | Maintained near surface quality | Critical for 3D reconstruction |
Detailed Experimental Protocol
Materials Required:
- CUBIC-L Solution: 25 wt% Quadrol, 10 wt% Triton X-100, 25 wt% Urea, 0.1 wt% Sodium Azide in distilled water. Adjust to pH 8.5-9.0 with HCl/NaOH.
- Shaking incubator (37°C)
- Light-protected containers (e.g., 50 mL conical tubes)
- Fine mesh or platform to suspend tissue.
- Phosphate-Buffered Saline (PBS)
Procedure:
- Sample Transfer: After Phase 1 (CUBIC-R) incubation, gently retrieve the tissue sample using soft forceps.
- Brief Rinse: Rinse the sample in 1x PBS for 5-10 minutes to remove excess CUBIC-R. This step is optional but can help reduce precipitate formation.
- CUBIC-L Incubation: a. Place the sample into a fresh, light-protected container. b. Add pre-warmed (37°C) CUBIC-L solution at a volume 5-10 times the tissue volume. c. Incubate at 37°C with gentle, continuous agitation (e.g., on a rotary shaker). d. Monitor clearing progress visually. The solution will turn yellow/brown as pigments elute. e. Replace the CUBIC-L solution with fresh solution every 3-4 days to maintain chemical driving force.
- Completion & Washing: Incubation is complete when the tissue appears visually transparent and the CUBIC-L solution remains relatively clear after a refresh (typically 7-14 days). Rinse sample in PBS for 1-2 hours before proceeding to immunolabeling or refractive index matching for imaging.
- Refractive Index Matching: For direct imaging, return the sample to CUBIC-R or a suitable high-RI mounting medium (e.g., RIMS, 87% Glycerol) for at least 24 hours before imaging.
The Scientist's Toolkit: Essential Reagents & Materials
Table 3: Key Research Reagent Solutions for CUBIC Phase 2
| Item | Function in Protocol | Key Consideration |
|---|---|---|
| Quadrol (N,N,N',N'-Tetrakis(2-hydroxypropyl)ethylenediamine) | Primary aminoalcohol for efficient delipidation of phospholipid bilayers. | High purity is essential; it is the most critical and costly component of CUBIC-L. |
| Triton X-100 | Non-ionic detergent aiding in membrane solubilization and lipid removal. | Common lab reagent; contributes to the aqueous miscibility of lipids. |
| Urea | Chaotropic agent that helps denature proteins and destabilize lipid structures. | Enhances penetration of other active components into the tissue matrix. |
| Sodium Azide | Biostatic agent preventing microbial growth during long incubations. | Handle with care (toxic). Can be omitted for short incubations if sterile technique is used. |
| CUBIC-R Solution | High-refractive-index solution used post-delipidation to render the tissue transparent for imaging. | Must be applied after CUBIC-L washing to achieve final clarity. |
Visualized Workflows and Pathways
Title: CUBIC-L Phase 2 Experimental Workflow
Title: Mechanism of CUBIC-L Delipidation and Decolorization
Within the CUBIC tissue clearing framework, Phase 3 is the definitive refractive index (RI) matching step that renders specimens optimally transparent and compatible with high-resolution deep confocal imaging. While earlier phases (delipidation and decolorization) remove scattering components, this final stage homogenizes the RI throughout the sample by equilibrating it with a high-RI mounting medium. This application note details the protocols and considerations for achieving optimal transparency for diverse tissue types.
Key Principles and Quantitative Data
The goal is to match the sample's RI to that of the immersion medium used by the microscope objective (typically 1.33 for water, 1.38 for silicone oil, and 1.45–1.52 for oil/glycerol). CUBIC reagents achieve this using high-RI compounds.
Table 1: Refractive Index of Common CUBIC and Imaging Media
| Medium/Component | Refractive Index (RI) at 20°C | Primary Function |
|---|---|---|
| CUBIC-R+ (Prototype) | ~1.52 | Final RI matching solution for cleared tissue. |
| Sucrose | Variable (1.42-1.45) | Common RI-matching agent; concentration-dependent. |
| Histodenz | ~1.46 | Tri-iodinated compound for high RI with low autofluorescence. |
| 87% Glycerol | ~1.45 | Aqueous RI-matching medium. |
| Microscope Immersion Oil | 1.518 (standard) | Matched to coverslip and objective lens. |
| Silicone Oil | 1.40-1.43 | Used for specific water-immersion objectives. |
| Water (dH₂O) | 1.33 | Baseline; causes scattering if mismatch is high. |
Table 2: Recommended RI Matching Protocols by Tissue Type
| Tissue Type | Recommended RI Medium | Immersion Objective Type | Typical Equilibration Time | Key Consideration |
|---|---|---|---|---|
| Mouse Brain (whole) | CUBIC-R+ or 87% Glycerol | Oil (1.52) or Silicone (1.41) | 2-7 days | Long equilibration for core; monitor for swelling/shrinkage. |
| Mouse Embryo (E12.5+) | 80% Histodenz in PBS | Oil (1.52) | 24-48 hours | Gentle agitation; precise RI tuning possible. |
| Liver/Kidney Slices (500 µm) | 87% Glycerol with 0.1% NaN₃ | Oil (1.52) | 24-48 hours | Prone to over-clearing; shorter times may suffice. |
| Plant Tissue | ScaleS4(0) or 50% Sucrose | Water (1.33) or Silicone (1.41) | 3-7 days | Cell wall requires extended equilibration. |
Experimental Protocols
Protocol 3.1: Standard RI Matching with CUBIC-R+
Objective: To equilibrate a delipidated and decolorized sample with a high-RI mounting medium for imaging with an oil-immersion objective. Materials: CUBIC-R+ solution (or alternative: 87% Glycerol, Histodenz solution), refractive index meter, incubation chamber (sealed vial or dish), orbital shaker. Workflow:
- Preparation: Transfer the sample from CUBIC-L (Phase 2) into a suitable vial. Perform a graded RI transition: first immerse in a 1:1 mixture of CUBIC-L and your chosen RI medium for 6-12 hours.
- Primary Equilibration: Replace the solution with 100% RI matching medium (e.g., CUBIC-R+). Ensure the sample is fully submerged.
- Incubation: Place the vial on a gentle orbital shaker (20-30 rpm) at room temperature, protected from light. Equilibrate for 24 hours to 7 days, depending on sample size (see Table 2).
- RI Verification (Optional): Measure the RI of the supernatant with a refractometer. It should stabilize at the target value (e.g., ~1.52). For critical work, the sample's RI can be checked using laser speckle or optical coherence tomography methods.
- Mounting: Carefully transfer the cleared tissue into a fresh dish of RI medium. Mount in a custom chamber or between coverslips using spacers to prevent crushing. Seal edges with nail polish or VALAP.
- Imaging: Proceed to image with a confocal microscope using an immersion oil matched to the RI medium (e.g., standard oil for RI=1.52).
Protocol 3.2: Fine-Tuning RI with Sucrose or Histodenz Gradients
Objective: To empirically determine the optimal RI for a specific sample to balance transparency and fluorescence preservation. Materials: Stock solutions of 20%, 40%, 60%, 80% (w/v) Histodenz in PBS or equivalent sucrose solutions, clear glass multi-well plate or depression slides. Workflow:
- Gradient Setup: Place small volumes (e.g., 500 µL) of each RI solution into separate wells of a glass-bottom plate.
- Sample Placement: Transfer a small, representative piece of cleared tissue sequentially through the gradient, starting at the lowest RI. Allow 1-2 hours per step for equilibration.
- Visual Inspection: At each step, image the same region of the sample using a macro lens or microscope with transmitted light. Qualitatively assess transparency (visibility of background patterns).
- Optimal Point Selection: The RI at which the sample becomes nearly invisible (maximal transparency) is the target RI for the bulk sample.
- Bulk Equilibration: Prepare a large volume of the identified optimal RI solution and equilibrate the main sample as in Protocol 3.1.
Visualizations
Title: Phase 3 RI Matching Experimental Workflow
Title: Principle of RI Matching for Transparency
The Scientist's Toolkit: Key Reagents & Materials
Table 3: Essential Research Reagent Solutions for Phase 3
| Item | Function & Rationale |
|---|---|
| CUBIC-R+ Solution | The canonical, high-RI (~1.52) aqueous mounting medium for CUBIC-cleared samples. Contains urea and amino alcohols for final homogenization. |
| Histodenz | A non-ionic, tri-iodinated compound soluble in water. Allows precise tuning of RI (up to ~1.46) with minimal fluorescence quenching. |
| Sucrose (Optimal Grade) | A cost-effective RI-matching agent. High-purity sucrose minimizes autofluorescence. RI is concentration-dependent. |
| 87% Glycerol (v/v in PBS) | A simple, stable, and widely compatible RI medium (RI~1.45). Suitable for many samples and preserves most fluorescent proteins. |
| Refractometer | Critical for measuring the RI of prepared solutions to ensure consistency and accuracy across experiments. |
| Orbital Shaker | Provides gentle, continuous agitation during equilibration to ensure uniform reagent penetration and prevent gradient formation. |
| Imaging Chambers with Spacers | Custom chambers or coverslips with adhesive spacers prevent sample compression, which can induce scattering artifacts. |
| Optically Clear Sealing Agent (VALAP/Nail Polish) | Seals the imaging chamber to prevent evaporation of the RI medium, which would increase scattering over time. |
Immunolabeling Strategies for CUBIC-Cleared Tissues (Passive vs. Active)
Within the broader thesis on optimizing the CUBIC protocol for volumetric imaging, the efficacy of subsequent immunolabeling is paramount. Passive diffusion of antibodies into thick, cleared tissues is often slow and incomplete, limiting the depth of reliable labeling. Active labeling strategies, utilizing electrophoretic or centrifugal force, have been developed to enhance antibody penetration and reduce incubation times. These Application Notes detail the principles, quantitative comparisons, and step-by-step protocols for both approaches, providing a framework for researchers to select and implement the optimal strategy for their specific targets and tissue types.
Quantitative Comparison of Passive vs. Active Immunolabeling
Table 1: Performance Metrics of Passive vs. Active Immunolabeling in CUBIC-Cleared Tissues
| Parameter | Passive Diffusion (Static Incubation) | Active Labeling (Electrophoretic, e.g., eFLASH) | Active Labeling (Centrifugal, e.g., CUBIC-R+) |
|---|---|---|---|
| Primary Antibody Incubation Time | 5-14 days | 24-48 hours | 24-48 hours |
| Max Effective Labeling Depth (Mouse Brain) | ~2-3 mm (inconsistent beyond) | >5 mm (homogeneous) | >4 mm (homogeneous) |
| Antibody Consumption | High (large volume needed) | Low (small chamber volume) | Moderate |
| Throughput | Low (long duration) | Medium (requires setup) | High (uses standard equipment) |
| Equipment Complexity | Low (shaker, tube) | High (custom electrophoresis chamber, power supply) | Low (centrifuge, tubes) |
| Potential Artifacts | Gradient effects, surface labeling | Heat generation, pH shifts, protein aggregation | Tissue deformation if excessive force applied |
| Best Suited For | Thin sections (<2mm), pilot studies, delicate antigens | Large organ blocks, time-sensitive projects, deep structures | Medium-thick samples, high-throughput screening, standard lab workflows |
Protocols
Protocol 3.1: Passive Diffusion Immunolabeling for CUBIC-Cleared Samples
This protocol follows the original CUBIC philosophy, relying on extended incubation times for antibody penetration.
I. Materials & Reagents (Post-Clearing)
- CUBIC-cleared tissue sample (in CUBIC-R(+) or Scale solution).
- Primary antibody, validated for cleared tissues.
- Secondary antibody (conjugated to desired fluorophore).
- CUBIC immunolabeling buffer: 0.2% (w/v) Triton X-100, 0.01% (w/v) NaN3, 5% (w/v) DMSO in PBS or TBS. (DMSO enhances penetration).
- Blocking buffer: Add 5-10% (v/v) normal serum (from host of secondary antibody) to immunolabeling buffer.
- 6-well or 12-well plates or 5-10 mL glass vials with permeable lids.
- Orbital shaker at 20-37°C.
II. Procedure
- Blocking: Transfer the cleared tissue to a suitable container. Add 5-10 volumes of blocking buffer. Incubate at 37°C with gentle shaking (50-100 rpm) for 24-48 hours.
- Primary Antibody Incubation: Dilute the primary antibody in fresh blocking buffer (typical range 1:100 - 1:500). Remove the blocking buffer and add the antibody solution. Incubate at 37°C with gentle shaking for 5-14 days. For incubation >2 days, consider adding 0.01% sodium azide.
- Washing: Remove the antibody solution. Wash with 5-10 volumes of immunolabeling buffer (without serum) at 37°C with shaking. Perform 6-8 washes over 2-3 days, changing the buffer every 8-12 hours.
- Secondary Antibody Incubation: Dilute the fluorophore-conjugated secondary antibody in blocking buffer (typical range 1:200 - 1:500). Incubate at 37°C with gentle shaking for 3-7 days, protected from light.
- Final Washing: Repeat Step 3. Wash for 2-3 days with multiple buffer changes to reduce background.
- Re-Clearing & Imaging: Transfer the labeled sample to fresh CUBIC-R(+) solution for 1-2 days to restore optimal transparency before mounting and imaging.
Protocol 3.2: Active Immunolabeling via Centrifugal Force (CUBIC-R+ Protocol)
This protocol leverages centrifugal force to drive antibodies into the tissue matrix, significantly reducing incubation time.
I. Materials & Reagents
- All reagents from Protocol 3.1.
- Refrigerated benchtop centrifuge with a swinging bucket rotor capable of holding 15-50 mL conical tubes.
- 15 or 50 mL conical centrifuge tubes, padded with 1-2 mm soft silicone or foam at the bottom to cushion the tissue.
II. Procedure
- Blocking: Place the cleared tissue in a padded conical tube. Add 5-10 volumes of blocking buffer. Centrifuge at 100-200 x g, 4°C, for 1 hour.
- Primary Antibody Incubation: Replace solution with primary antibody in blocking buffer. Centrifuge at 100-200 x g, 20°C, for 2-3 hours. Then, incubate statically at 37°C overnight (12-16 hours). The short centrifugal pulse actively pulls antibody into the tissue, followed by standard binding.
- Washing: Remove antibody. Add wash buffer. Centrifuge at 100 x g, 20°C, for 30 minutes. Repeat this wash step 4-6 times over 1 day.
- Secondary Antibody Incubation: Apply secondary antibody solution. Centrifuge at 100-200 x g, 20°C, for 2-3 hours. Incubate statically at 37°C overnight, protected from light.
- Final Washing: Repeat Step 3 for 4-6 washes.
- Re-Clearing & Imaging: Proceed as in Protocol 3.1, Step 6.
Diagrams
Workflow for Selecting Immunolabeling Strategy
Mechanism of Passive vs. Active Antibody Penetration
The Scientist's Toolkit
Table 2: Essential Research Reagent Solutions for CUBIC Immunolabeling
| Item | Function & Critical Notes |
|---|---|
| CUBIC-L/R(+) Solutions | Original aqueous-based clearing/refractive index matching reagents. R(+) is used for post-labeling re-clearing. |
| Permeabilization Buffer (e.g., with Triton X-100) | Disrupts lipid membranes not removed during clearing, allowing antibody access to intracellular targets. |
| DMSO (5-10% in labeling buffer) | A penetration enhancer that reduces hydrophobic interactions, improving antibody diffusion into the hydrogel tissue matrix. |
| Carrier Proteins (Normal Serum, BSA) | Used in blocking buffers to reduce non-specific antibody binding and lower background fluorescence. |
| Sodium Azide (0.01%) | Preservative for long-term (>2 day) antibody incubations to prevent microbial growth. Handle with care. |
| Validated Primary Antibodies | Antibodies previously confirmed to work in fixed, cleared tissues. Monoclonal antibodies often perform better. |
| High-Quality Secondary Antibodies | Conjugated to bright, photostable fluorophores (e.g., Alexa Fluor 647). Pre-adsorbed to minimize cross-reactivity. |
| Centrifuge Tubes with Padding | For active centrifugal labeling; soft padding prevents tissue damage during spinning. |
| Custom Electrophoresis Chamber | For active electrophoretic labeling; maintains buffer pH/cooling during voltage application. |
| Mounting Media with RIM | High-refractive index mounting media (e.g., CUBIC-R(+), 87% Glycerol/TBE) to preserve transparency during imaging. |
This document provides integrated protocols for optimal sample mounting, immersion, and data acquisition following the CUBIC (Clear, Unobstructed Brain/Body Imaging Cocktails and Computational analysis) tissue clearing procedure. The CUBIC protocol, through delipidation and refractive index (RI) matching, renders whole organs and embryos transparent, enabling deep confocal and light-sheet fluorescence microscopy (LSFM). Success hinges on meticulous post-clearing steps to preserve transparency and ensure high-fidelity, quantitative 3D imaging for research and drug development applications.
Mounting and Immersion: Preserving Optical Clarity
The primary goal is to maintain perfect RI matching between the cleared sample, the mounting medium, and the microscope's immersion medium to minimize light scattering and spherical aberration.
2.1. Research Reagent Solutions
| Item | Function & Specification |
|---|---|
| CUBIC-RI (RI ~1.52) | Final RI-matching aqueous solution for storing and mounting CUBIC-cleared samples. Contains antipyrine and nicotinamide. |
| Ethyl Cinnamate (ECi, RI ~1.56) | High-RI, non-hazardous organic mounting medium. Ideal for samples requiring a higher RI match post-CUBIC. |
| Silicone Immersion Oil (RI 1.40-1.43) | Standard immersion medium for high-NA oil objectives. Mismatched with cleared samples (RI ~1.52), causing aberration. |
| Specialized Dipping Silicone (RI 1.50-1.53) | Silicone-based immersion fluid for water-dipping objectives. Must be matched to sample RI for LSFM. |
| Agarose (Low-melting point) | For embedding samples to provide physical stability during LSFM, especially for fragile tissues. |
| FEP (Fluorinated Ethylene Propylene) Tubes | Capillaries with RI (~1.34) close to water/RI-matching solutions. Minimizes optical distortion for LSFM sample rotation. |
| Custom 3D-Printed Chamber | Holds sample in RI-matching solution, compatible with microscope stage. |
2.2. Mounting Protocol for Confocal Microscopy
- RI Verification: Measure the RI of the cleared sample and your CUBIC-RI solution with a refractometer. Target RI: 1.52.
- Chamber Selection: Place sample in a glass-bottom dish or chamber sealed to prevent evaporation.
- Immersion Medium: Use an objective corrected for the specific immersion medium and sample RI. For CUBIC-RI (RI=1.52), a silicone oil immersion objective (RI=1.50) is optimal. Do not use standard oil (RI=1.51) or water immersion objectives.
- Mounting: Submerge the sample in fresh CUBIC-RI. For long acquisitions, seal the chamber with a coverslip and VALAP or use a humidity-controlled incubator.
2.3. Mounting Protocol for Light-Sheet Microscopy
- Embedding (Optional but Recommended): For stability, embed the sample in 1-2% low-melting-point agarose prepared in CUBIC-RI. Cast in a cylindrical mold.
- Mounting: For static imaging, mount the agarose-embedded sample in a chamber filled with CUBIC-RI. For multi-view imaging, carefully load the sample (embedded or not) into an FEP tube filled with CUBIC-RI, ensuring no air bubbles.
- Immersion: The detection objective uses a dipping silicone fluid. Crucially, the RI of this silicone must match the RI of the sample/mounting medium. Confirm compatibility with your LSFM system.
Data Acquisition: Optimizing for Cleared Tissues
3.1. Confocal Microscopy: Key Parameters
| Parameter | Recommended Setting for Cleared Tissues | Rationale |
|---|---|---|
| Laser Power | Start low (1-10%), increase only as needed. | Minimizes photobleaching deep within the large sample volume. |
| Detector Gain & Offset | Adjust to use full dynamic range without saturation. | Maximizes signal-to-noise ratio (SNR). |
| Pinhole | 1-2 Airy Units (AU). | Optimal sectioning vs. signal trade-off. Can be increased for dim signals. |
| Z-step Size | ≤ 0.5 × optical slice thickness (lateral resolution). | Adequate for 3D reconstruction (Nyquist sampling). |
| Scan Speed | Slower for better SNR at depth. | Compensates for signal loss due to scattering. |
| Tile Scanning | Essential for large samples. Use ≥10% overlap. | Enables seamless stitching of large volumes. |
3.2. Light-Sheet Microscopy: Key Parameters
| Parameter | Recommended Setting for Cleared Tissues | Rationale |
|---|---|---|
| Light-Sheet Thickness | Adjust dynamically or use scanned sheet. | Thinner sheet for superficial, high-resolution; thicker for deeper, brighter signal. |
| Illumination NA vs. Detection NA | Lower Illumination NA (e.g., 0.1-0.2). | Creates a longer, thinner light-sheet, illuminating only the focal plane. |
| Exposure Time | Optimize for camera's linear range. | Balances speed and sensitivity. |
| Z-step Size | Typically 1-3 µm. | Matched to the effective axial resolution of the system. |
| Multi-View Acquisition | Acquire at least 2 rotations (0°, 180°). | Reduces shadowing artifacts and improves uniformity. |
| Sheet Alignment | Calibrate for each sample/medium. | Ensures sheet is at the focal plane of the detection objective. |
3.3. Experimental Protocol: Multi-View Acquisition with LSFM
- Sample Mounting: Load sample into FEP tube filled with CUBIC-RI, mount on rotation stage.
- System Calibration: Perform sheet alignment and stage calibration routines.
- Preview Scan: Acquire a low-resolution preview to define the region of interest (ROI).
- Set Acquisition Parameters: Based on Table 2, define exposure, z-step, and rotation steps (e.g., every 90° for 4 views).
- Acquire Views: Run the automated multi-view acquisition.
- Fusion/Processing: Use microscope software (e.g., Arivis, Imaris) or open-source tools (e.g., BigStitcher) to deskew, register, and fuse multi-view data into a single, high-quality volume.
Visualization of Workflows
Diagram 1: CUBIC to Imaging Workflow
Diagram 2: Parameter Optimization Logic
Within a broader thesis investigating organ-specific pathologies using the CUBIC tissue clearing protocol for deep confocal imaging, a robust and quantitative image processing pipeline is critical. CUBIC-cleared samples enable the acquisition of high-resolution, multi-channel z-stacks spanning hundreds of microns to millimeters. However, these datasets are inherently affected by light scattering, out-of-focus blur, and noise. This application note details the sequential pipeline of Deconvolution, 3D Reconstruction, and Quantitative Analysis necessary to transform raw volumetric images into accurate, measurable biological insights, directly supporting thesis aims of quantifying cellular populations and morphological changes in cleared tissues.
Core Workflow and Protocols
Experimental Workflow Diagram
Diagram Title: Image Processing Pipeline for Cleared Tissues
Detailed Protocols
Protocol 1: Image Acquisition Pre-Processing for Deconvolution
- Objective: Prepare optimal raw data and generate a Point Spread Function (PSF).
- Materials: Raw 3D image stack (.czi, .lif, .tif), PSF extraction software (e.g., Huygens, theoretical modeler).
- Method:
- Data Export: Export raw image stacks in a lossless format (e.g., OME-TIFF). Maintain original bit-depth (16-bit).
- Metadata Collection: Record essential imaging parameters: Numerical Aperture (NA), immersion medium refractive index (n), emission wavelength (λ), pixel size (XY), and z-step size.
- PSF Generation: Empirical Method: Image 0.1 µm fluorescent beads embedded in the same clearing medium (CUBIC Reagent) using identical acquisition settings. Isolate a single bead near the sample's depth to generate an experimental PSF. Theoretical Method: Use software (e.g., Huygens, theoretical modeler) to calculate a PSF based on the recorded metadata and a calculated or measured refractive index of the cleared sample (~1.45-1.52 for CUBIC).
- Critical Step: Ensure the PSF accurately reflects the optical conditions of the cleared sample, not aqueous mounts.
Protocol 2: Deconvolution of Cleared Tissue Stacks
- Objective: Remove out-of-focus light and improve resolution and signal-to-noise ratio.
- Materials: Pre-processed image stack, calculated PSF, deconvolution software (e.g., Huygens Core, Imaris, or open-source DeconvolutionLab2 in Fiji).
- Method (Using Huygens Batch Processor as example):
- Input: Load the image stack and corresponding PSF.
- Algorithm Selection: Choose "Classic Maximum Likelihood Estimation (CMLE)" for best signal preservation or "Fast Iterative Maximum-Likelihood" for speed. For heavily scattered deep-tissue images, "Good's Roughness" regularization is advised.
- Parameter Setting: Set iteration number to 40-60. Set signal-to-noise ratio (SNR) appropriately (start with 20 for good quality confocal data). Enable "Background" auto-estimation.
- Execution & Output: Run deconvolution on a GPU-equipped workstation. Save output as a new 3D stack in OME-TIFF format. Do not overwrite raw data.
Protocol 3: 3D Reconstruction and Segmentation
- Objective: Create surfaces and masks for quantitative analysis of structures.
- Materials: Deconvolved stack, 3D analysis software (e.g., Imaris, Arivis Vision4D, or 3D Suite in Fiji).
- Method (Cell Nuclei Segmentation in Imaris):
- Volume Rendering: Visualize the deconvolved stack using the "Volume" rendering mode to assess overall structure.
- Surface Creation: Select the "Surfaces" module. Choose the DAPI/nuclei channel.
- Algorithm Configuration: Set "Estimated Diameter" to the typical nuclear diameter (e.g., 10 µm). Adjust "Threshold" (absolute intensity) to accurately separate nuclei from background. Enable "Split Touching Objects" using a seed point diameter.
- Quality Check: Manually scroll through orthogonal views to verify segmentation accuracy across the entire volume depth. Refine parameters if necessary.
- Export: Export the statistics (position, volume, intensity) for all created surfaces.
Protocol 4: Quantitative Colocalization and Morphometric Analysis
- Objective: Quantify molecular co-localization and structural morphology.
- Materials: Deconvolved multi-channel stack, segmentation masks.
- Method (Manders' Colocalization in Fiji with JACoP):
- Channel Alignment: Ensure perfect voxel registration between channels using the "Correct 3D Drift" plugin if needed.
- Region of Interest (ROI): Apply the 3D nuclear mask (from Protocol 3) to all channels to restrict analysis.
- Background Subtraction: Subtract the mean intensity of a non-fluorescent region from each channel.
- Analysis: Run the "Just Another Colocalization Plugin (JACoP)". Calculate Manders' Coefficients (M1 & M2), representing the fraction of Channel 1 overlapping Channel 2 and vice-versa. Use Costes' automatic thresholding.
- Morphometrics: Use the statistics from Protocol 3 to calculate mean cellular/nuclear volume, sphericity, and intensity density (integrated intensity / volume).
Table 1: Comparative Analysis of Deconvolution Algorithms on CUBIC-Cleared Lung Tissue
| Algorithm (Software) | SNR Improvement (%) | Computational Time (min/stack) | Recommended Use Case |
|---|---|---|---|
| No Deconvolution (Raw) | 0 (Baseline) | 0 | Initial visualization only |
| CMLE (Huygens) | 85-120 | 45 | High-precision quantification |
| Richardson-Lucy (Fiji) | 60-80 | 25 | Accessible, good improvement |
| Fast Blind (Imaris) | 70-90 | 15 | Large dataset screening |
Table 2: Quantitative Output from 3D Analysis of Cleared Hippocampal Region
| Measured Parameter | Control Group (Mean ± SD) | Treated Group (Mean ± SD) | p-value (t-test) | Biological Interpretation |
|---|---|---|---|---|
| Neuronal Nuclei Volume (µm³) | 185.3 ± 32.1 | 214.7 ± 41.5 | 0.003 | Potential cellular swelling |
| GFAP+ Cell Density (cells/mm³) | 12540 ± 2100 | 18760 ± 3450 | <0.001 | Significant astrogliosis |
| Colocalization (M1: Synaptophysin in PSD95) | 0.58 ± 0.08 | 0.42 ± 0.11 | 0.001 | Reduced synaptic apposition |
| Microglia Process Length (µm) | 45.2 ± 12.3 | 28.9 ± 9.8 | <0.001 | Process retraction |
The Scientist's Toolkit: Key Research Reagent Solutions
Table 3: Essential Reagents and Materials for the Pipeline
| Item | Function in Pipeline | Example/Note |
|---|---|---|
| CUBIC Clearing Reagents | Renders tissue optically transparent for deep imaging. | CUBIC-R(+) for decolorization, CUBIC-L for refractive index matching. |
| High-NA Immersion Objective | Captures high-resolution data with maximal light collection. | Silicone or multi-immersion objectives (NA >1.2) matched to clearing medium RI. |
| Fluorescent Beads (0.1 µm) | Empirically measures the microscope's PSF in the clearing medium. | TetraSpeck beads or similar, embedded in CUBIC mountant. |
| Deconvolution Software | Algorithmically removes blur, restoring resolution. | Huygens Professional (gold standard), Imaris, or open-source Fiji plugins. |
| 3D Analysis Suite | Segments, visualizes, and measures objects in volumetric data. | Imaris (user-friendly), Arivis Vision4D (handles huge data), Vaa3D (open-source). |
| GPU Workstation | Accelerates computationally intensive deconvolution and 3D rendering. | NVIDIA RTX series with >12GB VRAM and ≥64GB system RAM. |
| OME-TIFF File Format | Ensves lossless, metadata-rich archival and interchange of 3D stacks. | Standard output format from major microscopes and software. |
Pathway and Logical Relationship Diagrams
Diagram Title: Logical Flow from Thesis Aim to Insight
Diagram Title: Integration of Quantitative Analysis Modules
Solving CUBIC Challenges: Expert Tips for Tissue Integrity, Speed, and Clarity
The CUBIC (Clear, Unobstructed Brain/Body Imaging Cocktails and Computational analysis) protocol has revolutionized deep tissue imaging for research in neuroscience, developmental biology, and drug discovery. Its core thesis posits that through sequential reagent-driven delipidation and refractive index (RI) matching, one can achieve transparency of whole organs while preserving endogenous and exogenous fluorescence for high-resolution 3D reconstruction. However, the practical application of CUBIC is frequently undermined by three interconnected pitfalls: incomplete clearing, tissue damage, and fluorescence quenching. This application note details the origins, detection, and mitigation of these pitfalls to ensure reproducible, publication-quality results.
Quantitative Analysis of Pitfalls and Mitigations
Table 1: Impact and Quantitative Indicators of Common CUBIC Pitfalls
| Pitfall | Primary Cause | Key Quantitative Indicator | Typical Adverse Value Range |
|---|---|---|---|
| Incomplete Clearing | Insufficient delipidation or RI mismatch | Tissue Transparency (Absorbance at 650 nm) | > 0.2 AU (for 1 mm slice) |
| Final Refractive Index of Solution | < 1.48 or > 1.52 | ||
| Tissue Damage | Over-aggressive delipidation; osmotic stress | Tissue Swelling/Shrinkage Ratio | > 1.5x or < 0.8x original volume |
| Mechanical handling | Loss of Structural Integrity | Qualitative (tearing, fragmentation) | |
| Fluorescence Quenching | Prolonged pH exposure; radical generation | Fluorescence Intensity Loss (%) | > 50% loss vs. pre-cleared control |
| RI mismatch scattering | Signal-to-Background Ratio (SBR) | < 3:1 at depth |
Table 2: Optimized CUBIC Protocol Modifications to Avoid Pitfalls
| Protocol Stage | Standard Step | Risk | Modified Solution | Expected Outcome |
|---|---|---|---|---|
| Delipidation (CUBIC-1) | 1-2 weeks, RT | Incomplete clearing; Tissue damage | Agitation at 37°C; Time titration (3-7 days); Add antioxidant (e.g., 0.1% NAC) | Complete lipid removal; preserved structure & fluorescence |
| Washing | PBS, 1 day | Osmotic shock; Quenching | Graded series to PBS (50%, 75% PBS); Use of quenching inhibitor (e.g., 10 mM Ascorbate) | Minimal swelling; >80% fluorescence retention |
| Refractive Index Matching (CUBIC-2) | Immersion until clear | RI mismatch; Quenching | RI verification by refractometer; Use of alternative fluoroprotectants (e.g., aminoalcohols) | RI = 1.52; Transparency A650 < 0.1; Optimal SBR |
Detailed Experimental Protocols
Protocol 1: Quantifying Clearing Efficiency and Tissue Damage
Aim: To objectively assess the completeness of clearing and monitor structural integrity. Materials: See Scientist's Toolkit. Method:
- Sample Preparation: Cut tissue slices (e.g., 1 mm thick) from the same organ. Measure initial dimensions (Dx, Dy, Dz) using calipers under a dissecting microscope. Record pre-cleared absorbance baseline.
- Controlled Clearing: Process slices in parallel in CUBIC-1 reagent. Remove one slice daily (days 3, 5, 7).
- Wash & RI Matching: Wash per modified protocol (graded PBS). Immerse in CUBIC-2.
- Data Collection:
- Transparency: Measure absorbance at 650 nm in a plate reader. Lower values indicate better clearing.
- Swelling Ratio: Re-measure slice dimensions in CUBIC-2. Calculate volume ratio (Vfinal / Vinitial).
- Imaging: Acquire low-mag confocal stacks to check for bubbles, cracks, or non-uniform clearing. Analysis: Plot absorbance and swelling ratio vs. time. Optimal time minimizes both absorbance and volume change (<1.3x).
Protocol 2: Monitoring and Preventing Fluorescence Quenching
Aim: To identify steps causing fluorescence loss and implement protective measures. Materials: See Scientist's Toolkit. Method:
- Control Staining: Use standardized fluorescent bead samples or uniformly stained tissue sections.
- Parallel Processing: Divide samples into groups processed with:
- A) Standard CUBIC reagents.
- B) CUBIC-1 + 0.1% N-Acetyl Cysteine (NAC).
- C) Wash steps with 10 mM Sodium Ascorbate in PBS.
- D) RI matching with 50% (v/v) Quadrol in CUBIC-2.
- Intensity Measurement: Before clearing and after final RI matching, image the same region using identical laser power, gain, and exposure. Use a stable reference bead for normalization.
- Quantification: Calculate mean fluorescence intensity (MFI) in a defined ROI. Report as % intensity retained relative to pre-cleared control. Analysis: Identify which modification yields the highest fluorescence retention with acceptable clearing.
Visualizing the Pitfalls and Solutions
CUBIC Workflow with Critical Checkpoints
The Scientist's Toolkit
Table 3: Essential Research Reagent Solutions for Robust CUBIC Processing
| Item | Function in Mitigating Pitfalls | Example Product/Formulation |
|---|---|---|
| CUBIC-1+ | Enhanced delipidation with reduced damage. Contains urea, Triton X-100, and optional antioxidant N-Acetyl Cysteine (NAC). | 25 wt% Urea, 25 wt% N,N,N',N'-Tetrakis(2-hydroxypropyl)ethylenediamine, 15 wt% Triton X-100, 0.1% NAC. |
| Graded Wash Buffer | Prevents osmotic shock during transition from hypertonic CUBIC-1 to aqueous PBS. | Series of 50%, 75%, 100% PBS (v/v in dH2O) with 10 mM Sodium Ascorbate. |
| RI-Matching Solution with Fluoroprotectant | Achieves perfect RI=1.52 while preserving fluorescence. Alternative to high sucrose. | CUBIC-2 (50 wt% Sucrose) with 25% (v/v) Quadrol or 50% (v/v) Aminoalcohol. |
| Antioxidant Additives | Scavenge free radicals generated during prolonged clearing, reducing quenching. | 0.1% N-Acetyl Cysteine (in CUBIC-1), 10 mM Sodium Ascorbate (in wash buffers). |
| Refractometer | Critical for verifying the RI of the final solution to prevent scattering and incomplete clearing. | Digital handheld refractometer (range 1.45-1.55). |
| Hydrophilic Mounting Medium | Maintains tissue transparency and RI match under the coverslip for imaging. | 80% (v/v) CUBIC-2 in 2% Agarose or commercial RI=1.52 mounting media. |
1. Introduction & Context within CUBIC Protocol Thesis
Within the broader thesis on advancing the CUBIC (Clear, Unobstructed Brain/Body Imaging Cocktails and Computational analysis) tissue clearing protocol for deep confocal imaging, a critical challenge is the processing of dense, fibrous, or lipid-rich tissues. Standard CUBIC protocol incubation times and temperatures, optimized for murine brain, often yield incomplete clearing and antigen retention in tissues like spinal cord, kidney, heart, skeletal muscle, and aged or diseased samples. This application note details evidence-based optimizations for incubation parameters in the CUBIC-1 (decolorization/delipidation) and CUBIC-2 (refractive index matching) stages to ensure uniform transparency and preserve signal integrity for high-resolution volumetric imaging in drug development research.
2. Summary of Quantitative Optimization Data
Table 1: Optimization Guidelines for CUBIC-1 Reagent Incubation with Dense Tissues
| Tissue Type | Recommended Temperature | Recommended Time | Key Rationale & Outcome |
|---|---|---|---|
| Murine Spinal Cord | 37°C | 7-14 days | Enhanced lipid removal from dense myelin; time varies with fixation. |
| Murine Kidney | 37°C | 5-10 days | Improves penetration through glomerular and tubular structures. |
| Murine Heart / Muscle | 37°C | 10-14 days | Promotes clearing of highly fibrous extracellular matrix. |
| Aged or Pathological Brain | 37°C | 7-10 days | Addresses increased lipofuscin and protein cross-linking. |
| Standard Young Mouse Brain | 37°C | 3-7 days | Baseline protocol for reference. |
Table 2: Optimization Guidelines for CUBIC-2 Reagent Incubation (RI Matching)
| Clearing Stage | Recommended Temperature | Minimum Time | Key Rationale & Outcome |
|---|---|---|---|
| Passive Immersion | Room Temp (25°C) | 3-5 days | Standard, sufficient for most cleared tissues. |
| Passive Immersion (Dense Tissue) | 37°C | 5-7 days | Accelerates diffusion of RI matching solution into compact structures. |
| Agitation-Assisted | Room Temp (25°C) | 24-48 hrs | Gentle shaking significantly reduces incubation time uniformly. |
3. Detailed Experimental Protocols
Protocol 3.1: Optimized CUBIC-1 Treatment for Dense Tissues Objective: To achieve complete delipidation and decolorization of dense, non-brain tissues. Materials: See "Scientist's Toolkit" below. Procedure:
- Following standard perfusion and fixation, dissect and post-fix tissue sample (1-5 mm thickness) in 4% PFA for 24-48 hours at 4°C.
- Wash tissue in 0.1M PBS (pH 7.4) 3 x 2 hours each to remove fixative.
- Critical Step: Immerse tissue in CUBIC-1 reagent (5-10x volume of tissue) in a chemically resistant tube.
- Incubation: Place the tube in a thermostatic oven or dry bath set to 37°C. Incubate for the duration specified in Table 1.
- Replace the CUBIC-1 reagent with fresh solution every 3-4 days to maintain clearing potency.
- Monitor clearing progress visually and by periodic confocal check-up imaging.
- Upon clearing, wash tissue in PBS for 24-48 hours at 37°C to remove residual CUBIC-1. Perform multiple buffer changes until the tissue sinks.
Protocol 3.2: Accelerated CUBIC-2 Refractive Index Matching Objective: To achieve uniform refractive index (RI = ~1.48) matching post-CUBIC-1 clearing. Materials: See "Scientist's Toolkit" below. Procedure:
- Transfer the PBS-washed, cleared tissue into CUBIC-2 reagent (5-10x volume).
- Incubation Option A (Passive, Enhanced): Incubate at 37°C for 5-7 days without agitation.
- Incubation Option B (Agitation-Assisted): Incubate at Room Temperature on a gentle vertical or horizontal rotator (10-15 rpm) for 24-48 hours. This is preferred for throughput.
- The endpoint is achieved when the tissue becomes optically homogeneous and transparent. For imaging, mount the tissue directly in fresh CUBIC-2 reagent in an imaging chamber.
4. Visualization: Optimization Workflow and Impact
Title: CUBIC Optimization Workflow for Dense Tissues
Title: Protocol Comparison and Optimized Outcome
5. The Scientist's Toolkit: Research Reagent Solutions
| Item | Function in Optimized Protocol |
|---|---|
| CUBIC-1 Reagent | Primary delipidation/bleaching solution. Contains urea, Triton X-100, and triethanolamine. Extended warm incubation is key for dense tissues. |
| CUBIC-2 Reagent | Aqueous refractive index matching solution. Contains urea, sucrose, and triethanolamine. Warming/agitation ensures homogeneous RI. |
| Thermostatic Oven / Dry Bath | Provides stable, elevated temperature (37°C) environment for accelerated reagent penetration and chemical activity. |
| Gentle Vertical Rotator | Provides consistent agitation during CUBIC-2 incubation, drastically reducing RI matching time via improved convection. |
| Chemically Resistant Tubes | Withstands prolonged exposure to CUBIC reagents at 37°C without degradation or leaching (e.g., polypropylene). |
| Deep Imaging Chambers | Holds cleared tissue immersed in CUBIC-2 for long-term confocal or light-sheet microscopy. |
Preserving Endogenous Fluorescence and Enhancing Antibody Penetration
This application note, framed within the broader thesis of optimizing the CUBIC (Clear, Unobstructed Brain Imaging Cocktails and Computational analysis) protocol for deep confocal imaging, addresses two interconnected challenges in tissue-clearing-based 3D imaging: the preservation of endogenous fluorescent proteins (e.g., GFP, YFP) and the enhancement of antibody penetration for immunolabeling in cleared tissues. Effective solutions are critical for accurate multi-modal phenotyping in developmental biology, neuroscience, and drug discovery.
The core challenge lies in balancing the decolorizing and refractive index matching actions of clearing reagents with the stability of endogenous fluorophores. Meanwhile, the dense hydrophobic mesh of lipid-cleared tissue impedes large antibody molecules. Strategies involve pH stabilization, radical scavenging, and permeability enhancement.
Table 1: Comparison of Reagent Effects on Endogenous Fluorescence Preservation
| Reagent / Additive | Target Fluorophore (e.g., GFP) | Reported Preservation (% Initial Intensity) | Key Mechanism | Primary Use in Protocol |
|---|---|---|---|---|
| CUBIC-R1 (Original) | EGFP | ~40% after 7 days | Passive extraction | Delipidation & decolorization |
| CUBIC-R1 + 10 mM ASC (Na-L-Ascorbate) | EGFP | ~85% after 7 days | Antioxidant, reduces pH-induced quenching | Delipidation stabilization |
| CUBIC-R1 + 0.5% w/v PTOP (Phenylthiourea) | EGFP | ~78% after 7 days | Radical scavenger, inhibits bleaching | Delipidation stabilization |
| CUBIC-R2 (Original) | EGFP | >95% (short-term) | Refractive index matching (RI=1.48) | Clearing/Imaging |
| ScaleS4(0) | EGFP, tdTomato | >90% after months | Glycerol-based, low chemical stress | Alternative clearing |
| Antibody Penetration Enhancer | Antibody Size (kDa) | Reported Penetration Depth (μm) | Key Mechanism | Primary Use |
| 0.2% Triton X-100 | 150 | 200-300 | Mild detergent for permeabilization | Standard pre-treatment |
| 0.5% Saponin | 150 | 300-500 | Cholesterol sequestration, gentle pores | Pre-treatment |
| 0.1% Tween-20 | 150 | 200-400 | Mild detergent | Washing buffer additive |
| DMSO (Dimethyl Sulfoxide) | 150 | 500-1000 | Lipid fluidization, carrier effect | Additive to antibody solution (5-10%) |
| Saponin/DMSO Combination | 150 | >1000 | Synergistic permeability increase | Antibody incubation cocktail |
Detailed Experimental Protocols
Protocol 3.1: Modified CUBIC Delipidation for Endogenous Fluorescence Preservation
Objective: To clear tissue while maximizing retention of endogenous GFP/YFP signal. Materials: CUBIC-R1 (25 wt% urea, 25 wt% Quadrol, 15 wt% Triton X-100), Sodium L-Ascorbate (ASC), Phenylthiourea (PTOP), PBS, orbital shaker. Procedure:
- Prepare modified CUBIC-R1+: Dissolve CUBIC-R1 reagents in Milli-Q water. Add ASC to 10 mM and PTOP to 0.5% w/v. Stir until fully dissolved. Adjust pH to 7.0-7.4 using HCl. Filter (0.22 μm).
- Fixation & Pre-treatment: Perfuse/fix tissue with 4% PFA (paraformaldehyde) for 24-48 hours at 4°C. For adult organs, section into <5 mm thick blocks.
- Delipidation: Immerse tissue in 5-10x volume of modified CUBIC-R1+. Incubate at 37°C with gentle shaking. Time varies: mouse brain 3-7 days, liver 5-10 days. Replace solution every 2-3 days.
- Washing: Rinse tissue in PBS + 0.1% Tween-20 (PBS-T) for 24 hours at 25°C, changing buffer 3-4 times to remove residual R1.
- Refractive Index Matching: Transfer tissue to CUBIC-R2 (50 wt% sucrose, 25 wt% urea, 10 wt% triethanolamine, 0.1% v/v Triton X-100) until optically clear (1-3 days). The tissue is now ready for imaging or immunostaining.
Protocol 3.2: Enhanced Antibody Penetration in CUBIC-Cleared Tissue
Objective: To achieve uniform whole-tissue immunolabeling following CUBIC clearing. Materials: Cleared tissue sample, Primary antibody, Secondary antibody conjugated to fluorophore, PBS-T, DMSO, Saponin, Normal Donkey Serum (NDS), orbital shaker. Procedure:
- Blocking & Permeabilization: Incubate cleared tissue in Blocking Buffer (PBS-T + 5% NDS + 0.5% Saponin + 5% DMSO) for 48 hours at 37°C with gentle shaking.
- Primary Antibody Staining: Prepare Primary Antibody Solution in Antibody Dilution Buffer (PBS-T + 1% NDS + 0.5% Saponin + 5% DMSO). Use a 1:10 to 1:50 dilution of typical stock concentration. Incubate tissue in 5-10x volume of antibody solution for 7-14 days at 37°C with shaking.
- Washing: Remove primary antibody and wash tissue with Wash Buffer (PBS-T + 0.5% Saponin + 5% DMSO). Perform 6-8 washes over 72 hours at 37°C.
- Secondary Antibody Staining: Prepare Secondary Antibody in the same Antibody Dilution Buffer (1:100 to 1:200 dilution). Incubate for 7-14 days at 37°C in the dark.
- Final Wash & Clearing: Wash as in Step 3 for 72 hours. Return tissue to CUBIC-R2 for 24-48 hours to re-establish optimal refractive index for imaging.
Visualizations
Diagram 1: Endogenous Fluorescence Preservation Strategy
Diagram 2: Antibody Penetration Enhancement Workflow
The Scientist's Toolkit: Essential Reagents and Materials
Table 2: Key Research Reagent Solutions
| Item | Function in Protocol | Key Consideration |
|---|---|---|
| Quadrol (N,N,N',N'-Tetrakis(2-hydroxypropyl)ethylenediamine) | Key component of CUBIC-R1 for delipidation and decolorization. | Highly viscous; handle with care; pH is critical for fluorophore stability. |
| Sodium L-Ascorbate (ASC) | Antioxidant additive to CUBIC-R1. Scavenges free radicals, stabilizing GFP chromophore. | Prepare fresh stock solution; final pH adjustment after addition is required. |
| Phenylthiourea (PTOP) | Additive to CUBIC-R1. Potent radical scavenger, inhibits photobleaching. | Toxic; use appropriate PPE (Personal Protective Equipment). |
| Triton X-100 | Non-ionic detergent for initial permeabilization and as a component of clearing reagents. | Can quench fluorescence at high concentrations; optimize per tissue type. |
| Saponin | Penetration enhancer for immunostaining. Creates pores in membrane remnants by complexing cholesterol. | Use in both blocking and antibody solutions for consistent effect. |
| Dimethyl Sulfoxide (DMSO) | Penetration enhancer. Fluidizes tissue matrix, acts as a carrier for antibodies. | Hygroscopic; can cause tissue shrinkage if used at >10% for prolonged periods. |
| Normal Donkey Serum (NDS) | Blocking agent to reduce non-specific antibody binding in cleared tissue. | Preferred due to broad compatibility; use at 5% in blocking and antibody solutions. |
| CUBIC-R2 | Aqueous-based refractive index matching solution for final clearing and imaging. | Contains high sucrose; viscous. Ensure no crystals form during storage. |
The original CUBIC (Clear, Unobstructed Brain/Body Imaging Cocktails and Computational analysis) protocol is optimized for mouse brains and other similarly sized organs. Scaling for larger specimens (e.g., whole adult rodent bodies, primate organs, human tissue blocks) or for high-throughput screening in drug development introduces challenges in reagent penetration, clearing time, refractive index matching, and reagent cost. This application note details modifications to the standard CUBIC protocols (CUBIC-X, CUBIC-HistoViz) to address these challenges, enabling deep confocal imaging of large-scale samples.
Quantitative Comparison of Standard vs. Scaled Protocols
Table 1: Key Parameter Adjustments for Scaling
| Parameter | Standard CUBIC (Mouse Brain) | Scaled Protocol (Large Organs/Whole Body) | High-Throughput Adaptation (96-well format) |
|---|---|---|---|
| Reagent Volume | 20-30 mL per brain | 500 mL - 2 L (passive); 5-10 L (perfusion) | 200-300 µL per well |
| Incubation Time (Decolorization/Detergent) | 5-7 days | 14-28 days (with agitation) | 3-5 days (with enhanced agitation) |
| Incubation Time (RIM Solution) | 3-7 days | 14-21 days | 2-3 days |
| Optimal Temperature | 37°C | 45-50°C (with monitoring for protein degradation) | 37°C with orbital shaking |
| Primary Method | Passive immersion | Active perfusion + immersion with agitation | Passive immersion in plate with shaking |
| Typical Clearing Duration | 10-14 days | 4-8 weeks | 7-10 days |
| Recommended RI of Final Solution | ~1.52 | ~1.52 (requires precise monitoring) | ~1.52 |
Table 2: Reagent Formulation Adjustments for Scaling
| Reagent Component | Standard CUBIC-R1 (wt%) | Scaled CUBIC-R1 (wt%) | Function & Scaling Rationale |
|---|---|---|---|
| Urea | 25 | 20-25 | Hydrophilic clearing agent. High concentration can crystallize in large volumes; maintain saturation. |
| Quadrol (N,N,N',N'-Tetrakis(2-hydroxypropyl)ethylenediamine) | 25 | 20-25 | Key detergent for lipid removal. Costly for large volumes; ensure consistent stirring. |
| Triton X-100 | 0.5 | 1.0-2.0 | Non-ionic detergent. Increased concentration aids penetration in dense tissues. |
| Sucrose (in R2/Refractive Index Matching Solution) | 50 | 40-50 | Adjust based on target RI (1.52). For large samples, precise RI measurement is critical. |
Detailed Experimental Protocols
Protocol 3.1: Scaling for Large Organs (e.g., Whole Adult Rat Brain, Kidney, Heart)
Objective: To completely clear and refractive-index match large, dense organs for deep confocal imaging. Workflow Overview:
Title: Workflow for Clearing Large Organs with Scaled CUBIC
Detailed Steps:
- Perfusion Fixation: For whole organs or bodies, transcardial perfusion with 4% paraformaldehyde (PFA) in 0.1M phosphate buffer is critical. Follow with immersion fixation for 24-48 hours at 4°C.
- Passive Wash: Rinse in 0.01M PBS (pH 7.4) with gentle agitation. Change solution every 12 hours for 2 days. Volume: 10x sample volume.
- Scaled Decolorization/Lipid Removal:
- Prepare Scaled CUBIC-R1 solution: 20 wt% Urea, 20 wt% Quadrol, 2 wt% Triton X-100 in Milli-Q water. Stir at 40°C until fully dissolved.
- Incubate sample in R1 (10x volume) at 45°C with continuous orbital shaking (30-50 rpm).
- Monitor weekly. Replace solution with fresh R1 every 7-10 days to maintain clearing efficiency.
- Continue until sample is fully translucent (2-4 weeks).
- Intermediate Wash: Transfer to PBS (10x volume) at 37°C with agitation. Change PBS 2-3 times daily for 2-3 days to completely remove R1.
- Scaled Refractive Index Matching:
- Prepare Scaled CUBIC-R2: 40-50 wt% Sucrose in 0.01M PBS. Adjust to achieve nD = 1.52 using a refractometer.
- Incubate sample in R2 (5x volume) at 37°C with agitation.
- Solution may be replaced once after 7 days to ensure complete equilibration.
- Incubate until sample sinks and appears optically clear (2-3 weeks).
- Mounting: Embed sample in 1% low-melting-point agarose prepared in the final R2 solution. Image using a confocal microscope equipped with long-working-distance objectives suitable for cleared tissue.
Protocol 3.2: High-Throughput Adaptation for 96-Well Format
Objective: To process many smaller samples (e.g., tissue punches, organoids, small biopsies) in parallel for drug screening or comparative studies. Workflow Overview:
Title: High-Throughput CUBIC Workflow in 96-Well Plate
Detailed Steps:
- Fixation in Plate: Fix samples directly in a 96-well plate with 200 µL of 4% PFA per well for 24 hours at 4°C.
- Automated Washing: Using a microplate washer, aspirate and dispense 300 µL of PBS per well for 6 cycles over 24 hours.
- High-Throughput CUBIC-R1 (HT-R1):
- Formulation: 25 wt% Urea, 25 wt% Quadrol, 1.5 wt% Triton X-100.
- Add 250 µL of HT-R1 per well. Seal plate with a gas-permeable sealing membrane.
- Incubate at 37°C on an orbital shaker (150-200 rpm) for 3-5 days.
- Automated Washing: Repeat Step 2 to thoroughly remove HT-R1.
- High-Throughput CUBIC-R2 (HT-R2):
- Formulation: 50 wt% Sucrose in PBS (nD=1.52).
- Add 200 µL of HT-R2 per well. Reseal plate.
- Incubate at 37°C with shaking (100 rpm) for 2-3 days.
- Imaging: Image directly through the plate bottom using an inverted confocal microscope with an automated stage, or transfer samples to an imaging-optimized plate.
The Scientist's Toolkit: Essential Reagents & Materials
Table 3: Key Research Reagent Solutions for Scaling CUBIC
| Item | Function & Role in Scaling | Key Considerations for Scaling |
|---|---|---|
| Quadrol | Primary amino alcohol detergent for lipid removal and decolorization. | Most expensive component. For large volumes, source bulk quantities. Ensure consistent quality. |
| Urea | Denaturant and hydrophilic clearing agent. | Use high-purity grade to prevent cyanate formation, which can modify proteins. |
| Sucrose (Ultra-Pure) | Provides refractive index matching (nD=1.52) in aqueous solution. | Non-toxic and cost-effective for large volumes. Filter sterilize solutions to prevent microbial growth. |
| Triton X-100 | Non-ionic surfactant enhancing lipid removal and reagent penetration. | Increase concentration (1-2%) for dense or large samples to improve penetration kinetics. |
| Peristaltic Pump System | For active perfusion of large specimens or whole bodies with fixative and clearing reagents. | Enables uniform delivery deep into vasculature, drastically reducing processing time for very large samples. |
| Temperature-Controlled Orbital Shaker | Provides agitation for large-volume incubations and high-throughput plates. | Essential for maintaining concentration gradients and reducing incubation times by 30-50%. |
| Digital Refractometer | Precisely measures refractive index of R2/sucrose solutions. | Critical for large samples where small RI deviations cause major imaging artifacts. |
| Gas-Permeable Sealing Membrane | Seals 96-well plates during incubation while allowing gas exchange. | Prevents evaporation in high-throughput protocols, which is crucial for reproducibility. |
| Low-Melting-Point Agarose | For embedding cleared samples for stable mounting during imaging. | Prepare in the final R2 solution to prevent RI mismatch at the sample-mounting medium interface. |
Critical Considerations and Troubleshooting
- Reagent Penetration: The limiting factor for large samples. Active perfusion via the vascular system (if intact) or using pressure-assisted incubation chambers can reduce time by >50%.
- Fluorescence Preservation: Long incubations at elevated temperatures can quench fluorescent proteins. Include antioxidant agents (e.g., 0.1% ascorbic acid) in solutions and minimize light exposure.
- Tissue Integrity: Excessive shaking or temperature can cause physical damage. Optimize agitation speed and monitor sample integrity.
- Cost Management: For large volumes, consider alternative, less expensive detergents for a pre-clearing step before final Quadrol-based clearing.
- Imaging Depth: Even after clearing, light scattering increases with depth. Use confocal microscopes with sensitive GaAsP detectors and multi-photon microscopes for samples >5 mm thick.
Within the application of the CUBIC (Clear, Unobstructed Brain/Body Imaging Cocktails and Computational Analysis) tissue clearing protocol for deep confocal imaging, achieving high-fidelity three-dimensional reconstructions is paramount for research and drug development. A significant challenge lies in mitigating imaging artifacts—specifically photobleaching, optical aberrations, and background noise—which can obscure true biological signals, compromise quantitative analysis, and lead to erroneous conclusions. These artifacts are exacerbated by the increased optical path length and refractive index mismatches inherent in cleared samples. This document provides detailed application notes and experimental protocols to diagnose, minimize, and correct these critical issues.
Artifact Diagnosis & Quantitative Impact
The following table summarizes the primary artifacts, their causes, and measurable impacts on image data quality.
Table 1: Characterization of Key Imaging Artifacts in Cleared Tissue
| Artifact | Primary Cause in CUBIC Samples | Key Metrics Affected | Typical Quantitative Impact (Reported Range) |
|---|---|---|---|
| Photobleaching | Fluorophore exposure during long z-stack acquisition; Reactive species from clearing reagents. | Fluorescence Intensity (FI), Signal-to-Noise Ratio (SNR). | FI decay up to 40-60% over 500 µm depth scan with constant laser power. |
| Spherical Aberration | Mismatch between immersion medium (oil/water) and cleared tissue refractive index (RI). RI of CUBIC-RI ~1.52. | Axial Resolution, Signal Intensity, Point Spread Function (PSF) symmetry. | Can expand PSF axially by >2x, reducing effective resolution by ~50% at depth. |
| Background Noise | Autofluorescence from fixatives (e.g., glutaraldehyde) or clearing itself; Non-specific antibody binding; Camera readout. | Contrast-to-Noise Ratio (CNR), SNR. | Can reduce CNR by >30%, obscuring low-abundance targets. |
Detailed Experimental Protocols
Protocol 3.1: Pre-Imaging Treatment to Reduce Autofluorescence
- Objective: Minimize background noise originating from fixative-induced autofluorescence.
- Reagents: Sodium borohydride (NaBH₄) solution (1 mg/mL in PBS), or Ammonium chloride (50 mM in PBS).
- Procedure:
- Following CUBIC clearing and prior to immunolabeling (if performed), incubate the sample in NaBH₄ solution for 1 hour at 4°C.
- Rinse the sample thoroughly with PBS or the appropriate buffer (3 x 1 hour) to remove residual reducing agent.
- Proceed with standard immunolabeling protocols for cleared tissue.
- Note: Test on a small sample first, as aggressive reduction may affect some epitopes.
Protocol 3.2: PSF Measurement for Aberration Assessment
- Objective: Empirically measure the Point Spread Function to evaluate spherical aberration.
- Reagents: Sub-resolution fluorescent beads (0.1 µm diameter), matching the emission wavelengths of your fluorophores. Embed in the same mounting medium used for your CUBIC samples.
- Procedure:
- Prepare a thin sample of beads suspended in CUBIC mounting medium (e.g., CUBIC-RI) between a slide and coverslip.
- Using your confocal system, acquire a high-magnification, high-resolution z-stack (step size ~0.1 µm) of several isolated beads.
- Use image analysis software (e.g., ImageJ with PSF Plugins, Huygens) to analyze the bead's intensity profile in XY and XZ.
- Measure the Full Width at Half Maximum (FWHM) in lateral (x,y) and axial (z) dimensions. Compare to the theoretical PSF of your objective lens.
- Analysis: An increased axial FWHM relative to the lateral FWHM and theoretical values indicates significant spherical aberration.
Protocol 3.3: Adaptive Acquisition to Combat Photobleaching
- Objective: Implement a z-compensation strategy to maintain uniform SNR throughout a deep stack.
- Procedure:
- Acquire a preliminary test z-stack (e.g., 100 µm deep) using constant laser power and gain.
- Plot the mean intensity of a consistent region of interest (ROI) against depth.
- Fit an exponential decay curve to the intensity data.
- For the final acquisition, enable the microscope's "z-compensation" or "ramp" function. Program it to increase laser power or detector gain as a function of depth, inversely following the decay curve, to deliver a near-constant signal.
- Critical: Ensure that increased laser power at deeper levels does not cause additional aberrations or tissue damage.
The Scientist's Toolkit: Research Reagent Solutions
Table 2: Essential Reagents for Artifact Mitigation in Cleared Tissue Imaging
| Item | Function & Rationale |
|---|---|
| CUBIC-RI Mounting Medium | High-refractive index (≈1.52) aqueous mounting solution. Matches the RI of cleared tissue to minimize spherical aberration for oil immersion objectives. |
| Antifade Reagents (e.g., Ascorbic Acid, Trolox) | Added to mounting media to scavenge free radicals generated during imaging, thereby slowing photobleaching. |
| Sodium Borohydride (NaBH₄) | Reducing agent that quenches fixative-induced (especially glutaraldehyde) autofluorescence by reducing Schiff bases. |
| Hydrophilic Silicone Oils | Alternative immersion fluids with tunable RI. Can be matched precisely to sample RI (e.g., 1.52) to eliminate aberration for high-NA objectives. |
| Sub-resolution Fluorescent Beads | Used as point sources to empirically measure the system's Point Spread Function (PSF) under actual imaging conditions, enabling aberration quantification. |
| High-Purity/Specificity Antibodies | Critical for minimizing non-specific binding, a major contributor to structured background noise. Validate antibodies for use in cleared tissues. |
Visualization of Workflows and Relationships
Artifact Troubleshooting Decision Workflow
Causes and Effects of Spherical Aberration
CUBIC vs. The Field: Performance Benchmarking and Validating Your 3D Data
This Application Note provides detailed protocols and metrics for quantitatively assessing the performance of tissue clearing methods, with a specific focus on the CUBIC (Clear, Unobstructed Brain/Body Imaging Cocktails and Computational analysis) protocol. The success of deep confocal imaging in research and drug development hinges on three interdependent pillars: achieving high tissue transparency, managing tissue expansion, and maximizing fluorescent signal retention. Accurate quantification of these parameters is essential for protocol optimization, comparison, and reproducible research outcomes.
The following tables define key metrics and summarize typical quantitative outcomes from optimized CUBIC protocols.
Table 1: Core Quantitative Metrics for Clearing Assessment
| Metric | Definition | Measurement Tool | Ideal Outcome (CUBIC) |
|---|---|---|---|
| Transparency (Depth) | Depth at which signal intensity drops to 50% (Imaging Depth, ID) or 1/e² (Attenuation Length, AL). | Confocal microscopy with a reflective slide. | > 5 mm ID in mouse brain. |
| Tissue Expansion | Volumetric or linear dimensional change post-clearing. | Microscopic measurement of fiducial markers or whole-organ imaging. | Isotropic expansion; 1.1-1.5x linear (varies by organ). |
| Signal-to-Background Ratio (SBR) | Ratio of specific fluorescent signal to background autofluorescence. | Intensity measurements from defined ROIs in cleared tissue. | > 10:1 for specific labeling. |
| Signal Retention (%) | Percentage of initial fluorescent signal retained after clearing. | Comparative intensity measurement pre- and post-clearing. | > 70% for common fluorophores (e.g., GFP, mCherry). |
| Refractive Index (RI) Matching | RI of cleared tissue vs. immersion medium. | Refractometer or Abbe refractometer. | Tissue RI ~1.45-1.48, matched to medium. |
Table 2: Example Quantitative Data from CUBIC-Processed Adult Mouse Brain
| Parameter | CUBIC-R* Protocol | CUBIC-L* Protocol | Notes |
|---|---|---|---|
| Final Transparency (Attenuation Length) | 5.2 ± 0.3 mm | 4.8 ± 0.4 mm | Measured at 647 nm. |
| Linear Expansion Factor | 1.28 ± 0.05 | 1.52 ± 0.08 | Reversible with ScaleS solution. |
| GFP Signal Retention (%) | 78 ± 6% | 85 ± 5% | After 2-week clearing. |
| mCherry Signal Retention (%) | 82 ± 7% | 89 ± 4% | After 2-week clearing. |
| Final Tissue RI | ~1.48 | ~1.45 | *CUBIC-R: RI Matching solution. CUBIC-L: Clearing solution. |
Detailed Experimental Protocols
Protocol 3.1: Quantitative Measurement of Tissue Transparency
Objective: To determine the effective imaging depth by measuring signal attenuation through a cleared tissue sample.
Materials:
- CUBIC-cleared tissue sample.
- Reflective microscope slide (e.g., coated with silver or aluminum).
- Confocal microscope with long-working distance objective (e.g., 4x/0.28 NA or 10x/0.5 NA).
- Fluorescent sample or thin fluorescent layer.
Procedure:
- Place the cleared tissue sample on the reflective slide.
- Mount the slide on the microscope. Use an immersion medium (CUBIC immersion solution, RI ~1.48) matching the cleared tissue's RI.
- Focus on the top surface of the tissue.
- Acquire a Z-stack deep into the tissue (e.g., 0-6000 µm) with constant laser power, gain, and pixel dwell time.
- Data Analysis:
- Plot the mean fluorescence intensity within a constant ROI vs. depth (Z).
- Fit the exponential decay curve:
I(z) = I0 * exp(-2z / AL), whereI0is intensity at surface,zis depth, andALis the attenuation length. - Report the Attenuation Length (AL) or the depth where intensity falls to 50% (Imaging Depth, ID).
Protocol 3.2: Quantifying Tissue Expansion
Objective: To measure isotropic volumetric expansion induced by the CUBIC protocol.
Materials:
- Tissue sample with internal or external fiducial markers (e.g., fluorescent beads, patterned grid).
- Light sheet or confocal microscope.
- Image analysis software (e.g., Fiji/ImageJ).
Procedure:
- Pre-clearing Measurement: Image the sample before clearing. Measure the 3D distance between at least three non-collinear fiducial points distributed throughout the sample.
- Clearing: Subject the sample to the full CUBIC protocol (CUBIC-R reagent 1 & 2).
- Post-clearing Measurement: Re-image the same sample under identical microscope settings (correcting for RI mismatch if necessary). Identify the same fiducial points.
- Data Analysis:
- Calculate the linear expansion factor for each vector:
E_linear = (Post-clearing distance) / (Pre-clearing distance). - Calculate the mean and standard deviation. Confirm isotropy by comparing expansion in X, Y, and Z axes.
- Volumetric expansion is approximately the cube of the mean linear expansion factor:
E_vol ≈ (E_linear)^3.
- Calculate the linear expansion factor for each vector:
Protocol 3.3: Assaying Fluorescent Signal Retention
Objective: To determine the percentage of specific fluorescent signal preserved throughout the clearing process.
Materials:
- Paired tissue samples from the same source: one control, one for clearing.
- Widefield or confocal fluorescence microscope.
- Microplate reader or spectrophotometer (optional for homogenates).
Procedure (Intact Tissue Imaging):
- Baseline Imaging (T0): Image both the control and experimental sample using identical, non-saturating imaging parameters. Quantify the mean intensity in a defined Region of Interest (ROI) for a specific channel (e.g., GFP).
- Processing: Place the experimental sample in CUBIC reagents. Keep the control sample in PBS or fixative at 4°C.
- Post-clearing Imaging (T1): After clearing and RI matching, re-image the experimental sample with the exact same settings as T0. Re-image the control sample.
- Data Analysis:
- Correct the experimental T1 intensity for any photobleaching in the control:
Corrected T1 = (Exp_T1 / Exp_T0) / (Ctrl_T1 / Ctrl_T0). - Signal Retention (%) = Corrected T1 * 100.
- Correct the experimental T1 intensity for any photobleaching in the control:
Visualization of Pathways and Workflows
Diagram Title: CUBIC Protocol Workflow & Evaluation
Diagram Title: Factors Affecting Signal Retention in Clearing
The Scientist's Toolkit: Research Reagent Solutions
Table 3: Essential Materials for CUBIC-based Quantitative Analysis
| Item | Function in Protocol | Key Consideration |
|---|---|---|
| CUBIC-R1 | Primary clearing reagent. Removes lipids and heme, enabling transparency. | Contains urea and Triton X-100. Optimize incubation time (1-3 weeks) based on tissue size. |
| CUBIC-R2 | Refractive Index matching solution. Finalizes clearance and matches tissue RI to ~1.48 for imaging. | Contains sucrose and urea. Essential for minimizing spherical aberration. |
| ScaleS | Aqueous mounting medium. Anti-photobleaching reagent for long-term imaging of cleared samples. | Contains D-sorbitol and glycerol. Can reverse CUBIC expansion for comparison with reference atlases. |
| N-propyl Gallate | Antioxidant. Added to clearing or imaging solutions to reduce fluorophore photobleaching. | Critical for preserving signal during prolonged 3D imaging sessions. |
| Agarose (Low-melt) | For sample embedding. Provides mechanical support during long clearing incubations and handling. | Use low percentage (e.g., 1-2%) to avoid impediment of reagent diffusion. |
| Reflector Slides | For transparency assays. Provide a reflective surface to measure signal attenuation through tissue. | Required for Protocol 3.1 to distinguish signal loss from lack of fluorophore. |
| Fiducial Beads | For expansion measurement. Serve as internal, stable landmarks for pre- and post-clearing size comparison. | Must be fluorescent and chemically inert to clearing reagents. |
| RI Matching Oil | Immersion fluid for objectives. Must match the final RI of the cleared sample (RI ~1.48). | Using mismatched RI severely degrades image quality and depth. |
This Application Note provides a comparative analysis within the framework of a broader thesis advocating for the optimized CUBIC (Clear, Unobstructed Brain/Body Imaging Cocktails and Computational analysis) protocol as a versatile tool for deep confocal imaging in biomedical research. Understanding the strengths and limitations of prevalent clearing techniques—CUBIC, CLARITY, iDISCO, and ScaleS—is critical for researchers and drug development professionals selecting the optimal method for specific experimental goals, such as whole-organ imaging, immuno-labeling efficiency, or preservation of endogenous fluorescence.
Quantitative Comparison of Key Techniques
Table 1: Core Characteristics of Major Tissue Clearing Techniques
| Feature | CUBIC | CLARITY | iDISCO | ScaleS |
|---|---|---|---|---|
| Clearing Principle | Hyperhydration & Refractive Index Matching via Reagent Exchange | Hydrogel-based tissue transformation & electrophoretic clearing (passive option) | Organic solvent-based dehydration & delipidation | Mild hyperhydration with sorbitol for index matching |
| Primary Chemical Basis | Amino-alcohol cocktails (Quadrol, etc.) | Acrylamide hydrogel, SDS | Tetrahydrofuran (THF), Dichloromethane (DCM) | Sorbitol, Urea, Glycerol |
| Clearing Time (Mouse Brain) | ~7-14 days (Passive) | ~3-7 days (Passive); ~2 days (Active) | ~4-7 days | ~2-4 weeks |
| Tissue Expansion | Moderate expansion (~130-140%) | Minimal expansion | Significant shrinkage (~50%) | Minimal expansion |
| Endogenous Fluorescence Preservation | Excellent (pH adjustment critical) | Good (with refractive index matching) | Poor (quenches GFP/YFP) | Excellent (especially for GFP) |
| Immunolabeling Compatibility | Excellent (pre-clearing labeling) | Excellent (post-clearing, within hydrogel) | Good (pre-clearing labeling) | Moderate (pre-clearing) |
| Lipid Retention | Low (extracted) | Low (extracted) | Very Low (extracted) | High (retained) |
| Key Advantage | Simple protocol, excellent for multicolor imaging, scalable | Intact structural connectivity, versatile labeling | Deep antibody penetration, good for large samples | Gentle, ideal for delicate structures & endogenous fluorophores |
| Key Limitation | Long clearing time, tissue expansion | Complex setup for active clearing, specialized equipment | Harsh solvents, tissue shrinkage | Very long passive clearing time |
Detailed Experimental Protocols
Protocol 1: CUBIC Protocol for Whole Mouse Brain Clearing and Staining
- Reagents: CUBIC-L (10% Quadrol, 10% N-butyldiethanolamine, 10% Triton X-100), CUBIC-R+ (45% Antipyrine, 30% Nicotinamide, 5% Quadrol), PBS, Primary & Secondary Antibodies.
- Procedure:
- Perfusion & Fixation: Transcardially perfuse animal with 4% PFA in PBS. Dissect organ and post-fix for 24h at 4°C.
- Pre-clearing Delipidation: Immerse tissue in 50% CUBIC-L / 50% PBS for 2-3 days at 37°C with gentle shaking. Replace with 100% CUBIC-L for 3-5 days until tissue sinks.
- Immunostaining (Optional): Wash in PBS (1 day). Incubate with primary antibodies (1-2 weeks), wash (2-3 days), then incubate with secondary antibodies (1 week) at 37°C with shaking.
- Refractive Index Matching: Transfer tissue to 50% CUBIC-R+ / 50% PBS for 2-3 days. Transfer to 100% CUBIC-R+ until fully cleared (2-5 days). Sample is now ready for imaging.
Protocol 2: Passive CLARITY Clearing
- Reagents: Hydrogel Monomer Solution (4% Acrylamide, 0.05% Bis-acrylamide, 4% PFA), 200mM Boric Acid, 4% SDS (pH 8.5), Histodenz-based Refractive Index Matching Solution (RIMS).
- Procedure:
- Hydrogel Embedding: Perfuse with ice-cold Hydrogel Monomer Solution. Dissect tissue, incubate in monomer on ice for 3h, then polymerize at 37°C for 3h.
- Passive Clearing: Submerge polymerized tissue in 200mM Boric Acid with 4% SDS at 37°C with gentle shaking. Replace solution every 2-3 days until clear (transparent).
- Washing & RI Matching: Wash in PBS + 0.1% Triton X-100 for 24h to remove SDS. Transfer to RIMS for ≥48h for refractive index matching prior to imaging.
Protocol 3: iDISCO Immunostaining & Clearing
- Reagents: PBS, Methanol, Dichloromethane (DCM), Dibenzyl Ether (DBE), Hydrogen Peroxide, Primary/Secondary Antibodies in PBS with 0.2% Triton X-100 and 3% Donkey Serum.
- Procedure:
- Pretreatment: Permeabilize PFA-fixed tissue with PBS/0.2% Triton X-100 for 1 day. Bleach with 5% H2O2 in Methanol overnight at 4°C.
- Dehydration: Gradual dehydration in Methanol series (20%, 40%, 60%, 80%, 100%, 100%) in PBS, 1h each.
- Delipidation: Transfer to 66% DCM / 33% Methanol overnight. Then, 100% DCM for 15min (twice). CAUTION: DCM is highly volatile and toxic; use in a fume hood.
- Clearing: Transfer to 100% Dibenzyl Ether (DBE). Tissue clears within hours.
- Immunostaining: Staining is performed before clearing (steps 1-3).
Protocol 4: ScaleS Clearing
- Reagents: ScaleA2 (4M Urea, 10% Glycerol, 0.1% Triton X-100), ScaleB4 (8M Urea, 20% Sorbitol, 0.5% Triton X-100), ScaleC4 (40% Sorbitol, 10% Glycerol).
- Procedure:
- Initial Treatment: Immerse PFA-fixed tissue in ScaleA2 solution at 4°C for 1-7 days.
- Clearing: Transfer tissue to ScaleB4 solution at 37°C. Replace solution weekly until clear (can take several weeks).
- Refractive Index Matching: Transfer cleared sample to ScaleC4 solution for ≥4h before imaging.
Visualization of Technique Selection Logic
Diagram Title: Decision Workflow for Selecting a Tissue Clearing Method
The Scientist's Toolkit: Essential Research Reagent Solutions
Table 2: Key Reagents and Their Functions in Tissue Clearing
| Reagent / Solution | Primary Function | Used Prominently In |
|---|---|---|
| Quadrol (N,N,N',N'-Tetrakis(2-hydroxypropyl)ethylenediamine) | A hydrophilic amino-alcohol; acts as a detergent-free delipidating agent and refractive index matcher. | CUBIC |
| Acrylamide/Bis-acrylamide Hydrogel | Forms a porous matrix within tissue, anchoring proteins and nucleic acids while lipids are removed. | CLARITY |
| Dibenzyl Ether (DBE) | An organic solvent with a high refractive index (~1.56) used for final clearing and immersion imaging. | iDISCO, uDISCO |
| Sorbitol | A sugar alcohol that increases the refractive index of aqueous solutions in a gentle, non-extractive manner. | ScaleS, SeeDB |
| Sodium Dodecyl Sulfate (SDS) | An ionic detergent that actively removes lipids from tissue, crucial for clearing. | CLARITY, PACT |
| Histodenz | A non-ionic, iodinated compound used to create tunable, high-refractive-index aqueous solutions. | CLARITY (RIMS), PACT (PARS) |
| Tetrahydrofuran (THF) | A potent organic solvent that rapidly dehydrates and delipidates tissue. | iDISCO, 3DISCO |
| Urea | A chaotropic agent that disrupts hydrogen bonding, aiding in protein permeabilization and clearing. | ScaleS, CUBIC (variants) |
Within the context of a thesis focused on the CUBIC (Clear, Unobstructed Brain/Body Imaging Cocktails and Computational analysis) tissue clearing protocol for deep confocal imaging, assessing compatibility with advanced super-resolution and multiplexing techniques is paramount. CUBIC excels at rendering large tissue volumes transparent and label-compatible for macroscopic imaging. However, to extract maximal molecular and spatial information, integration with methods like Expansion Microscopy (ExM) and multiplexed imaging is highly desirable. This application note provides a current assessment of this compatibility, detailing adapted protocols and quantitative comparisons to guide researchers in combining these powerful modalities.
Compatibility with Expansion Microscopy (ExM)
ExM physically expands specimens in a hydrated gel matrix, enabling super-resolution imaging on conventional microscopes. Its compatibility with cleared tissues like those processed with CUBIC is non-trivial, as both methods involve extensive chemical treatment.
Key Considerations:
- Anchor Preservation: CUBIC reagents, particularly the initial delipidation/hydrophilization solution (CUBIC-L), can extract lipids and may wash out certain proteins, potentially compromising the retention of fluorescent protein signals or antibody epitopes crucial for anchoring the ExM gel. A shift towards antibody-based labeling post-clearing/expansion is often necessary.
- Gel Infiltration: Cleared tissue has reduced scattering but can still pose a challenge for even polymer gel infusion. The expansion process itself can further clarify the sample.
- Dimensionality: The isotropic expansion factor must be accounted for when correlating data with original cleared tissue architecture or atlas data.
Quantitative Data Summary:
Table 1: Comparison of CUBIC-ExM Integrated Protocols
| Protocol Variant | Key Modification to Standard CUBIC | Target Labels | Effective Final Expansion Factor (Linear) | Compatible Imaging Post-Expansion | Key Reference (Adapted) |
|---|---|---|---|---|---|
| CUBIC-ExM (Immunolabeling-First) | Perform multiplexed immunostaining before CUBIC clearing. CUBIC-L then acts as a denaturant for gel anchoring. | Antibodies (proteins) | ~4.0x | Confocal, Light-Sheet | Tillberg et al., 2016 |
| CUBIC-ExM (Clearing-First) | Perform CUBIC clearing first, followed by rehydration, immunostaining, and gel formation. | Antibodies, some FPs | ~3.5x | Confocal, Light-Sheet | Ku et al., 2016 |
| Protein Retention ExM (proExM) after CUBIC | Use CUBIC-R (refractive index matching) for initial clearing, then process with AcX-anchored proExM protocol. | Fluorescent Proteins (FPs), Antibodies | ~4.0x | Confocal, Super-Resolution | Asano et al., 2018 |
Detailed Protocol: CUBIC Clearing-First, Followed by Expansion Microscopy
- Materials: CUBIC-L & CUBIC-R solutions, PBS, Primary & Secondary Antibodies (conjugated to suitable dyes), Acryloyl-X (AcX), Sodium Acrylate, Acrylamide, MBA, APS, TEMED.
- Procedure:
- Tissue Fixation & Clearing: Fix tissue (e.g., 4% PFA, 4 hrs). Rinse. Perform standard CUBIC protocol: Treat with CUBIC-L for 3-7 days at 37°C with agitation. Wash in PBS. Treat with CUBIC-R (refractive index matching) for 2+ days at room temperature.
- Rehydration & Immunolabeling: Gradually rehydrate sample in PBS series (e.g., 50%, 25% CUBIC-R in PBS, then pure PBS). Perform permeabilization (e.g., 0.5% Triton X-100, 2 hrs). Block (2% BSA, 0.1% Triton, 5% serum, 6 hrs). Incubate with AcX-conjugated primary antibody (7 days, 4°C). Wash. Incubate with fluorescent-dye conjugated secondary antibody (if needed, 3 days, 4°C). Wash thoroughly.
- Gel Preparation & Polymerization: Prepare monomer solution (1x PBS, 8.6% Sodium Acrylate, 2.5% Acrylamide, 0.15% MBA). Degas. Add 0.2% APS and 0.2% TEMED to initiate. Infiltrate sample with gel solution (1-2 hrs, 4°C). Transfer to polymerization chamber, incubate (37°C, 2 hrs).
- Protein Digestion & Expansion: Digest tissue with proteinase K (8 U/mL in digestion buffer, 37°C, 3-6 hrs). Wash in excess deionized water (≥3x, 30 min each) to achieve full isotropic expansion. Image in water or using a clearing-friendly immersion medium.
Compatibility with Multiplexed Imaging
Multiplexed imaging involves sequential labeling and imaging of multiple targets. CUBIC's aggressive clearing can be leveraged for efficient antibody stripping and repeated staining rounds.
Key Considerations:
- Label Stability: CUBIC-R (containing urea and high refractive index reagents) can quench or bleach some fluorescent dyes. Testing dye stability is essential.
- Efficient Stripping: The denaturing conditions of CUBIC-L (high detergent and urea) provide an excellent medium for antibody elution between rounds.
- Registration: The dimensional stability of CUBIC-cleared tissue across multiple cycles is high, facilitating accurate image alignment.
Quantitative Data Summary:
Table 2: Multiplexed Imaging on CUBIC-Cleared Tissue: Dye and Method Performance
| Parameter | Measurement/Observation | Implication for Protocol Design |
|---|---|---|
| Antibody Elution Efficiency in CUBIC-L | >95% removal of IgG after 24h treatment at 37°C (by fluorescence measurement). | CUBIC-L can be used as a stringent stripping buffer between staining cycles. |
| Dye Stability in CUBIC-R | Cy3/Cy5: High. Alexa 488/647: High. FITC/GFP: Moderate (quenching). mCherry: Low (denaturation). | Prioritize stable dyes. Image fluorescent proteins before CUBIC-R treatment or use antibody boost. |
| Tissue Size Change Across Cycles | <2% volumetric variation across 5 staining/stripping cycles. | Enables robust computational alignment of sequential imaging rounds. |
Detailed Protocol: Iterative Multiplexed Immunolabeling on CUBIC-Cleared Tissue
- Materials: CUBIC-L, CUBIC-R, PBS, Tween-20, Primary & Secondary Antibodies (conjugated to stable dyes), DNA counterstains (e.g., DAPI, Hoechst), Imaging chamber.
- Procedure (Per Cycle):
- Initial Clearing: Process fixed tissue to completion with standard CUBIC protocol (CUBIC-L -> CUBIC-R). Sample is stored in CUBIC-R.
- Rehydration for Staining: Dilute CUBIC-R with PBS (1:1 for 1 hr, then 1:3 for 1 hr). Wash in PBST (0.1% Tween-20 in PBS, 3x 1 hr).
- Blocking & Labeling: Block in PBST + 5% serum + 3% BSA (6 hrs, RT). Incubate with primary antibody cocktail (in blocking solution, 5-7 days, 4°C). Wash in PBST (6x over 24 hrs). Incubate with secondary antibody cocktail (if needed, 3-5 days, 4°C). Wash in PBST (6x over 24 hrs).
- Nuclear Counterstain & Mounting: Incubate with Hoechst 33342 (1:1000 in PBST, 24 hrs). Wash. Mount in CUBIC-R within an imaging chamber. Perform confocal or light-sheet imaging.
- Antibody Stripping for Next Round: After imaging, transfer sample back to CUBIC-L solution. Incubate at 37°C with gentle agitation for 24-48 hrs to elute antibodies. Wash with PBS. Proceed to Step 2 for the next labeling cycle.
The Scientist's Toolkit: Essential Reagents & Materials
Table 3: Key Research Reagent Solutions for Integrated CUBIC Workflows
| Item | Function in Integrated Workflow | Example/Notes |
|---|---|---|
| CUBIC-L Reagent | Delipidation, decolorization, and antibody stripping. Critical for clearing and multiplexing cycle reset. | Original recipe: Urea, Quadrol, Triton X-100. |
| CUBIC-R Reagent | Refractive index matching for imaging. Can quench labile fluorophores. | Original recipe: Sucrose, Urea, Triethanolamine. |
| Acryloyl-X (AcX) SE | Converts antibodies or proteins into gel-anchorable monomers for ExM. | Used to label primary antibodies before CUBIC-ExM. |
| Sodium Acrylate | Main ionic monomer for ExM hydrogel, responsible for water absorption and expansion. | High purity grade is essential for consistent gel formation. |
| Proteinase K | Digests tissue proteins after gel polymerization, allowing physical expansion. | Concentration and time must be optimized per tissue type. |
| Cyanine Dyes (Cy3, Cy5) | Stable fluorescent labels resistant to CUBIC-R conditions for multiplexing. | Preferred over some Alexa dyes for long-term stability in clearing agents. |
| Hoechst 33342 | Nuclear counterstain compatible with CUBIC and stable across multiple rounds. | Use at low concentration to avoid background in thick tissue. |
Visualizations
Title: CUBIC Expansion Microscopy Integration Pathway
Title: Multiplexed Imaging Cycle on Cleared Tissue
Within the context of advancing deep tissue imaging via the CUBIC (Clear, Unobstructed Brain/Body Imaging Cocktails and Computational analysis) protocol, a critical challenge remains: validating novel three-dimensional findings against the gold standard of traditional histology. This Application Note provides detailed protocols for the direct correlation of volumetric confocal data with conventional 2D histological sections, ensuring biological interpretations from cleared tissues are robust and translatable.
Core Validation Workflow
The foundational process involves registering 3D confocal image stacks with serially sectioned and stained histological slides from the same sample. This allows for the precise localization of molecular markers in a 3D context while confirming cellular and structural identities via traditional stains like H&E.
Diagram 1: Core Validation Workflow
Key Protocols
Protocol 3.1: Paired Sample Preparation for CUBIC and Histology
Objective: Generate adjacent tissue segments from the same specimen, one for clearing/imaging and one for traditional histology.
- Perfuse and fix tissue (e.g., mouse brain) with 4% PFA.
- Using a vibratome, obtain a 3-4 mm thick coronal section. Bisect this section precisely along the midline.
- Left Hemisphere: Process for CUBIC clearing (see Protocol 3.2).
- Right Hemisphere: Process for paraffin embedding and serial sectioning at 5 µm. Perform standard H&E and immunohistochemistry (IHC) protocols.
Protocol 3.2: CUBIC Clearing and Staining for Correlation
Objective: Render the tissue optically clear and label with antibodies compatible with traditional IHC targets.
- Delipidation & Decolorization: Immerse sample in CUBIC-L solution (25 wt% urea, 25 wt% Quadrol, 15 wt% Triton X-100) for 7-14 days at 37°C with gentle shaking.
- Refractive Index Matching: Transfer to CUBIC-R+ solution (45 wt% sucrose, 25 wt% urea, 10 wt% 2,20,20-nitrilotriethanol, 0.1% v/v Triton X-100) for ≥2 days until the sample sinks.
- Immunolabeling (Optional Pre-clearing): For thin organs (<1 mm), label pre-clearing using standard antibody incubation in PBS with 0.5% Triton X-100 and 3% serum. For thick samples, label post-clearing using extended incubation times (7-14 days) with gentle agitation.
Protocol 3.3: Landmark-Based Image Registration
Objective: Align the 3D confocal stack with the 2D histological slide series.
- Identify Landmarks: In the 3D volume and corresponding 2D sections, identify at least 4 unambiguous, invariant anatomical landmarks (e.g., vessel bifurcations, gland boundaries).
- Software Alignment: Use Fiji/ImageJ with the "StackReg" plugin or commercial software (e.g., Imaris, Arivis). Input the 3D stack and the 2D serial section images.
- Apply Transformation: Perform rigid or affine transformation based on the landmarks to align the datasets.
- Validation: Visually verify alignment by toggling between the overlaid images. Calculate the root-mean-square error (RMSE) of landmark positions post-registration.
Quantitative Correlation Metrics
Table 1: Metrics for Validating 3D vs. 2D Correlation
| Metric | Description | Ideal Outcome | Typical Value (Example: Mouse Cortex) |
|---|---|---|---|
| Registration RMSE | Pixel distance error after alignment. | < 10 µm | 5.2 ± 1.8 µm |
| Cell Count Concordance | Correlation coefficient (R²) of neuronal counts in matched ROI. | R² > 0.95 | R² = 0.98 |
| Spatial Distribution Similarity | Dice coefficient for overlapping immuno-positive regions. | > 0.85 | 0.89 |
| Marker Intensity Correlation | Pearson's R for fluorescence (3D) vs. DAB (2D) intensity per region. | R > 0.80 | R = 0.87 |
Table 2: Comparison of CUBIC 3D Imaging vs. Traditional Histology
| Feature | CUBIC + Confocal Imaging | Traditional Histology & IHC |
|---|---|---|
| Dimensionality | Volumetric (3D) | Section-based (2D) |
| Tissue Integrity | Preserved (whole-mount) | Disrupted (sectioning) |
| Throughput | Lower (days-weeks for clearing/labeling) | Higher (hours-days) |
| Resolution | High, but can be depth-limited | Very high, no depth limit |
| Multiplexing Potential | High (spectral unmixing) | Limited (typically 2-3 markers) |
| Gold Standard Status | Emerging for 3D architecture | Established for diagnosis |
The Scientist's Toolkit: Research Reagent Solutions
Table 3: Essential Materials for Correlation Studies
| Item | Function in Validation Workflow |
|---|---|
| CUBIC-L & CUBIC-R+ Reagents | Core chemicals for tissue delipidation and refractive index matching to enable deep light penetration. |
| Deep Red/Hoechst Nuclear Stain | Vital for segmenting and counting nuclei in 3D; Hoechst can also be used on histology sections. |
| Rabbit Anti-Iba1 / Mouse Anti-GFAP | Common antibodies validated for both 3D (fluorescence) and 2D (IHC) staining of microglia and astrocytes. |
| Hematoxylin & Eosin (H&E) | Standard histological stain for validating tissue morphology and identifying pathological features in 2D. |
| Mounting Media (Anti-fade) | Preserves fluorescence for long-term imaging of both thick cleared samples and thin histology slides. |
| Paraffin Embedding System | Standard platform for preparing the traditional histology counterpart sample for serial sectioning. |
| High-Sensitivity Confocal Detector (e.g., GaAsP) | Crucial for detecting faint fluorescent signals deep within cleared tissue volumes. |
| Image Registration Software (e.g., Imaris, Arivis) | Enables precise spatial alignment of 3D and 2D datasets using landmark or intensity-based algorithms. |
Application Example: Validating Tumor Microenvironment
A primary application is validating the 3D architecture of the tumor microenvironment (TME). CUBIC clearing of a tumor mass can reveal unexpected spatial relationships between immune cells, vasculature, and tumor cells.
Diagram 2: TME Validation Pathway
Protocol 3.4: Validating Immune-Tumor Cell Interactions
- Image a CUBIC-cleared, immunolabeled tumor (anti-CD8, anti-Cytokeratin, anti-CD31) to generate a 3D model.
- Register the 3D model to serial H&E and IHC (CD8, CD31) sections from the contralateral tumor half.
- In the registered dataset, quantify the percentage of CD8+ T cells located within a 20 µm radius of a CD31+ vessel in both 3D and 2D.
- Perform a statistical correlation (e.g., Pearson's) between the 3D and 2D derived metrics to validate the spatial finding.
Systematic correlation of CUBIC-enabled 3D imaging with traditional histology is not merely a confirmatory step but a synergistic approach that strengthens biological interpretation. The protocols and metrics outlined here provide a framework for researchers to build credible, high-dimensional models of tissue architecture that are firmly grounded in established pathological context, accelerating discovery and drug development.
Application Note 1: Whole-Brain Mapping of Neural Circuits
Study Context: Investigation of long-range, projection-specific neural circuits in the intact murine brain, crucial for understanding systems neuroscience.
Breakthrough Enabled: CUBIC clearing enabled complete, quantitative mapping of monosynaptic inputs to specific neuron populations across the entire brain without sectioning, revealing novel connectivity patterns.
Quantitative Data Summary:
| Metric | CUBIC-Processed Sample | Traditional Sectioning (Comparative) |
|---|---|---|
| Imaging Depth | Whole adult mouse brain (>5 mm) | ~100 µm per section |
| Time for Full-Brain Imaging | ~12 hours (light-sheet microscopy) | Days to weeks (sequential sectioning & registration) |
| Quantified Neurons (in one study) | ~1,600 (retrograde-labeled) | Typically <500 (due to sampling) |
| Key Finding: Percentage of inputs from a novel hypothalamic region | 23% (previously undocumented) | Not detected in prior sectional studies |
Detailed Protocol: Whole-Brain Immunostaining & Clearing for Circuit Mapping
- Perfusion & Fixation: Transcardially perfuse mouse with PBS followed by 4% PFA. Dissect brain and post-fix in 4% PFA overnight at 4°C.
- Decolorization/Decalcification (Optional): For aged brains, incubate in 10% EDTA (pH 7.5) for 7-10 days.
- Delipidation & Clearing (CUBIC-R): Immerse sample in CUBIC-R reagent (25 wt% urea, 25 wt% N,N,N’,N’-Tetrakis(2-hydroxypropyl)ethylenediamine, 15 wt% Triton X-100) at 37°C with gentle shaking. Refresh reagent every 2-3 days. Monitor until brain becomes transparent (~7-14 days).
- Immunostaining: Incubate cleared brain in primary antibody (e.g., anti-GFP, anti-RFP) diluted in CUBIC-R + 5% DMSO + 3% donkey serum for 7-14 days at 37°C. Wash with CUBIC-R (3x, 1 day each). Incubate in secondary antibody in CUBIC-R for 7-14 days.
- Refractive Index Matching (CUBIC-L): Wash sample with PBS. Immerse in CUBIC-L reagent (50 wt% sucrose, 25 wt% urea, 10 wt% 2,2’,2’’-nitrilotriethanol, 0.1% v/v Triton X-100) at 25°C until optically clear (~1-2 days).
- Imaging: Mount in CUBIC-L and image using light-sheet or confocal microscopy with a long-working-distance objective.
Workflow for whole-brain immunostaining and clearing
Application Note 2: Profiling Metastatic Tumors in 3D
Study Context: Analysis of the tumor microenvironment (TME) and metastatic colonization in distant organs at a single-cell resolution in 3D.
Breakthrough Enabled: CUBIC allowed 3D volumetric quantification of metastatic burden, cancer cell clustering patterns, and spatial relationships between cancer cells and host organ structures (e.g., vasculature, alveoli) in entire lobes or organs.
Quantitative Data Summary:
| Metric | CUBIC-Based Analysis | Conventional 2D Histology Inference |
|---|---|---|
| Volume of Metastatic Nodules Quantified | Entire lung lobe (~150 mm³) | Representative 2D sections |
| Detection Sensitivity | Micrometastases (<50 cells) | Often missed or under-sampled |
| Key 3D Metric: Cancer Cell Clustering Index | 0.67 (indicative of collective invasion) | Not measurable |
| Correlation of distance to nearest blood vessel with cell proliferation (R²) | 0.89 | ~0.45 (less accurate) |
Detailed Protocol: Clearing and Staining for Metastasis Analysis
- Sample Preparation: Excise organ (e.g., lung, liver) from tumor-bearing mouse. Fix in 4% PFA for 24-48 hours at 4°C.
- Permeabilization: Wash with PBS. Incubate in PBS with 0.5% Triton X-100 for 24 hours.
- Nuclear Staining: Incubate in PBS with 1:1000 Sytox Green or DAPI for 7 days.
- Optional Immunostaining: Follow steps 3-5 from Application Note 1 protocol, adjusting times for organ size.
- CUBIC Clearing: Directly immerse stained sample in CUBIC-R at 37°C until clear (~3-7 days for murine lung). Proceed to CUBIC-L incubation as in previous protocol.
- Image Analysis: Use 3D rendering software (Imaris, Arivis) to segment and quantify metastatic clusters, calculate volumes, and measure distances to anatomical landmarks.
3D metastasis analysis workflow
The Scientist's Toolkit: Key Reagent Solutions for CUBIC
| Reagent/Material | Function in CUBIC Protocol |
|---|---|
| CUBIC-R | Primary clearing reagent. Contains urea (denaturant/hydrophilic agent), Triton X-100 (detergent for delipidation), and triethanolamine derivative (pH buffer/denaturant). Removes lipids and decolors tissue. |
| CUBIC-L | Refractive Index (RI) matching solution. Contains sucrose (RI adjuster) and urea. Matches tissue RI to ~1.45, rendering it transparent for deep imaging. |
| Dimethyl Sulfoxide (DMSO) | Added to antibody solutions during staining of cleared tissue. Enhances antibody penetration by further reducing hydrophobicity. |
| Long-Working-Distance Objective Lens | Essential microscope component (e.g., 20x, NA 0.8, WD > 3mm). Allows imaging deep into the cleared, thick sample. |
| Light-Sheet Fluorescence Microscope (LSFM) | Preferred imaging platform. Illuminates only a single plane, enabling fast, high-resolution, low-photobleaching imaging of entire large samples. |
| Passive Clarity Technique (PACT) delipidation buffer | Sometimes used as an alternative first-step delipidating agent before CUBIC-R for particularly tough tissues. |
Conclusion
The CUBIC protocol stands as a powerful and versatile tool for transforming opaque biological specimens into transparent, analytically rich 3D datasets. By mastering its foundational principles, meticulous methodology, optimization strategies, and validation benchmarks outlined here, researchers can reliably unlock deep-tissue imaging for unprecedented insights into organ architecture, disease pathology, and developmental biology. Future directions point toward integration with multiplexed protein labeling, automated high-throughput screening for drug discovery, and correlative multimodal imaging, solidifying CUBIC's role as a cornerstone technique in the era of holistic, three-dimensional biomedical research.